Nowadays some action cameras (like GoPro Hero 7) and even smartphones (like iPhone XR and Google’s own Pixel 2) are equipped with electrical image stabilization (EIS) and optical image stabilization (OIS) technology that allows you to record stable and shake-free videos handheld.
The OIS technology is basically implemented in the hardware (lens) of the camera, whereas, EIS technology uses electronic processing to stabilize the videos. As of now, both these technologies are available in high-end smartphones only.
If your smartphone doesn’t have built-in image stabilization, you can use other workarounds. Here we have shared some tips and methods that can help you create butter-smooth and shake-free stable videos on your Android smartphone easily.
Table of Contents
3 tips for recording stabilized videos on Android
There are basically two ways to stabilize any video footage. The first way is to stabilize the video while shooting. On the other hand, if you have already recorded any video, then you can use a software tool to remove shakes or jitters in it.
Here we have shared some useful tips that can help you to shoot stable videos on your smartphone (both Android and iPhone) –
- Use a tripod – Tripod will give great stability to your videos especially when you are taking a still shot like a timelapse video. It is good for vlogging also. You can do some basic camera movements like pan, tilt, zoom, etc.As the name itself suggests, a tripod has three legs so it can be placed anywhere on the plane surface easily. Some tripods also have bendable legs that you can move in any direction.
- Use Gimbal – The ultimate solution to get shake-free and butter smooth videos on your Android smartphone is by using a gimbal. You will get a cinematic look in your videos. We will recommend you to check out the sample video of the gimbal on YouTube.A gimbal is an electronic device that stabilizes your phone movements in all three axes (x, y, & z). There are so many gimbals available in the market but they are a little bit expensive (above $100). One of our favorite smartphone gimbals is DJI Osmo Mobile 2.
- Handheld recording – It is quite a tedious task to keep your hand stable while recording a video handheld. You should try to compensate the shake with your body movements. Don’t move too fast. It is also advised to keep your camera near your core as it is the most stable place.
- Bonus Tip – Record your videos in higher frames per second (fps) and then apply slow motion effect.
Stabilize videos using Google Photos
Now let’s discuss the second way to stabilize videos on your Android phone by using the Google Photos app. Google Photos is a gallery app popularly used to backup photos and videos. It also has an electronic image stabilization (EIS) feature that can remove jittering from any video.
You might be curious to know how it actually works behind the processing. So technically, the app will shift the image from frame to frame of the video to counteract the motion (or shake). The final video will be cropped a little from all sides.
This step-by-step guide will show you how to stabilize videos on your smartphone using Google Photos app – (These steps are almost the same for both Android and iPhone)
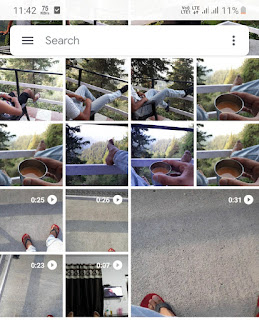
- First, open Google Photos app on your phone.

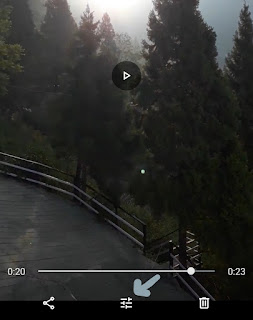
- Here you will find all your gallery photos and videos. Open the video that you want to stabilize.
- Tap the edit (or toolbar) icon at the bottom.

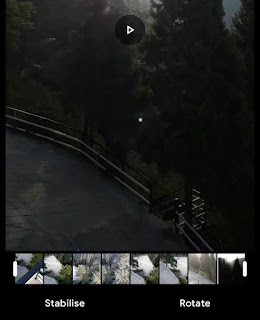
- After this, click the “Stabilise” option at the bottom-right corner.

- Now the app will start processing the video. It will take some time to complete it depending on the length or size of the video.

- Once the video is stabilized, you will see its preview. Finally, tap the “Save” button at the top-right corner to save the video to your device. That’s it.

Stabilize videos using PowerDirector
PowerDirector is one of the most popular video editing apps for Android. It has also added an image stabilization feature that does its job pretty well. Here’s how you can use it –
- Download and install PowerDirector app on your Android phone.
- Open the app, create a new project, and add a video in it that you want to stabilize.
- Now select the video from the timeline and tap the edit (pencil) icon at the top-left corner.
- Here you will find an option to stabilize the video – simply, click the “Stabilizer” button.

- Once after processing the video, you will be asked to set the motion level, which is set to 50 by default. You can increase or decrease this value to adjust the stabilization.
- Finally, save the video to your gallery.
Like Google Photos, PowerDirector app will also crop the video a little from all sides to apply the stabilization effect. It will also add its watermark on the video which you can remove by upgrading to the pro version.
So these are some tips and methods that can help you to stabilize videos on your Android phone and iPhone also. Don’t forget to share this tutorial with your friends. If you want to ask something, let us know in the comment section below.


