Photography is not just about clicking photos by keeping the camera at the right angle. It is an art, a skill set that requires a lot of time to master. There are a bazillion of camera tricks that one can learn to create a photo that never tires the eyes of the viewer. A great photographer can even click a dynamic photo at the loneliest and most boring places. On the other hand, one who doesn’t have great photography skills can make the most photogenic places boring.
One such camera trick that can click the most impactful photos is the Long exposure mode. If you remember seeing the photos or videos where the still objects look crisp and clear and the moving objects are blurred beautifully, then you have understood what long exposure is all about.
Surprisingly, you don’t need expensive DSLRs to click a jaw-dropping long exposure photo. Your iPhone camera is enough to steal the moment. All you need is to learn how long exposure photos work and how to click a perfect one. And for this, we are here to help you out.
Table of Contents
What are long exposure photos
As the name suggests, long exposure means the photos are exposed to light for a longer duration. If you are a photographer, you would know that the amount of light that enters the camera depends on the shutter speed which defines how long the shutter will be open to capture a photo.
The more shutter speed means the shutter will open for a smaller duration and thus capturing the photo in a fraction of a second. On the other hand, the slow shutter speed means the shutter will be open for a longer duration and thus it will capture more light than normal. Long exposure photos are taken with slow shutter speed.
Now let’s discuss what is special about long exposure photos and what results you get when the shutter speed of the camera is set to low. If you ever clicked photos at night, you would notice that they aren’t as good as you are seeing the view with your eyes. When there is a low-light environment, your camera is unable to capture more light into it and thus your pictures are mostly dark and blurred.
In such conditions, long exposure photos can do miracles. You will get more bright and crisper photos in the same low-light environment if you keep the shutter speed low and allows more light to enter the camera. You might have seen those photos of galaxy and night photography. It might seem next to impossible for you to take such pictures and you would think that it requires professional skills but it’s actually very simple if you know the concept of long exposure photos and how to use your camera for that.
What is Live Photos feature on iPhone camera
You might be using your iPhone camera for a while and wondering where did this long exposure setting is available on it. Well, iPhone has this hidden in the Live Photos feature. Before we show you the steps to take long exposure photos, let’s first discuss a little bit about the live photo mode on the iPhone camera.
When this mode is enabled, your iPhone will capture the whole moment for 3 seconds instead of just taking a single picture. You can also play it as a video along with the audio. iPhone records everything that happens 1.5 seconds before and after you tap the shutter button to take your live photo.
Another amazing thing about the live photo is that you can apply effects on it later in the Photos app. There are three effects available named Loop, Bounce, and Long Exposure. When you choose Long Exposure, your iPhone will automatically convert your live photo to long exposure. You will see a smooth motion blur effect with more light on the picture.
Take long exposure photos on iPhone with Live Photo
Now you know all the basics and background details, it’s time to learn how you can take stunning long exposure photos on your iPhone. Here’s a step-by-step guide –
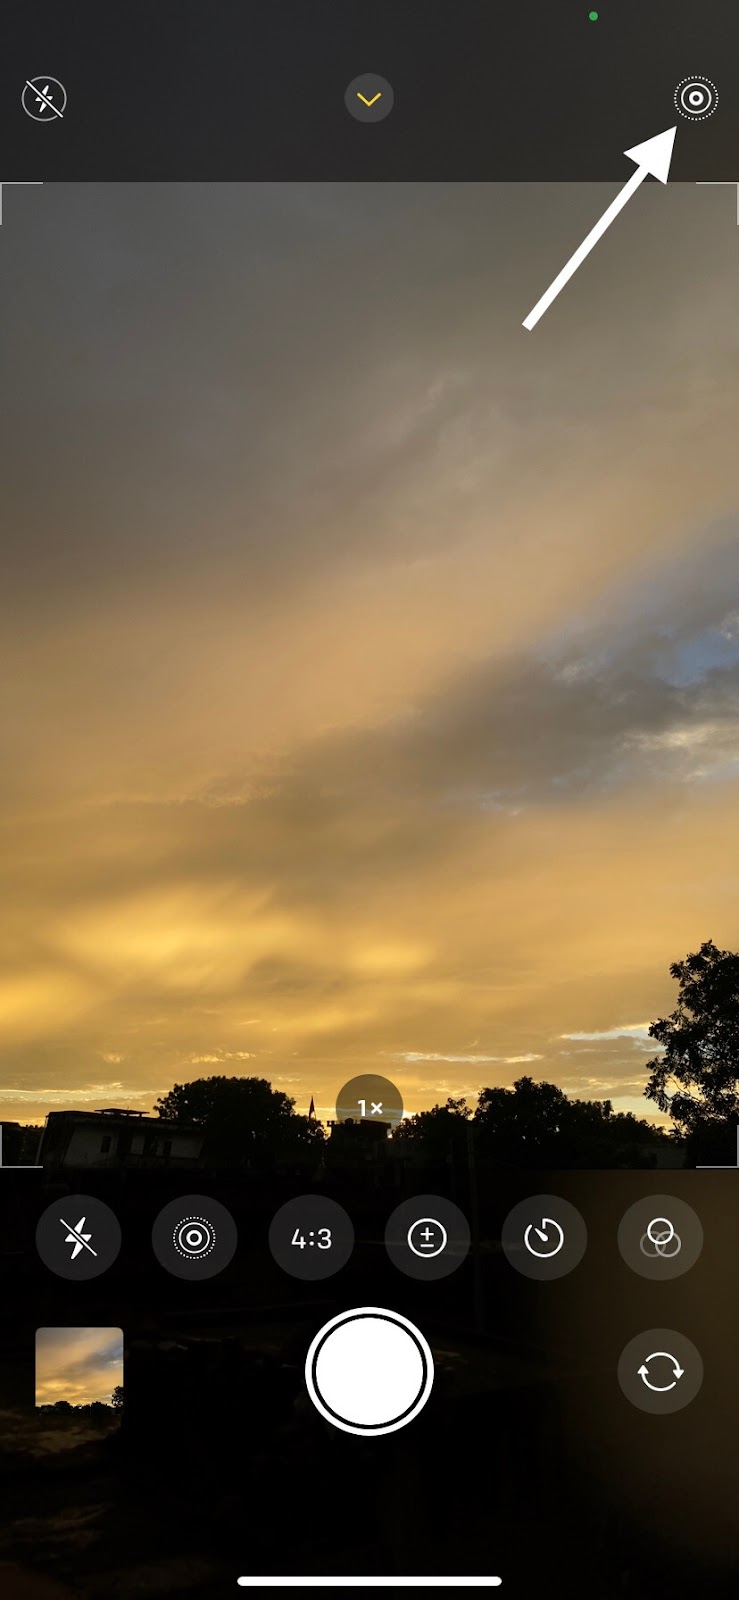
- Open the Camera app on your iPhone.
- Go to the Photo mode and enable the Live Photos option from the top-right corner (It’s a small icon with three concentric circles). If there is a line through it, that means the Live Photos is turned off.
- Now set your iPhone camera as you want to capture the photo.
- Tap the shutter button at the bottom to take your shot. Make sure to keep your device still for a couple of seconds before and after you press the shutter.
- Once the photo is taken, click the thumbnail in the bottom-left corner to open it. Alternatively, you can go to the Photos app and view your Live Photo from there.
- Click the Live option on the photo in the upper-left corner and then you will see various effects. If you have an iPhone running on some iOS version older than 15, then you need to swipe up the photo to reveal these effects.

- Now choose Long Exposure and this will automatically convert your Live Photo to long exposure photo.
Take long exposure photos on iPhone with Night Mode
You can also take long exposure photos with the night mode on iPhone camera. When you are in a low-light environment, your iPhone camera will automatically turn on night mode and choose the best shutter speed by analyzing the amount of light that is entering it. You can also adjust the shutter speed as you want. Here’s how you can use this feature to take long exposure photos –
Open the Camera app on your iPhone and click the night mode icon in the upper left corner. Please note that this icon only appears when you are in a low-light environment. You will see the number of seconds on this icon which iPhone has chosen for the shutter speed itself. After you click on the night mode icon, you will see a slider at the bottom.
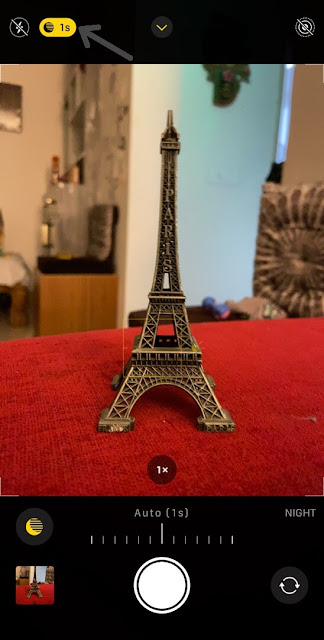
By moving this slider, you can set the shutter speed for your photo manually. It can go up to 10 seconds maximum. Once you have set this, aim your camera at the scene you want to capture and then tap the shutter button. Make sure to keep your device as still as possible. If you shake it even a little bit, your photo might get blurred. We recommend you to use a tripod for this. So that’s how you can take long exposure photos on your iPhone with the night mode. Go to the Photos app and see the results.
Where you can take long exposure photos
There are various instances where taking a long exposure photo would give you better results than taking a normal picture. Here we have discussed some scenarios where you can use long exposure to take your photography skills to the next level –
Night photography
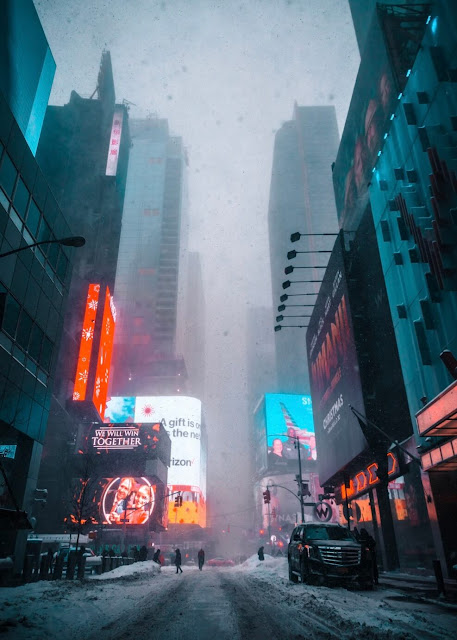
When you are in a low-light environment, you need more exposure to take a good picture. You can get some really mind-blowing results by setting your iPhone camera to slow shutter speed in such cases.
Motion blur effect
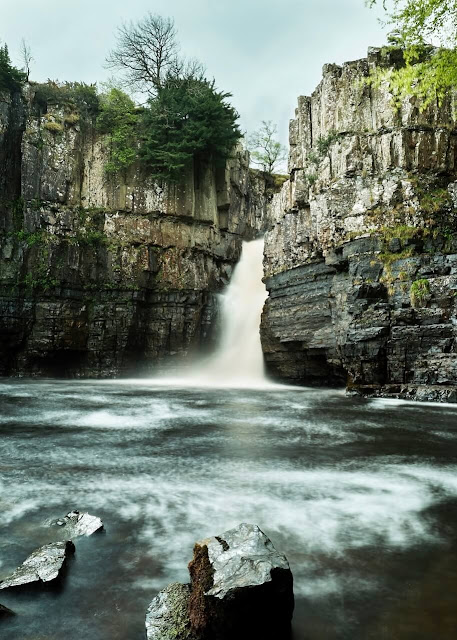
Have you ever seen a photo in which flowing water (like a river or waterfall) appears very smooth? This is called the motion blur effect. If you are capturing flowing water or some moving object like a car, you can use long exposure to give this kind of smooth blur effect to your photos.
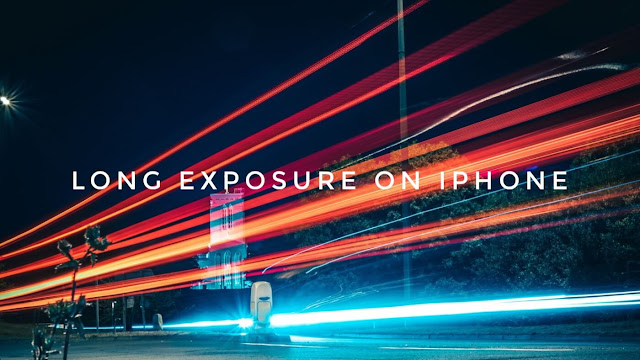
Capturing light trails
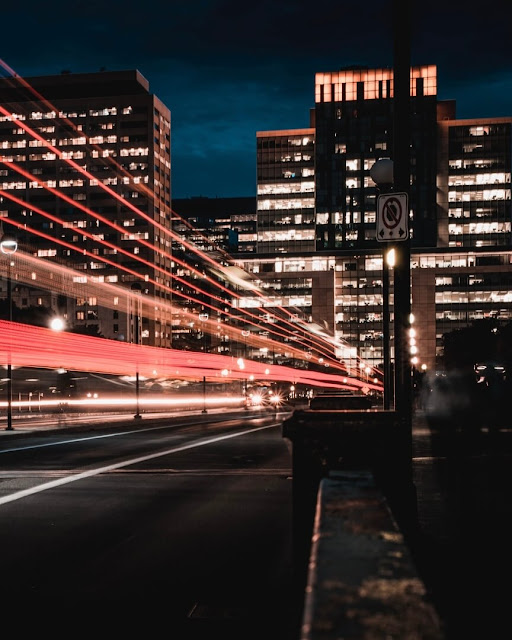
Another popular usage of long exposure is to take light trail photos. You have probably seen those professional night photographs with moving traffic lights or sky trails. Guess what? your iPhone camera can also take such types of photos. Light trail photography is possible with long exposure settings.
Tips for taking better long exposure photos
Getting good photos with long exposure isn’t something that you can achieve overnight. Most probably, you will end up getting a blurred photo on your first try. Knowledge is not enough to learn long exposure photography but you need to do practice also. Here are some important tips that you need to keep in your mind –
- Keep your iPhone as still as possible while taking a long exposure photo. Even a slight shake can make your photo blur.
- We highly recommend you to use a tripod and keep your iPhone in a stable and safe place.
- Don’t use long exposure if there is already enough light. If you need it (like in the case of the motion blur effect), then use the live photo mode which will automatically take the best shot according to your environment.
iPhone has undoubtedly the most powerful camera and it has a lot of potential more than you can ever imagine. Taking long exposure photos was only possible with professional DSLR cameras in the past but iPhone is the only smartphone that has made this possible on a mobile platform. We hope you find this guide helpful and learned something new about iPhone photography here. Do share this post with your friends and let us know if you have any questions in your mind.