Lightroom is the official app of Adobe. You may already know that Adobe is famous for its Photoshop and Lightroom software. The mobile version of the Lightroom is also very popular. It offers some really amazing editing features. One of them is the ability to apply presets to your photos.
Presets are used to apply a particular set of adjustments or edit settings on the pictures. Like in the desktop Lightroom, you can also apply presets in the mobile Lightroom app. Here we will guide you how to apply them on your iPhone or Android phone.
1. Download Lightroom preset DNG file
Before we start the tutorial, first you have to download the preset you want to apply to your photos. The presets for Lightroom are saved in the DNG format files. Like PNG and JPG, DNG is also one of the file formats of image. So DNG file is basically an image.
You can download Lightroom presets from the internet. Just search them on Google or YouTube. There are both free and paid options available. The presets normally comes in a ZIP file, so you have to unzip it first. For this task, either you can use your phone’s built-in file manager or ZArchiver app.
2. Install presets on mobile Lightroom app
Once you have extracted the files, you will see an image in them with the DNG format. We will be using this image to install preset on the Lightroom app. Here are the steps you need to follow –
- Launch the Lightroom app on your iPhone or Android phone. Make sure that you are logged into your account.
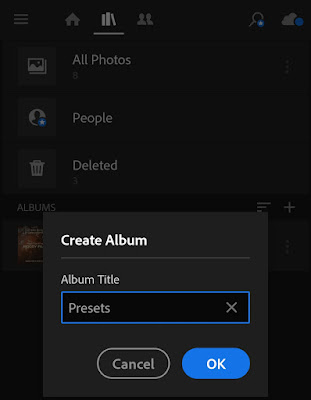
- Create a new album – Tap the + icon next to the Albums. Then, choose Album and give it a name such as Presets. Here you can store all your presets.

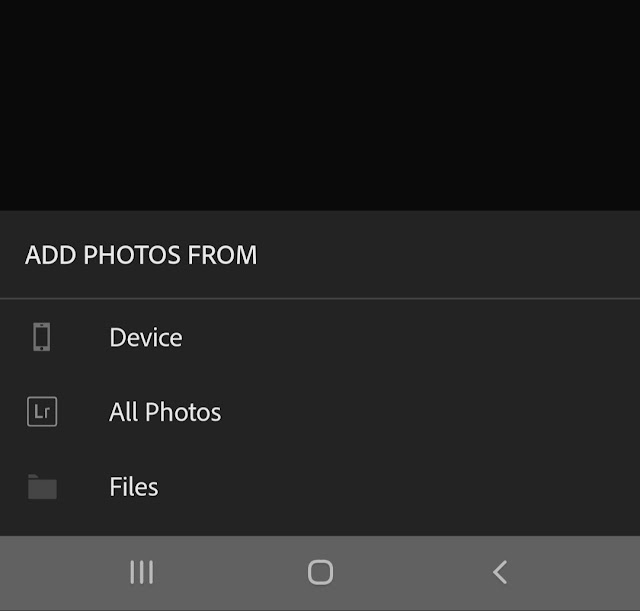
- Add DNG image – Next, go to the album you have just created and click the add image icon at the bottom-right corner. After that, click the Files option and select the DNG image of the preset that you have extracted earlier.

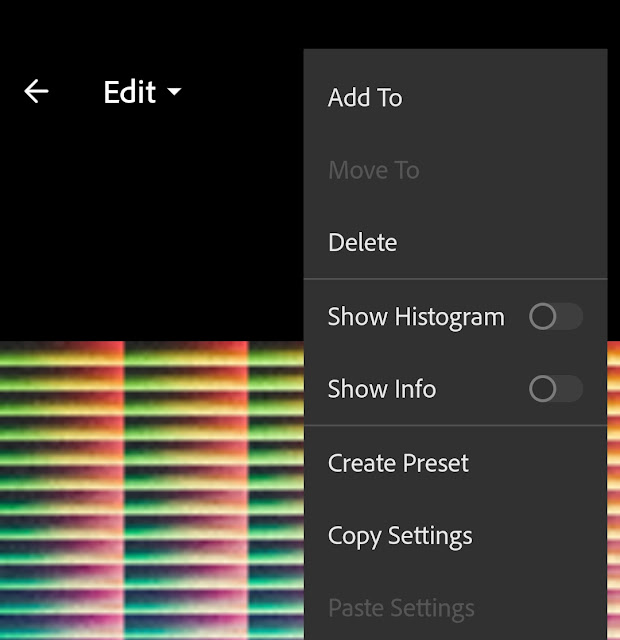
- Copy preset settings – Now open the DNG image, tap the menu button (three dots) at the top-right, and then click the Copy Settings option. You will be asked which settings of the preset you want to copy. Select them all.

- Apply preset to your photos – Next, add the photo in the Lightroom that you want to edit and open it. Once you are in the editor screen, click the menu button (three dots) and press the Paste Settings option. Now you will be asked which settings you want to apply. Like in the previous step, select all of them. Done!

If you don’t want to copy and paste the settings again and again, then you can save the preset. For that, click the Create Preset option from the menu in the 5th step. After that, enter the preset name, select all settings and save it. Now the preset is saved in the Lightroom app.
To apply it, simply open any photo, click the Presets option from the toolbar at the bottom and apply the preset that you have just saved from the User Preset group. That’s it.
We hope you find this guide helpful to install presets in the mobile Lightroom app on your iPhone/Android phone. If you are facing any problem in the above steps, ask it in the comments below right now. We will be happy to help you. Stay tuned with us for more interesting tutorials.


