Converting photos to PDF is something which almost every one of us has needed at some point in our life whether it is for personal or professional work. Sometimes you have a bunch of pictures and you need to merge them together into one single file so as to make it easier to store or share them with someone.
One of the popular examples of this case is when you want to save your scanned documents such as your Aadhaar card, driving license, registration certificate of your vehicle or any other important document at one place. Or let’s suppose you have clicked pictures of a book and you need to save it digitally in an easily readable format. These are just few instances but there are many more.
In this tutorial, we have shared several methods that can help you to convert photos and images into PDF on your iPhone or iPad. Most of these methods include using the built-in features of the iOS. This is one of the perks of having an Apple device. You don’t need to use a third-party app or online tool to do the most basic tasks such as this one. Let’s get to the methods one-by-one and see how you can achieve this.
Table of Contents
1. Using the print feature to save photos as PDF
In this method, we will be using the native Photos app of your iOS device. There is a hidden feature in it which allows you to print photos and the same feature allows you to convert them to PDF document. Here’s a step-by-step guide –
- Open the Photos app on your iPhone or iPad.
- Click the Select option in the upper right corner and then choose the photos that you want to save as PDF. Make sure to select them in order you want them to appear in the PDF document.
- Next, tap the Share icon at the bottom left corner which is a small square with an arrow pointing upward. This will open a pop-up box where you will various options for sharing.
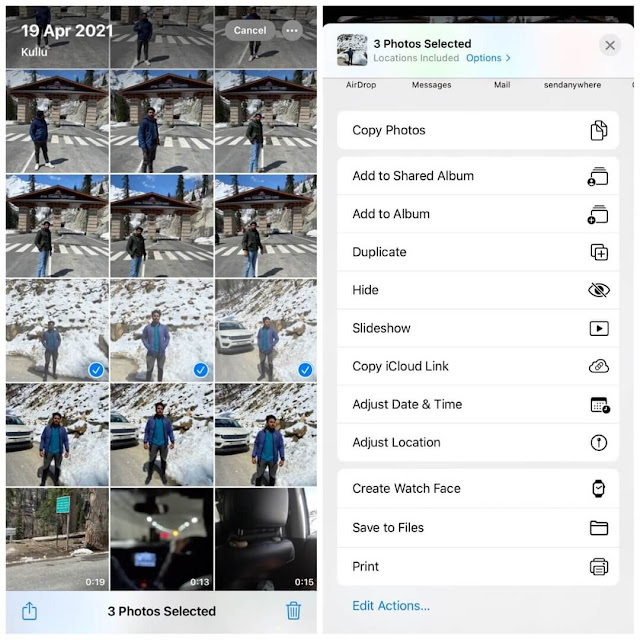
- Scroll down and click on the Print option. If you want to use this feature frequently, you can add it to your Favourites by clicking on the Edit Actions option.
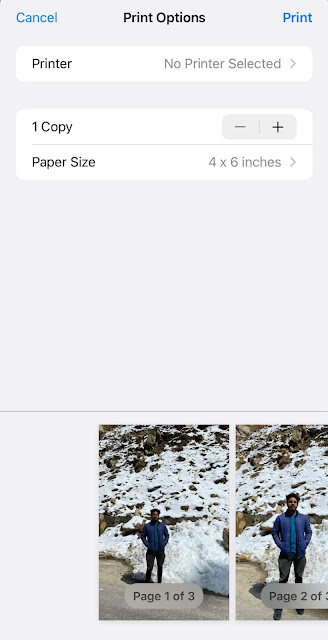
- On the Print Options page, zoom in the preview of the photos using the pinch and zoom method with your two fingers. Now your PDF is ready and you simply need to save it to your iPhone.
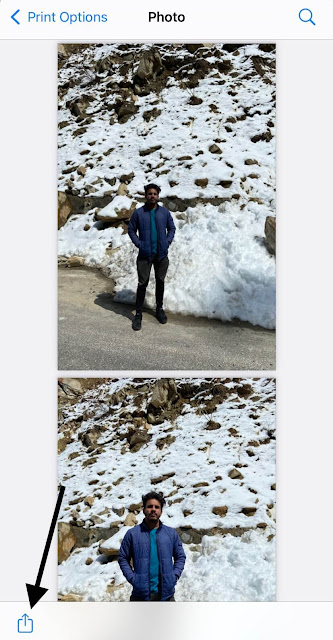
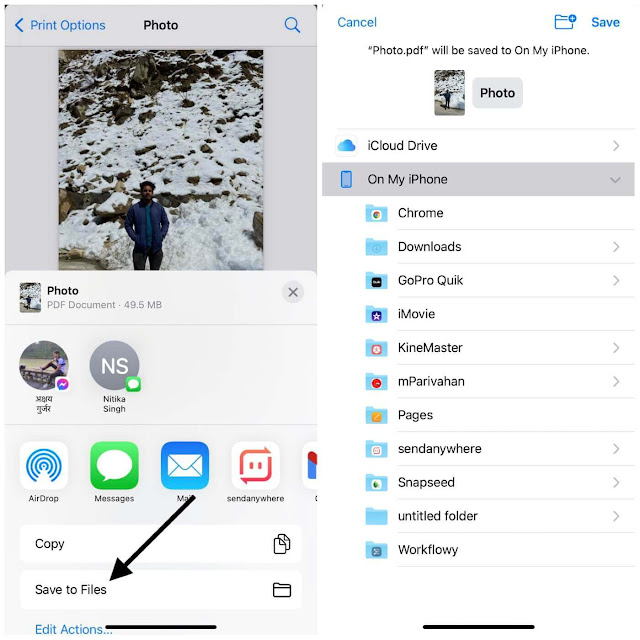
- Tap the Share icon in the bottom right corner and then choose Save to Files option.
- You will be asked to change the file name and select the location where you want to save it. The default location will be On My iPhone. After this, simply click the Save option and you have successfully converted photos to PDF on your iPhone/iPad.
2. Merge multiple photos as PDF using Books app
Another way you can merge multiple photos into PDF is by using the Books app. As you may already know, every iPhone and iPad comes with a built-in app named Books which is basically an app for book lovers where they can read and collect their favourite books digitally. You can import photos and images to Books app and later export them as PDF. This step-by-step guide will show you how to do that –
- Open the Photos app on your iOS device.
- Select the photos you want to save as PDF.
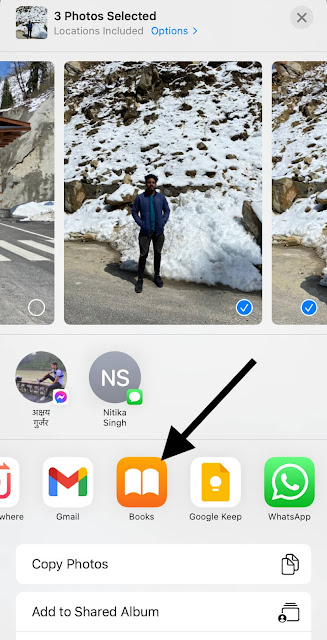
- Click the Share icon at the bottom left corner.
- From the list of apps, find and choose Books. If you didn’t find it, scroll to the rightmost side of the apps carousel, click on More option and then on Edit. Now find the Books app under Suggestions and tap the + icon to add it to your Favourites.
- Once you have imported the photos to Books app, you will see a new item in the Library tab. Click the three dots options on it and then choose Share PDF from the pop-up box that opens up.
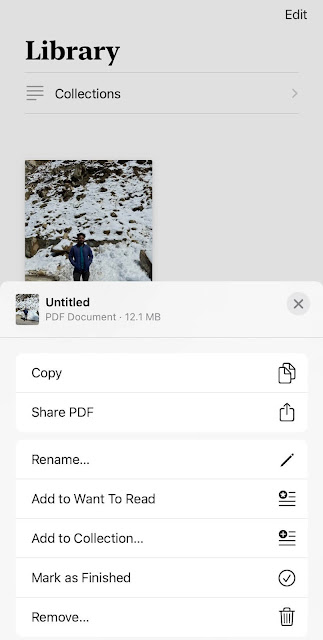
- Now you can directly share the PDF to any of your recent contacts or favourite apps. If you want to save it locally, then click on Save to Files option.
3. Save multiple photos as PDF using Files app
Files app is the native file manager of iOS which allows you to manage files and documents on your iPhone or iPad. You can also use the Files app to merge your photos and convert them into PDF file. All this is possible with the built-in feature of this app and you can do it with just a few taps. If you haven’t transferred your photos to Files app, first you will need to do that.
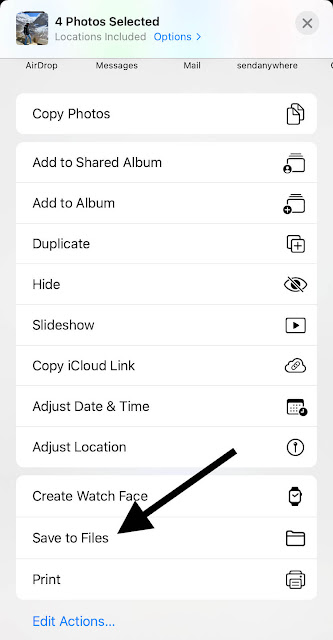
Simply, open the Photos app, go to the selection mode by clicking on the Select option at the top-right corner and then choose the photos you want to convert to PDF. After that, tap the share icon (square with an arrow in upward direction) and click on Save to Files option. Next, you can select the location or particular folder where you want to save them. Now you are all set to convert your photos to PDF. Follow these simple steps for that –
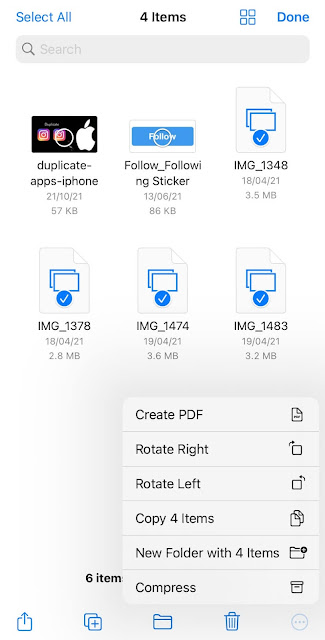
Open the Files app on your iPhone or iPad and find the folder where you have saved your photos. Tap three dots at the top-right and click the Select option. After that, select the photos in the order you want them to appear in PDF and then again tap the three dots which you will see at the bottom right corner. Now a small menu will pop up on your screen. Click on the Create PDF option. This will instantly convert your photos to PDF and save the file on the same location.
4. Using a third-party app to save photos as PDF
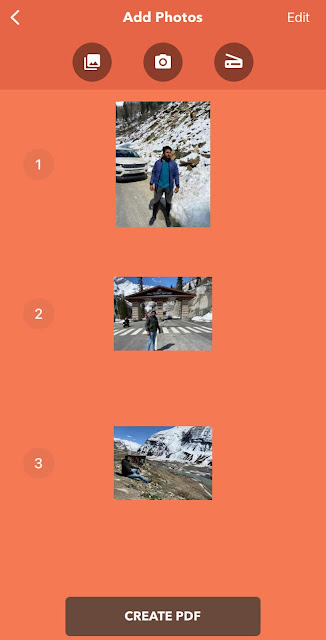
A third-party app is also an option which you can consider to convert images to PDF on your iOS device. You will find plenty of apps on the App Store. One of them is Photos to PDF which has a very simple and elegant user interface. This app not just allows you to convert photos that are already saved on your device but also lets you scan documents or take a new picture from the camera directly.
Just download and install the Photos to PDF on your iPhone or iPad. As you launch the app, you will see three options named Camera Roll, Take Photo and Scan Document. Choose Camera Roll to select the photos that are saved on your device. In the next screen, you can click on the Edit option and the rearrange the photos as you want them to appear in PDF. After that, tap the Next button and then you can choose the Margins and Orientation. Finally, tap the Create PDF button and give a name to your PDF.
The PDF will be saved within the app. From there, you can share it to other apps or save to your Files. Another benefit of using this method is that you can make your PDF password protected which isn’t possible with the previous methods. There is a feature in the Photos to PDF app which allow you to set password on PDF if you have something confidential in it like your personal documents.
5. Using an online tool to save photos as PDF
Last but not the least, you can also use an online converter tool to merge photos into PDF on your iPhone. Although, there is no need to use this method as there are other better alternatives but we are mentioning it just for the sake of your knowledge. There are a number of online images to PDF converter tools which you can find through Google. One such popular tool is provided by SmallPDF website. It’s very simple to use it.
Just open the Safari browser on your iPhone and visit the JPG to PDF converter on SmallPDF website. Now you will see an option to select and upload your photos. Once they are uploaded, tap the Convert button and wait until your photos are converted to PDF. You will then see an option download the file, save it to your Dropbox or Google Drive. The website will also suggest you some other tools for editing, compressing and converting PDF to Word.
Wrapping up
When it comes to merging multiple images into PDF, you have so many options to choose from. We personally liked the built-in features of the iOS which includes using the Photos, Books, and Files apps. If you need more features like setting up a password for your PDF, then you can consider using a third-party app such as the one which we have discussed in this guide. Let us know which method you will stick with for converting photos to PDF on your iPhone or iPad. If you are facing any problem in the above steps, feel free to share it in the comments below.