Zoom application has been in a trend from a quite long time now since the coronavirus pandemic hit the world. When the offices and schools went shut down, everything moved to the digital world from meetings to classes to exams and presentations. Zoom has provided a platform for these kinds of activities where people can connect and talk to each other through live conferencing.

Sometimes you need to save a Zoom meetings as video so you can watch it later offline, send it to others, or upload somewhere like on YouTube or any other social media platform. In this tutorial, we will discuss all possible methods that are available for helping you download Zoom recording offline on any device or OS including Windows PC, MacBook, iOS (iPhone/iPad) or Android smartphone.
When it comes to recording Zoom meetings, Zoom itself provides built-in features in its app which are local recording and cloud recording. However, the drawback is that only the person who is hosting the meeting has this permission to record a video. If you are just participant then you don’t have access to these features. Luckily, there are other alternatives methods available so you are not out of luck this time.
Table of Contents
1. Record Zoom meeting with local recording
As the name suggests, local recording feature will record your Zoom meeting locally on your system. This feature is only available for the host, however host can also give permission to the specific participants for allowing them to record a video. We will cover that later but let’s first see how you can use the local recording on Zoom to save your Zoom meeting as a video. Follow this step-by-step guide –
- Open the Zoom app on your PC/desktop.
- Start a new meeting or join one you have scheduled. Wait for all participants to join and once you have set up the meeting successfully, move on to the next step.
- Tap the Record button from the options available at the bottom. Please note that this button will only appear if you are the host or if you have been given permission by the host to record a video.

- You may have to click on Record on this Computer option additionally. Once the recording starts, you will see Recording… label in the upper-left corner with two option to pause or stop the recording. Please note that the participants will also get to know that you have started to record the meeting.
- Click on Stop button to end the recording. This will save your Zoom meeting to your PC and open the folder where it is saved. Your recording can also be found in the Recorded tab in the Meetings section of the app.

To change the location where you want to save your Zoom recordings, click the gear icon in the upper-right corner on the Home tab. Next select Recording from the menu and then you will see an option to choose a location where you want to store your recordings at.
Allow participants to record Zoom meeting
If you are the host of a meeting and you want to allow other participants to record the meeting from their side as well then you have to assign them recording privileges. To do this, go to the Participants list in a Zoom meeting. Find the person to whom you want to allow the permission and click on the More option next to his name. From the menu, select Allow Record and you have done it. The participant will now receive a notification on his screen that you have allowed him to record the Zoom meeting. In this same way, you can also disable this permission.
Save audio of all participants separately
Zoom also provide you an option to save audio from all participants in a separate audio files. This can be done from the Recordings settings on your Zoom application. On the Home tab, click the settings gear icon in the top-right corner of the screen and this will open up a pop-up window.
Choose Recordings from the menu on the left side and then enable Record a separate audio file for each participant. Now whenever you will record a Zoom meeting, your local recording will also include the audio recording of all participants separately. They will be saved in a folder named Audio Record within the location where your video recordings are saved.
2. Record Zoom meeting with cloud recording
There is another feature offered by Zoom called cloud recording for premium users. With this feature, users can record their Zoom meetings on the cloud servers instead of saving them locally on PC. Cloud recording is automatically enabled for users having premium membership of the app. To begin using this feature, first you need to upgrade to the Pro, Business or Enterprise plan of Zoom if not already.
The steps for recording your Zoom meeting with cloud recording is almost the same as in the local recording. When you are in a meeting, just click on the Record button at the bottom and then choose Record to the Cloud option. This will start the recording as usual and when you need to stop it, simply tap the Stop button or End Meeting. Once the video has been processed and made ready, Zoom will send you a link to the video via email.
Another way to find your recorded Zoom meeting video is by using the Zoom web portal. Go to the Zoom web portal and login to your account. After that, go to Account Management > Recording Management. Now this is where you will find all the video recordings on your Zoom meetings. You can search a particular recording by entering the meeting ID or topic.
3. Record Zoom meeting on Windows PC
For those of you who wants to record Zoom meeting without being the host or having necessary permission, there is a simple workaround. You can use a screen recording software on your Windows PC. There are so many software available online and the one that we recommend you to use for this purpose is Bandicam.
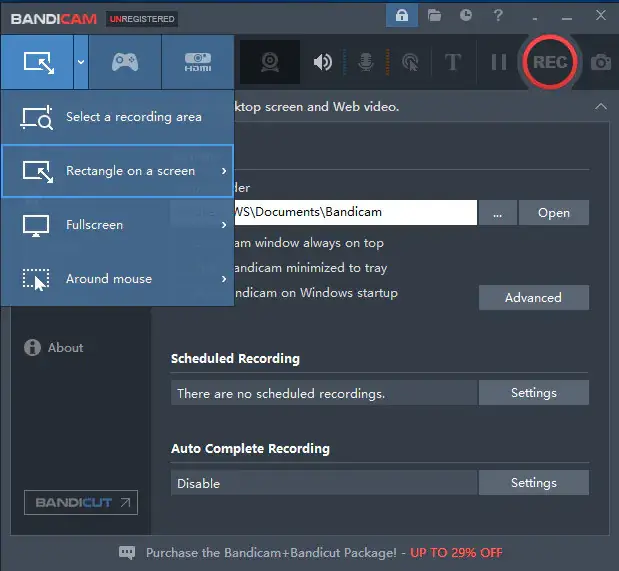
Bandicam is a free screen recording application for Windows that can capture anything on your screen with internal audio and microphone as well. When doing the screen recording, you can select a particular area of the screen that you want to capture. Bandicam uses advance high compression technology to make the video size as small as possible without compromising with the quality of the video.
Using Bandicam to record your Zoom meeting is very easy. First download the Bandicam software from its official website and install it on your Windows PC. Once after that, start your meeting on Zoom and open the Bandicam app alongside. Hover to the screen size icon and select the type of area you want to capture. Next tap the ● REC button and you are good to go.
To record internal audio of the system and your microphone at the same time, you have to tweak the audio settings. Just open the Bandicam and go to Video > Settings. Choose “(Default Sound Device)” as the Primary Sound Source and select your microphone for the Microphone settings. Click the Setting… button next to the Primary Sound Source, go to the Communication tab and select Do nothing.
4. Record Zoom meeting video on Mac
Mac users are lucky to have QuickTime application installed on their system which has a built-in feature for screen recording. The same feature can also be used for recording your Zoom meetings even if you are just participant and don’t have necessary privileges. The QuickTime app also support internal audio recording so you can also record the audio of your Zoom meeting with it.
To begin with, start your meeting on Zoom and then open the QuickTime Player app on your Mac. Go to File > New Screen Recording. This will open up the Screenshot and display you various tools. Tap on the Record button to start the recording. You can also select what portion of the screen you want to capture. You can either record the entire screen or a portion of it.
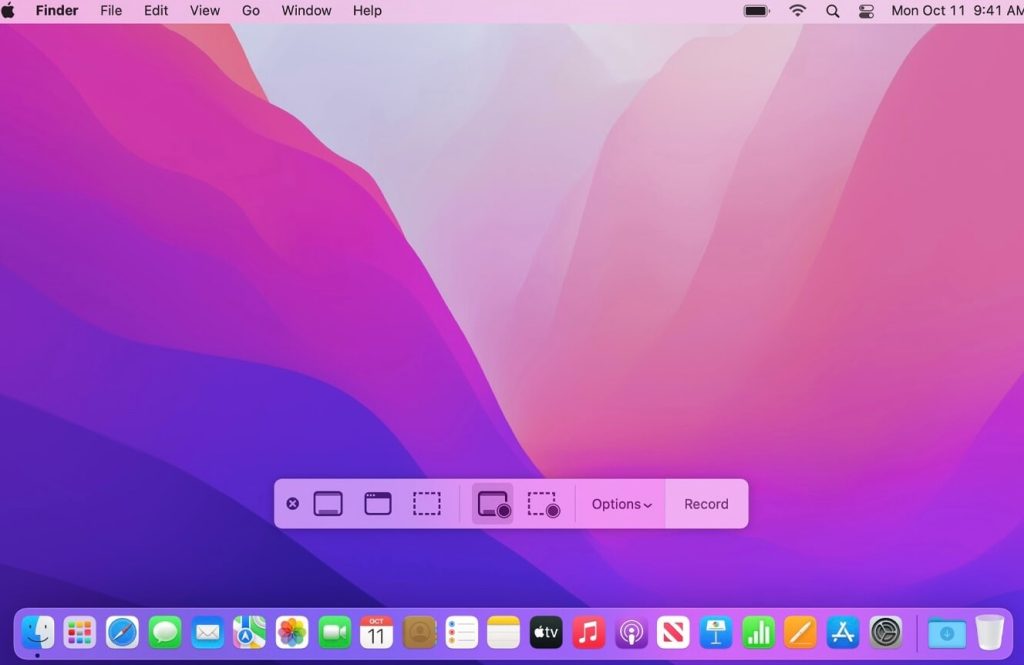
By clicking on the Options, you can control more settings of your recording such as set the location where you want to save your screen recording or include the pointer or clicks, etc. Once you have finished your recording, click the Stop Recording button in the menu bar. Now just go to the place where you have selected to save the recording and there you will find your Zoom meeting video.
5. Record Zoom meeting video on iPhone with audio
Unfortunately, Zoom app doesn’t offer built-in feature on its iOS app for recording your meeting videos locally. However, if you are a premium user, you can use the cloud recording by following these simple steps:
- Open the Zoom app on your iPhone or iPad.
- Start a meeting or join one you have scheduled.
- Tap the More… button at the bottom.
- Click Record on the Cloud. The app will now start recording your meeting.
- Tap the More… again to stop or pause the recording.
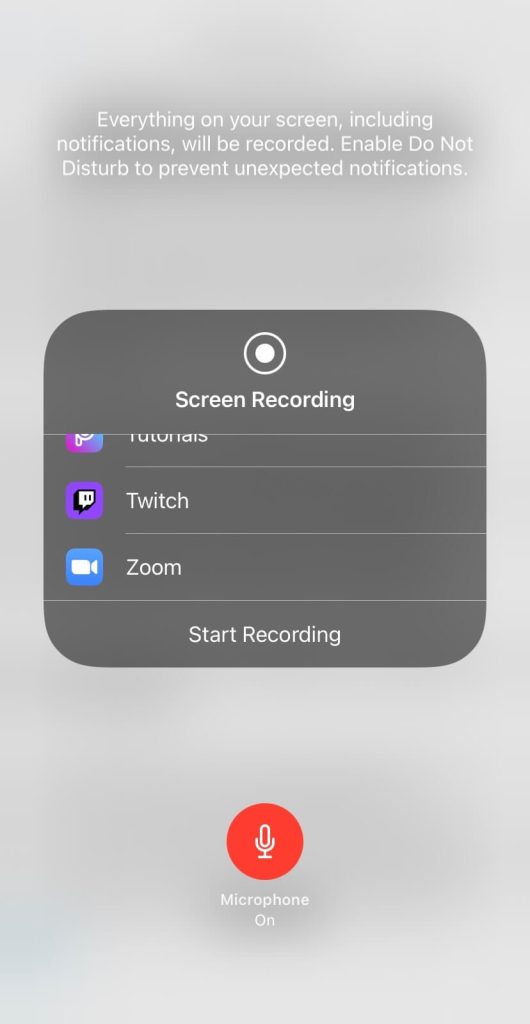
The above method will only work if you have premium account on Zoom and you are the meeting host. If you are a free user or participant, then you can do local screen recording on your iOS devise using the built-in screen recorder. For that, go to Settings > Control Center and make sure that Screen Recording is added to the enabled list.
To record your Zoom meeting, simply go to the Control Center and long-press on the Record ● button. Make sure that Microphone is enabled. After that, just tap the Start Recording option and you are good to go. To stop the recording once your meeting is done, open the Control Center again and tap the Stop button. Your recorded video will be saved to the Photos app directly.
6. Record Zoom meeting on Android with audio
Like in the case of iOS, Zoom also doesn’t provide local recording on its Android application. However, if you have premium account, you can use cloud recording feature. The steps are almost the same as we have shared for the iPhone. When you are in a Zoom meeting, tap the More button and choose “Record on the Cloud” option. From the More options, you can pause or stop the recording.
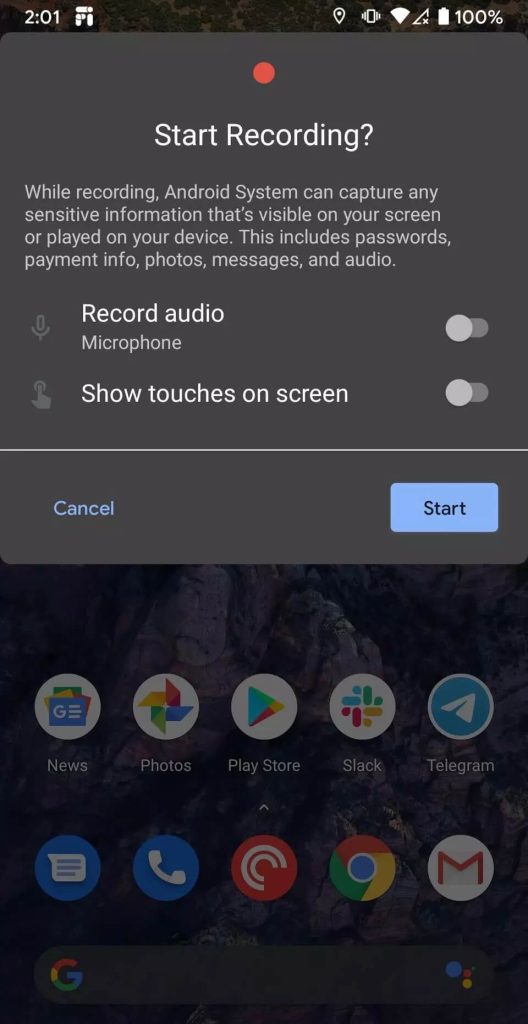
Another method to save Zoom meeting video on your Android smartphone is by using the screen recorder. The drawback of this method is that you may not be able save the audio recording. This is because Android has restricted screen recorder apps from recording internal audio of your phone.
Some manufacturers provide built-in screen recorder feature on their Android smartphones. If you also have it, then give it a shot and check if it is recording the internal audio or not. For those who don’t have native support from their manufacturer, they can download a third-party screen recorder app from the Play Store such as AZ Screen Recorder.
In case if your Android phone isn’t recording internal audio then you can use another device to record the audio of your Zoom meeting separately. That’s the only workaround left for you to do at the end.
General FAQs
Will the meeting host know that you are screen recording Zoom?
You might have a question in your mind that whether the meeting host or other participants will get to know that you are recording the Zoom meeting with screen recorder. The answer is no. Screen recording works on your system locally and the Zoom app doesn’t detect it. Thus you will be completely anonymous when using this method.
Is it legal to record Zoom meetings?
If you are using local recording feature on the Zoom app and you are either the meeting host or authorised participant who have been given permission to record the meeting then it’s completely legal. However, if you are using any other method like screen recording to record any Zoom meeting anonymously without taking permission from the host then it will be considered illegal. Even if you do so, make sure to use it for personal use only and don’t misuse it in any way.
Conclusion
So these are some methods that can help you to record a video of your Zoom meeting with audio also. The best method is to use the built-in local recording feature on the Zoom app but as it only works for the meeting hosts and authorised participants, we have shared other workaround methods for people who don’t have recording privileges to record the Zoom meeting anonymously. No matter what device or operating system you are using be it Windows PC, MacBook, Android, iPhone, or iPad, this guide is a one-stop solution for all. Let us know if you have any questions in your mind.