
A signature gives a professional look to your email. The built-in signature editor in Gmail allows you to customize your signature as per your choice. You can add your name, picture, email address, phone number, website, social media links and other information in it.
Despite being so useful feature, there is a major issue with the Gmail signature. It doesn’t work in Gmail’s mobile app (both Android and iOS). Unlike desktop Gmail, your signature won’t appear when you will compose a new email or reply to an existing one.
If you are also facing this issue with the Gmail signature on your iPhone or Android smartphone, then here we have some workarounds that you can use.
Table of Contents
How to add Gmail signature in mobile app (Android and iOS)
The desktop Gmail signature doesn’t work on the mobile app, but there is a separate feature in the settings of the Gmail app (for both Android and iOS) which allows you to add a signature to your emails. Here are the steps you need to follow –
- First of all, open the Gmail app on your Android phone.
- Click the three parallel lines at the top-left corner of the screen or swipe the screen from the left side to the right. This will open the menu section.
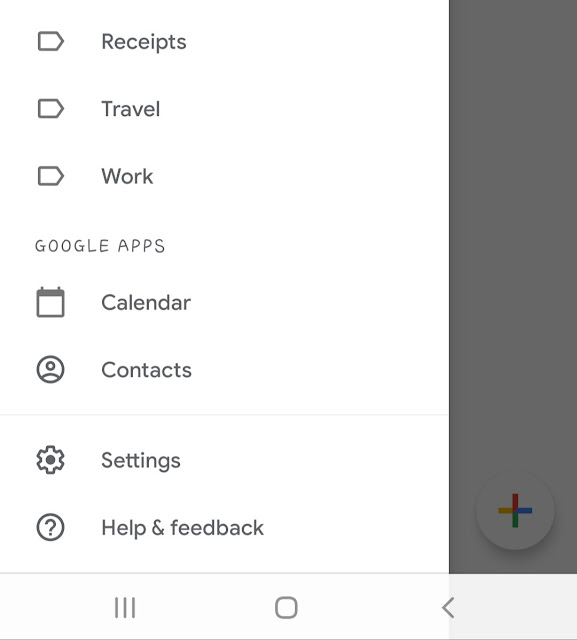
- Now scroll down to the bottom of the menu and click the Settings option. If you have logged into more that one Google account on your phone, then select the right one you want to use.
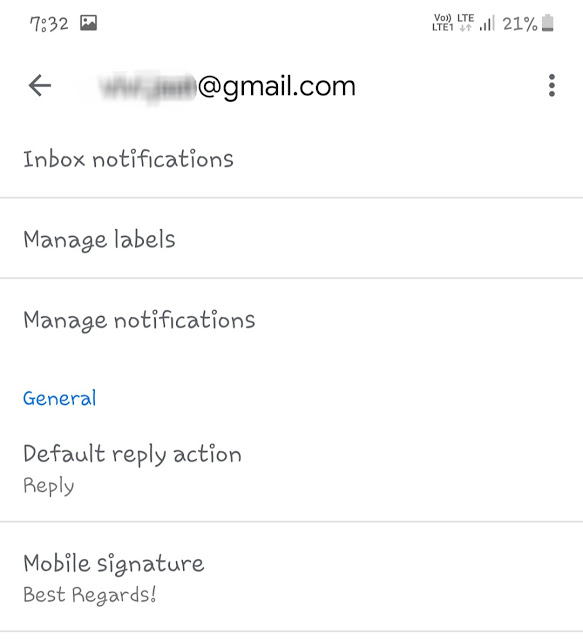
- Under the General sub-heading, click the Mobile signature option.
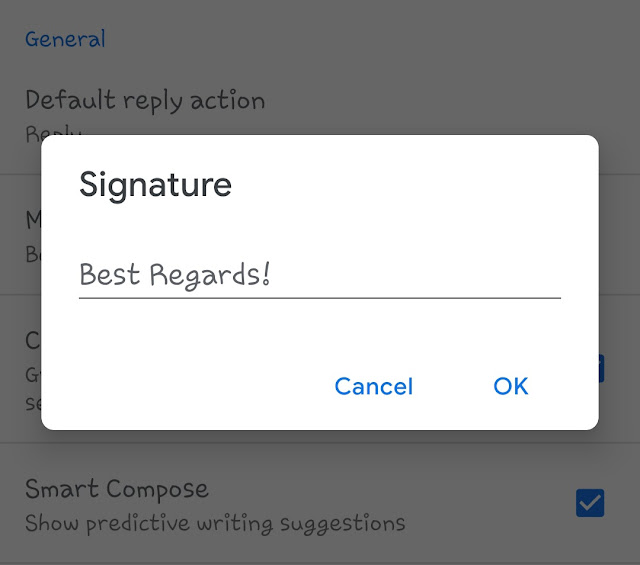
- A pop-up box will open after that where you can write anything you want to add in your email signature. Finally, tap the OK button to save it.
These steps are same for the iOS version of the Gmail app also except in the 4th step, you need to click the Signature settings option. After that, toggle the button to turn it on and then edit your signature. The default signature text on the iPhone is “Sent from my iPhone“.
Once you have done everything, go and compose a new email to check if your new mobile signature is working.
Unfortunately, there are certain limitations with the mobile signature in the Gmail app. It allows you to add only plain text. You cannot add images, HTML codes, or links like in the signature on desktop Gmail.
How to add signature in Gmail mobile website
Gmail also provides signature facility on its mobile website. If you use Gmail in a web browser on your Android smartphone or iPhone, you can use this method. First, click the menu button (three parallel lines).
After that, tap the settings gear icon at the top-right corner. There you will see an option named Mobile Signature. Toggle the button to turn it on and then you can add any text as your signature by replacing the default “null“.
Use desktop Gmail signature on your phone
There is a simple workaround to use a desktop Gmail signature on your iPhone or Android phone. It is possible by using the desktop version of the Gmail website. You can use a browser like Google Chrome for this task. Here’s how you can do it –
First, open the Google Chrome browser on your smartphone and click the menu button (three dots at the upper right corner). From the menu, enable the Desktop Site feature. After that, go to the Gmail website and login to your account (if you aren’t logged in).
The above steps will load the desktop version of the Gmail website on your browser. Now you will be able to use your desktop Gmail signature even if it is HTML based and contains images and links. Compose a new email and give it a try.
That’s how simple is it to fix the Gmail signature problem on your smartphone. We hope you find these methods helpful. If you want to ask something, feel free to share it in the comments below. Finally, don’t forget to share this tutorial on social media.
