We all have our go-to fonts we use for our daily projects and articles – ones which distinguish our writing patterns from the rest and give us our watermark for the future. Fonts like the complex and cursive ones are especially difficult to make from scratch and are time-consuming as well.
Hence to expedite the delivery of our projects, the best option is to use the readymade fonts we like and access them from a safe place we usually go to. But not all platforms have that ‘safe place’ to access our favourite fonts and other cool features we use.
In this tutorial, we’ll familiarise you with some new fonts as well as custom – into PicsArt, so that you can take your creativity to the next level and make your artwork stand out to the crowd. This step-by-step guide will show how you can add custom unique fonts to your PicsArt creation:
Table of Contents
Step 1: Find your perfect font
This is the first and foremost step to getting the best font out there for you. Simply search the Internet for free fonts. There are various websites like Google fonts or DaFont where you can find the perfect lettering. This will take a bit of research on your part, but we’re confident it’s not too much of a hassle! We recommend doing this on your phone so that you can seamlessly transition into the next steps of this tutorial, which specifically apply to our mobile app.
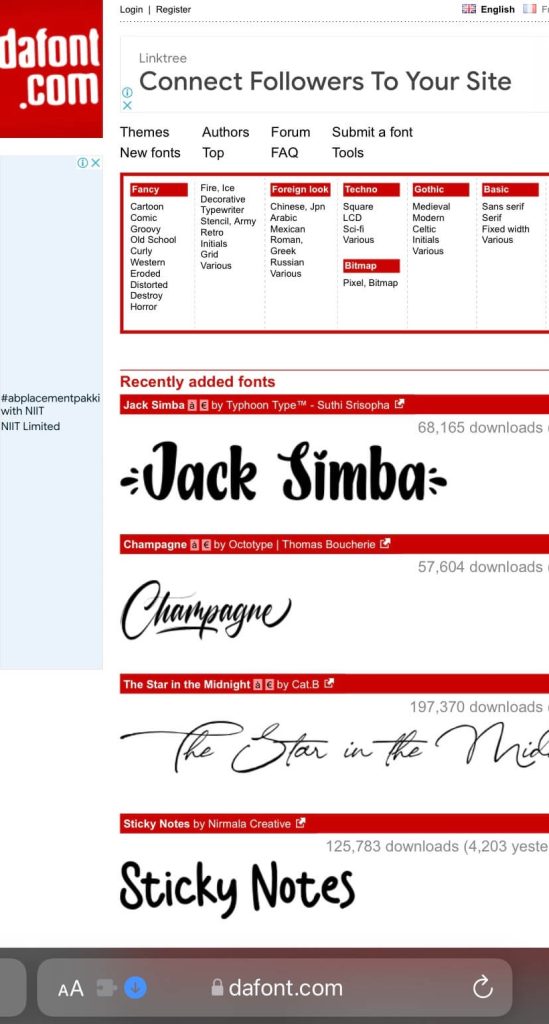
Download it on your phone after you have located the file from a third-party app of your choice. Don’t forget to read the fine print on the font you downloaded before leaving that app. Make sure you understand the permissions and where you can use this lettering. Some fonts, for example, are only for personal use, while others are for commercial projects as well.
Step 2: Locate downloaded font on your phone
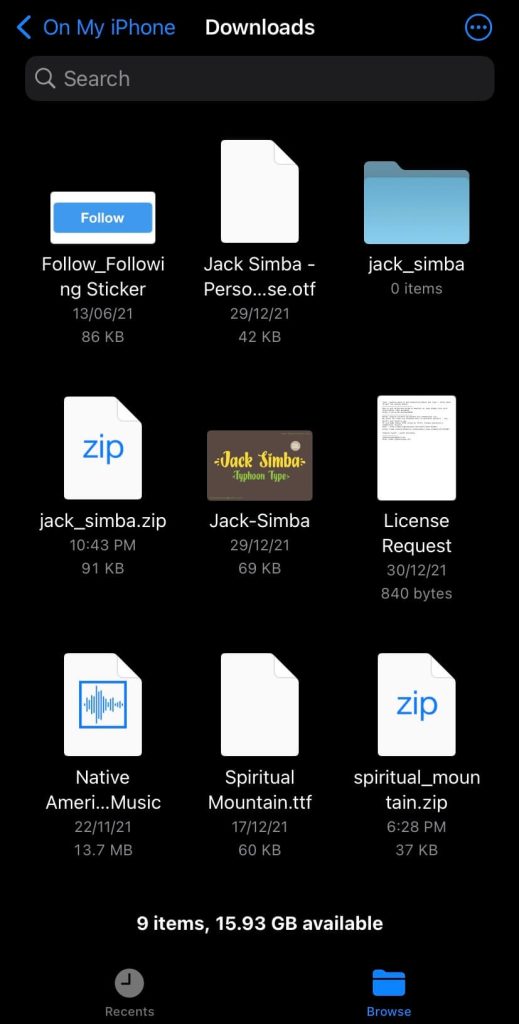
Next you’ll need to locate the file you downloaded to your phone. The file’s location may vary depending on your phone type. On the iPhone, you’ll find it in the ‘Downloads’ folder on Files app. If you are using Android then find it in the Downloads section of your File Manager. The font file will be in either TTF or OTF format and it may even have the PicsArt logo on it. If the font is in ZIP file, then extract it first.
Step 3: Add font file to PicsArt
Once you locate the font, long-press on the file to select it, choose Copy/Move option and then paste it in the Internal Storage > PicsArt > Fonts folder. If there is no folder named Fonts inside PicsArt, then create one. This method is for Android users.
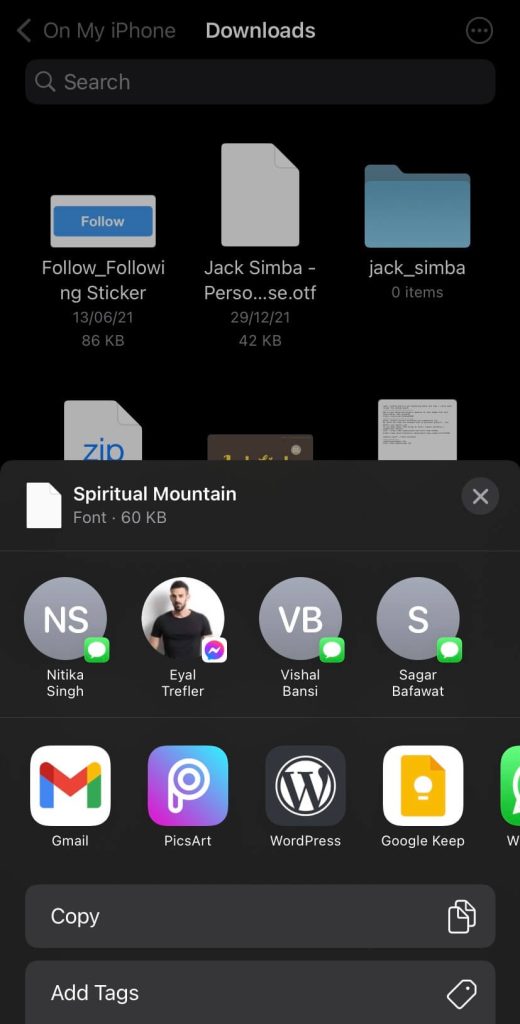
If you have an iPhone, then you need to long-press on the font file and choose Share option. After that, tap on the PicsArt icon to launch the application next. Your font should now be available for use within the program, and we’ll show you exactly where to find it in the next few steps.
Step 4: Create your project in PicsArt
Click on the purple plus sign to start a new project, once you open the PicsArt application. After that, chose a background image for your creation from your gallery or amongst the many thousands template backgrounds for use in the app. The text you use will go atop the background you choose, so choose the one which fits both nicely.
Step 5: Add text with custom font
- Choose the ‘Text’ option from the menu below your canvas and it will bring up a text box on your screen.
- Add whatever text you like now, without having to worry about the font, size or colour of it. You can change them later on, as we’ll show you. Click the check mark on the upper right-hand corner of your screen when done.
- Highlight the “Font” option at the bottom of the screen, and then click on the teal arrow in the left-hand corner under your image to pull up our searchable font library.

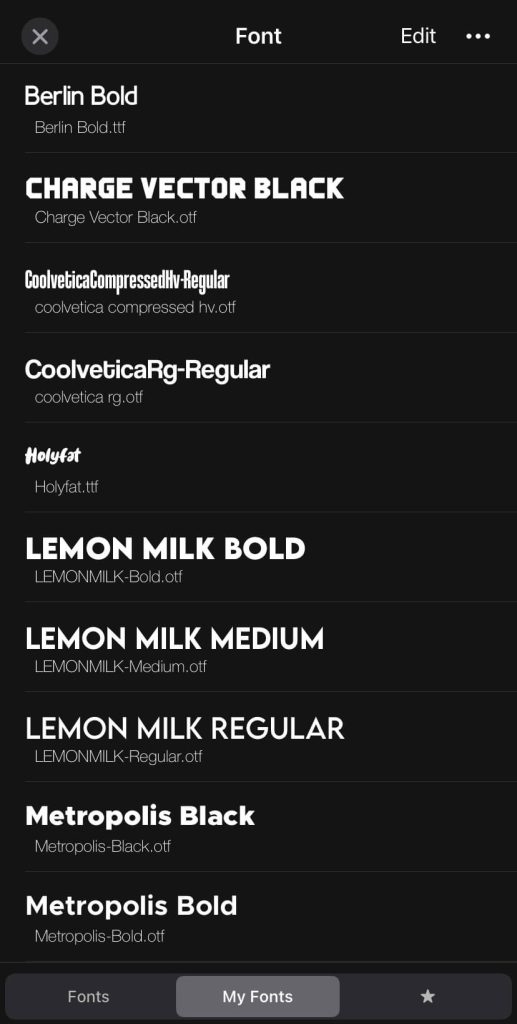
- You’ll now see a heart icon which reads, ‘My Fonts’ at the bottom of the screen. Click on this option to open the custom fonts library you’ve downloaded.
- You should see the font you just added to PicsArt. Click on it to apply it to your text and you would have successfully added a new font to your library. Now it will be there for easy use in your future projects!
So that’s how you can add text to your photo in PicsArt but there is still more you can do with that. Let’s move on to the next step!
Step 6: Customize your text to unlimited styles
You can now transform the font as needed back on the editing screen. Use your fingers to stretch out the text box until the lettering is the correct size. Then, highlight “Colour” to change the hue of the letters as desired. Do all the stylistic changes needed to mark the presence of your personal or global brand.
Change other features of your text using tools like “Bend,” “Highlight,” and “Stroke.” These are the most innovative features of the application, and separates it from its rivals all over the world. In the image below, we applied a contrasting stroke – also known as an outline – so that the lettering stands out better against the background.
Step 7: Save your edited photo
You can add other necessary elements like stickers or effects once you’re done transforming your text. Once you’re happy with the finished product, export the image by clicking on the Next option at the top-right corner followed by clicking on the Save button. Doing so will export the edited photo to your phone from where you can further share it with the world!
[Update] PicsArt not adding custom fonts
For some reasons, PicsArt has restricted users to import custom fonts on their application. The above method may not work for those who are using the latest version of PicsArt. If you are also one of them then we will show you another workaround that can help you to apply custom fonts to your text and make them stylish.
There is an application available for iOS named Phonto which you can download from the App Store for free. This is basically a text editor application which support custom fonts as well. You can follow the exact same steps we discussed above to import custom fonts on Phonto app. With this application, you can also save text with transparent background in PNG format image and then later add it as an overlay image in the PicsArt.
For Android users, there is another similar application which comes by the name AddText. It has hundreds of unique and stylish fonts that you can apply to your text for free. Not just that, there are also other text editing tools available such as shadow, 3D perspective, background, and more. These two applications can be used an as alternative to PicsArt especially for adding custom fonts to your text over any image or photo.
Conclusion
PicsArt is a creative and very popular global Armenian-based technology company which develops online photo and video editing applications with a social creative community. With more than a billion downloads, the platform get a whopping 150+ millions visitors to use their services through the power of visual storytelling. It is free-to-use, has a lot of powerful tools and features drawing inspiration from a host of their creators, and the virtuous circle can only grow for the photo and video-editing giant going forward.
The basis of creativity on 2022 is abstaining from limiting oneself even one bit. The plethora of apps in every field today can be more overwhelming rather than underwhelming for users to branch out in the right forms of creativity using their limited resources at hand. Because of this, it is pretty easy to find your suitable needs to the exact tee.
Get your own personalized fonts for your creation at PicsArt through the above tutorial and you never have to worry about fonts again! We sincerely hope the above detailed tutorial on how to download, install and customize the perfect font for your next project, will definitely help you out in ways more than one! Happy Font-ing!