There are various ways you can transfer contacts from Android to Android. We have explained all methods in this article thoroughly with a step-by-step guide and pictures. You can use any of the methods based on your personal preference. Let’s get started!
Table of Contents
1. Transfer contacts on Android by syncing with Google
There is a feature available in Android phones by Google which allows you to sync your phone’s data on your Google account, the same way you can backup your photos and videos on Google Photos app. This can also be used to transfer your contacts from one phone to another.
Out of all three methods, this one is the most easiest, fastest, and hassle-free. It doesn’t require you to manually transfer data between the phones. You just have to use your Google account for syncing and then login with the same account on your new phone to retrieve all your contacts.
The sync feature is automatically enabled on Android by default when you add your Google account it in. However, this step-by-step guide will walk you through all the steps from enabling it manually and then transferring the contacts on your new Android phone –
- Sync contacts on your old Android phone – Open Settings app and go to Accounts > Google. There you will find your Google account. Click on it and then go to the Sync option. Now just make sure that Contacts sync is enabled.
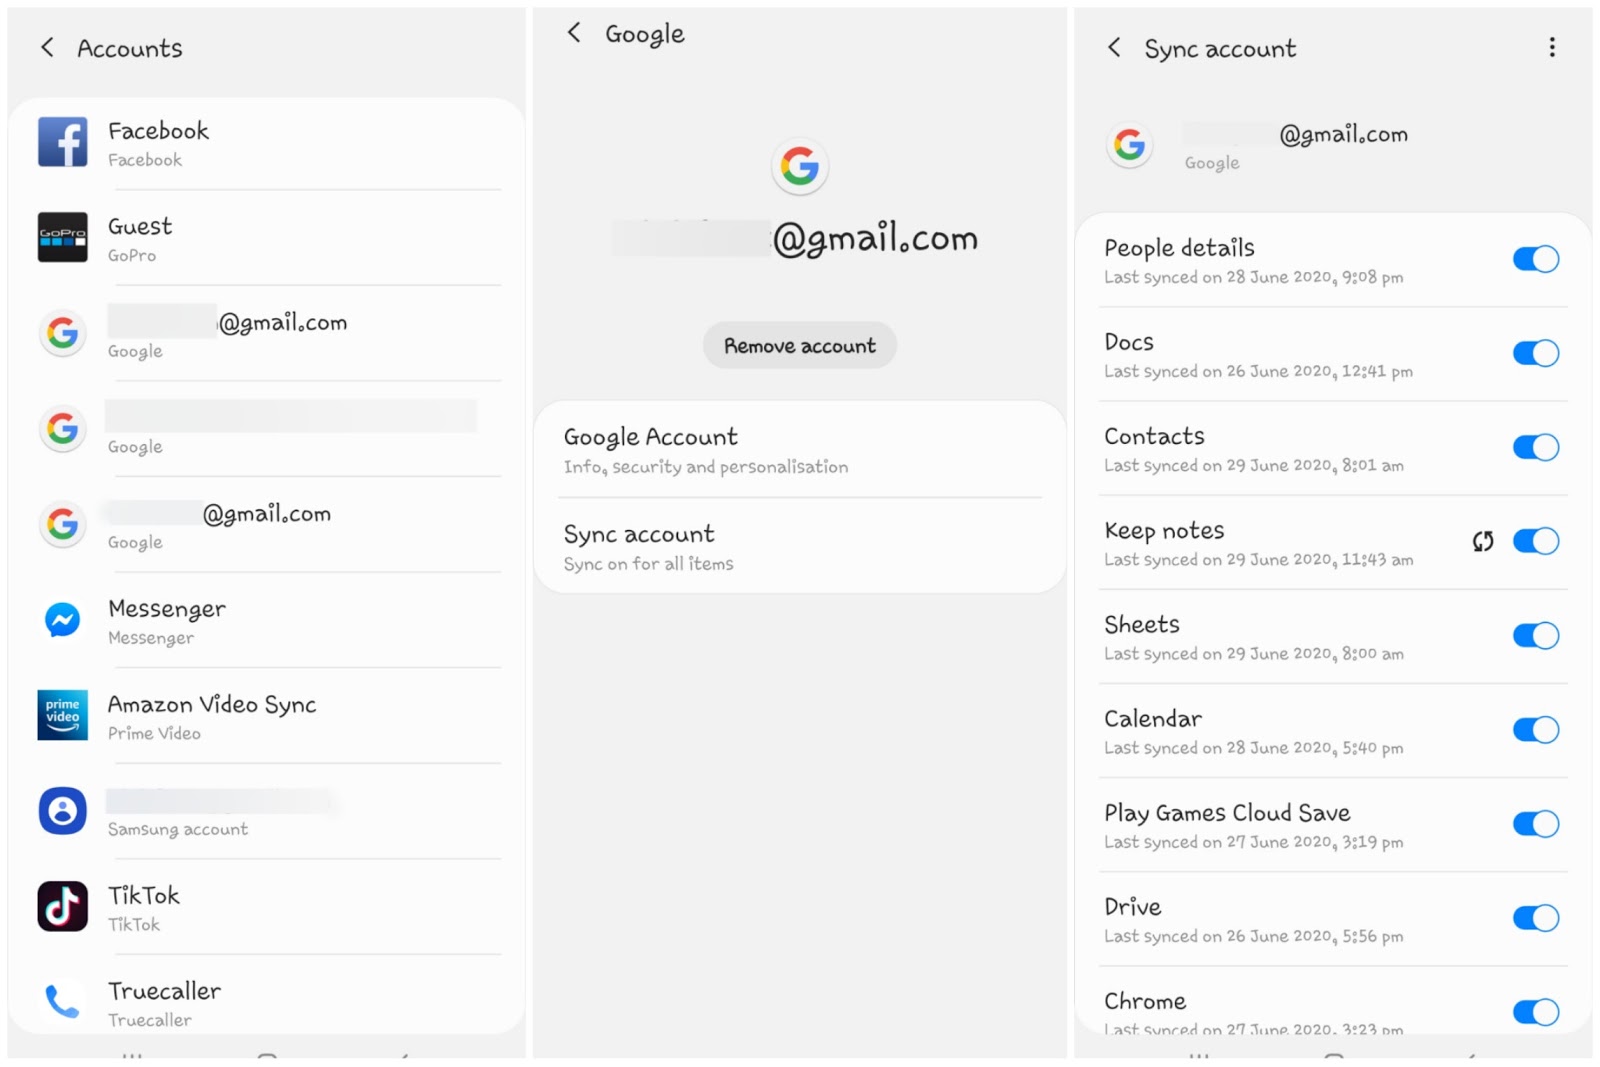
You can also see the last time when your contacts are synced (in case, if it was already enabled). To sync the most recent data, click three dots at the top-right corner and then tap Sync now option.
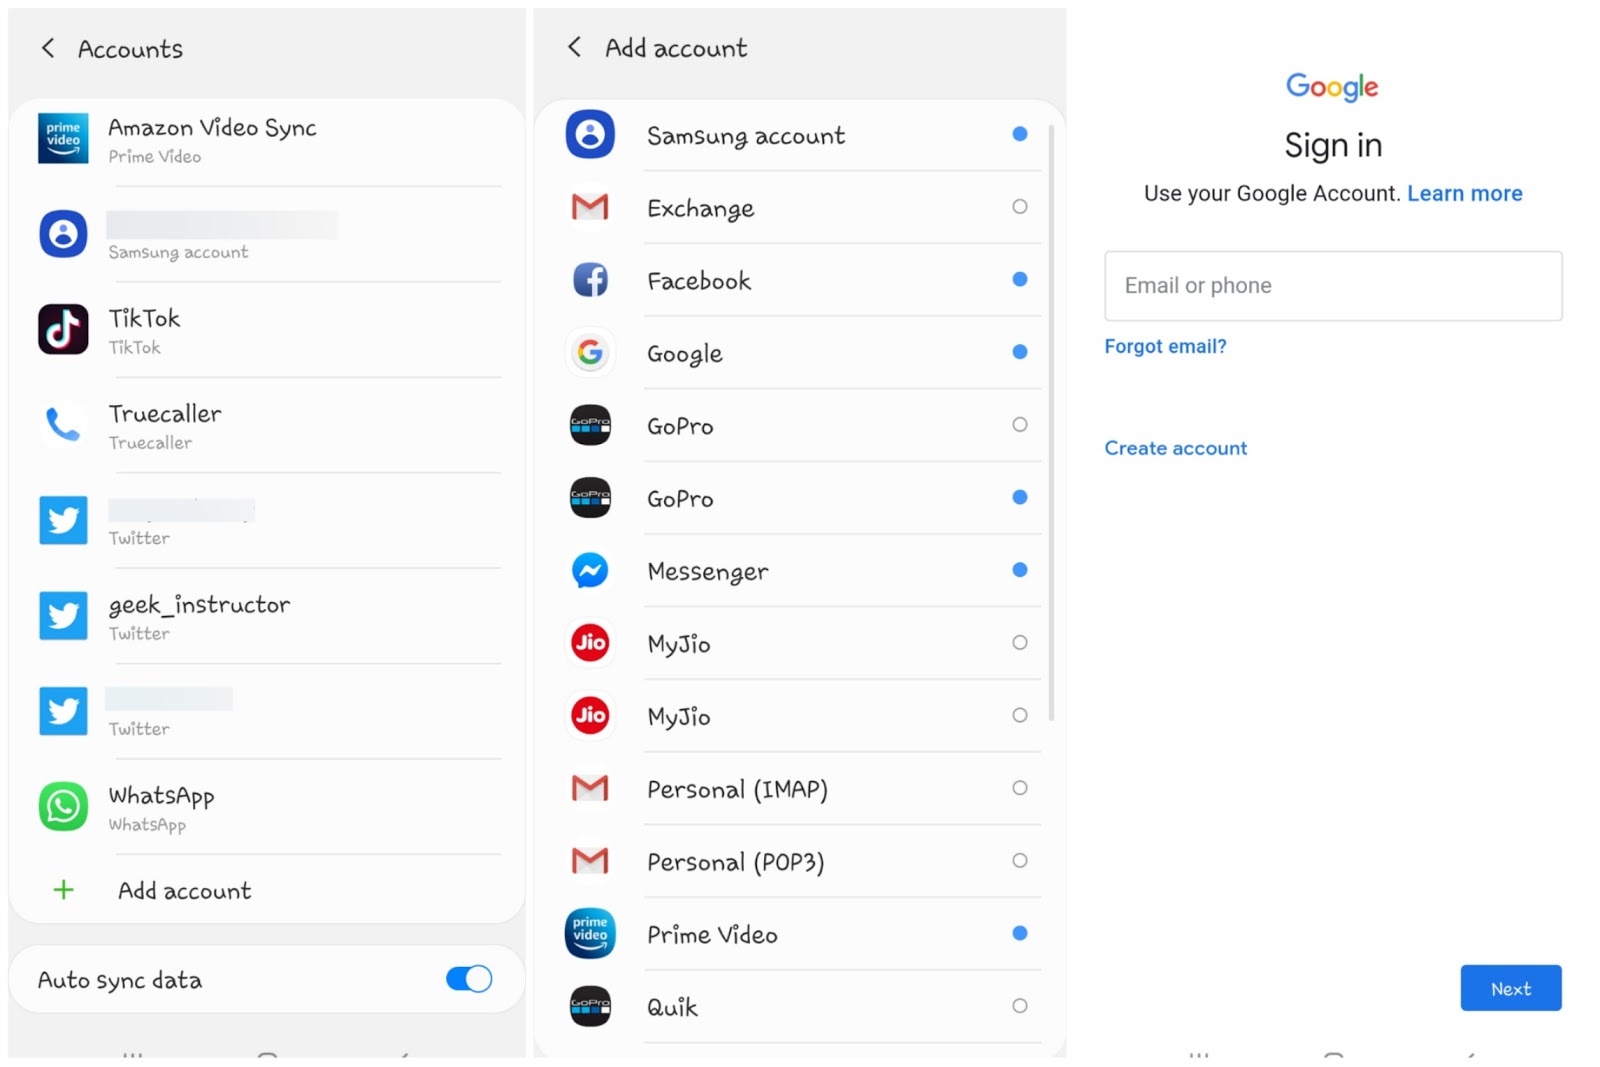
- Login with the same Google account on your new Android phone – You are asked to login to your Google account when you set up a new phone for the first time. If you haven’t logged in at the time, you can do it manually.
Simply, go to Settings > Accounts. Click Add account button and then choose Google. On the next page, you will be asked to enter your email/phone number and password for login.
- Check your contacts – Once you have logged in to your account successfully, Google will automatically retrieve and synchronize all contacts on your new Android phone. Just open the Contacts app and check them.
2. Transfer contacts on Android manually using VCF file
Another way to transfer contacts to your new Android phone is by using the VCF file. In this method, first you have to create a backup of your contacts and then restore it on your new phone manually. The previous method requires internet access on your devices but sometimes you don’t have an internet connection. In that case, you can use this manual method.
Now let’s talk about the VCF file. VCF (short for Virtual Contact File), also known as vCard, is a type of file format which is used to save contact information such as name, address, phone number, email address, etc. It also supports custom fields, images, and other types of media.
When you create a backup of your contacts, they are saved in a VCF file. Later, you can import it on your new phone. This can be done either by using the Google Contacts app or your phone’s native Contacts app. Here we have shared a completed guide for both methods –
Use Google Contacts app
Google Contacts is an Android application by Google itself which is used for managing contacts on your phone. This apps also allows you to import and export your contacts manually. Just follow these steps –
- Install Google Contacts app on both Android phones (old and new one). The app is available on Google Play Store. It is just 5MB in size.
- Export contacts in VCF file – Open Google Contacts app on your old Android phone. Then go to the menu (click hamburger icon – three parallel lines at the top-left corner) and click Settings.

Under Manage contacts sub-heading, you will find Export option. Click on it and then choose your account. After that, you will be asked to select the location where you want to save the contacts VCF file. Just save it in the root folder of your internal storage or anywhere else.
- Send VCF file to your new phone – There are various ways you can do this. One of the easiest methods is to use a file-sharing app such as SHAREit. Apart from that, you can also use Bluetooth service or computer/PC to transfer the VCF file to your new Android phone.
- Import contacts – Now open Google Contacts app on your new Android phone. Again, go to Menu > Settings. Now you have to click Import option under the Manage contacts sub-heading.
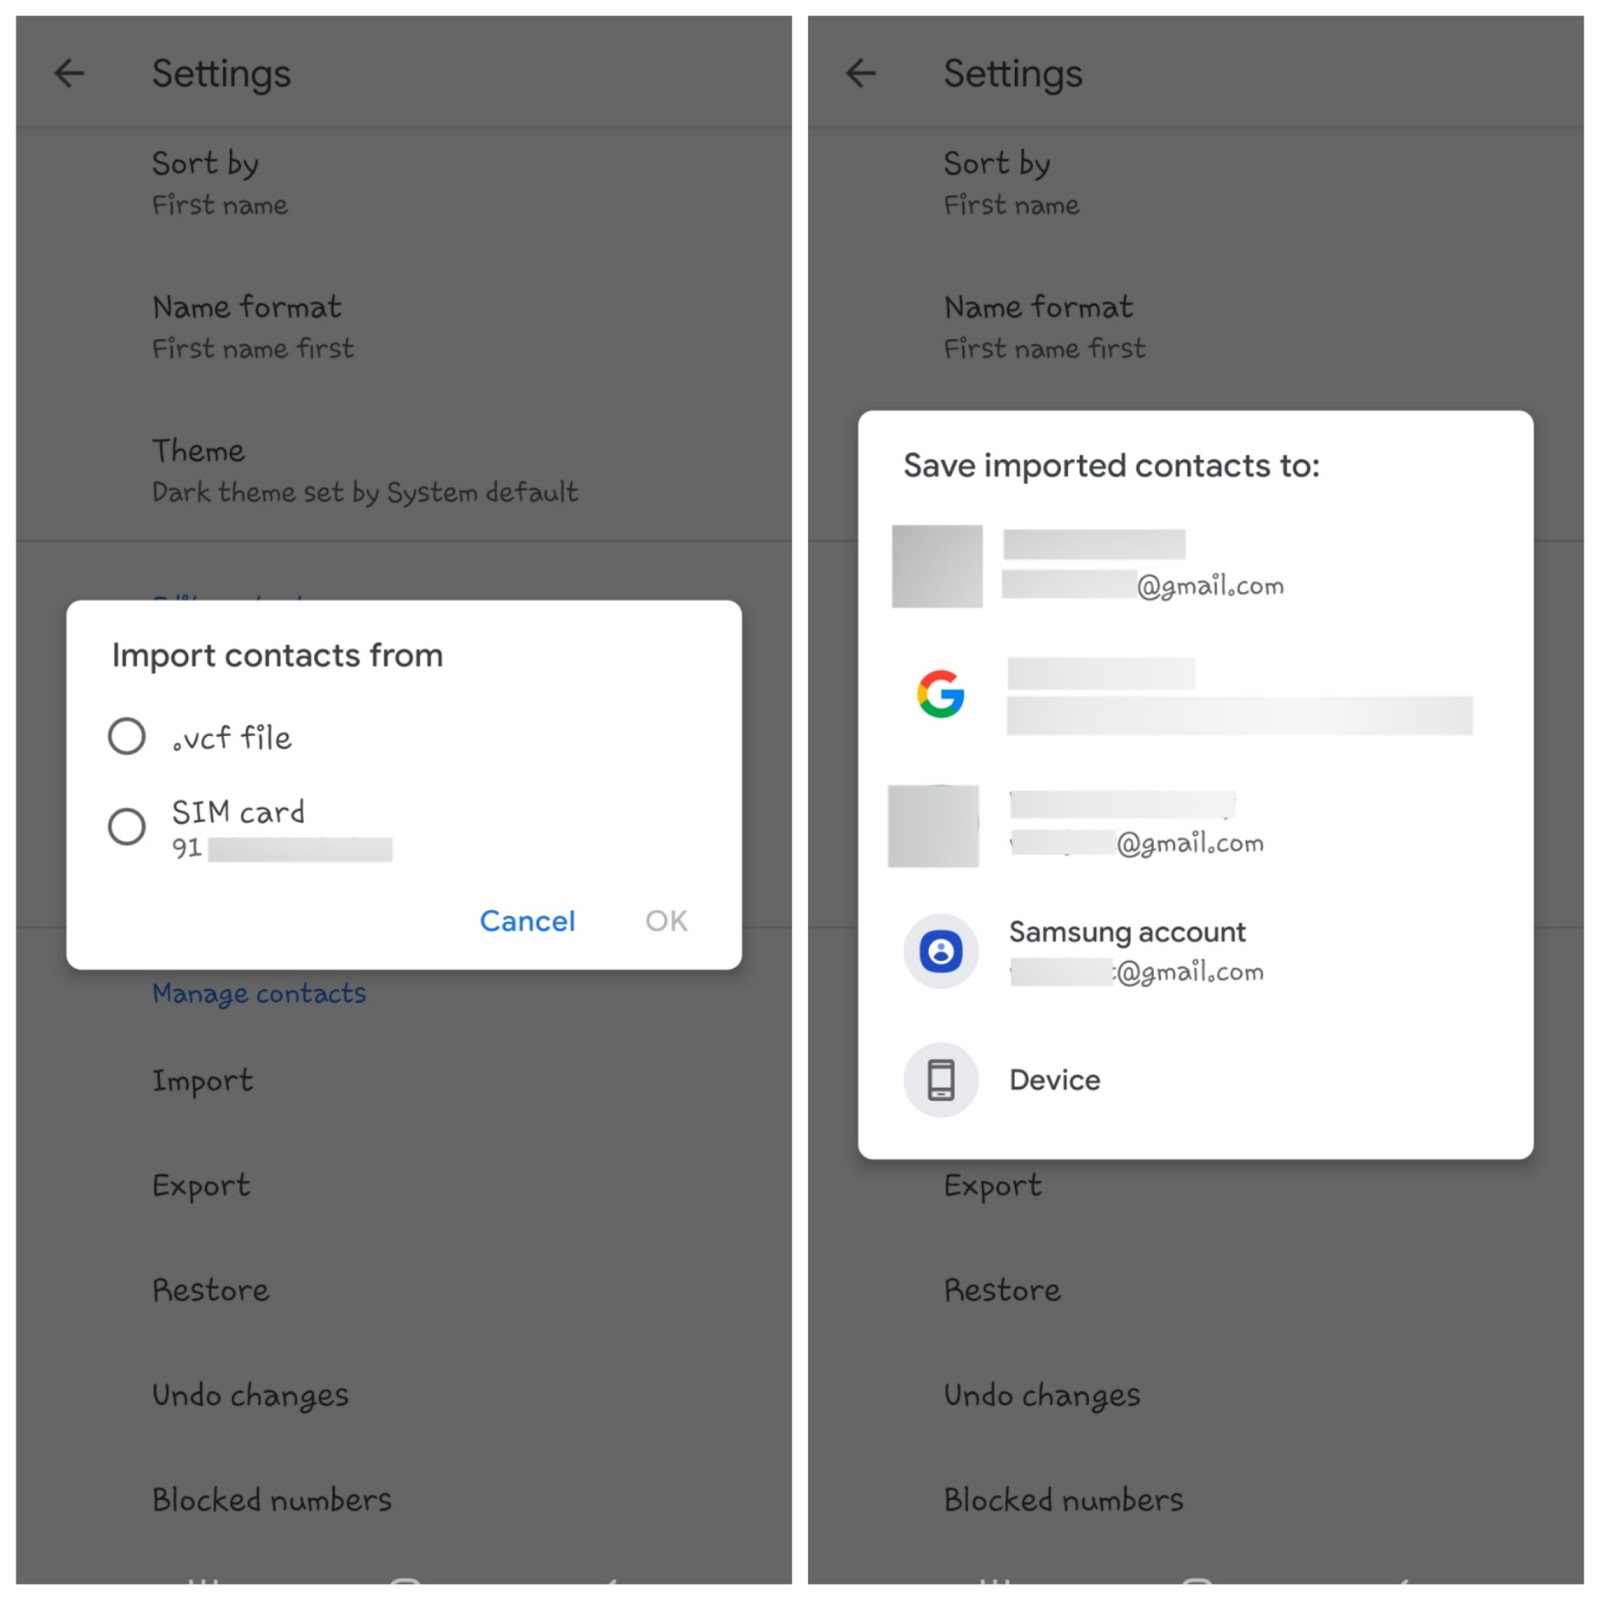
Next, choose .vcf file option in the pop-up box, and then you will be asked to choose the location where you want to save the imported contacts.
There are various options available. Either you can save it on your Google account or device locally. After all this, you just have to load the VCF file of the contacts from your phone. That’s it.
Use native Contacts app
The native Contacts app on Android phones can also be used to import and export contacts. The steps are almost the same as we have described above, only the user interface of the app will change a little. As for this tutorial, we are using Samsung’s Contacts app.
First, open the Contacts app on your old Android phone (Don’t open it from the Phone app). Go to Menu > Manage Contacts. Click Import or export contacts option. Next, tap the Export button and choose your Internal storage to save it.
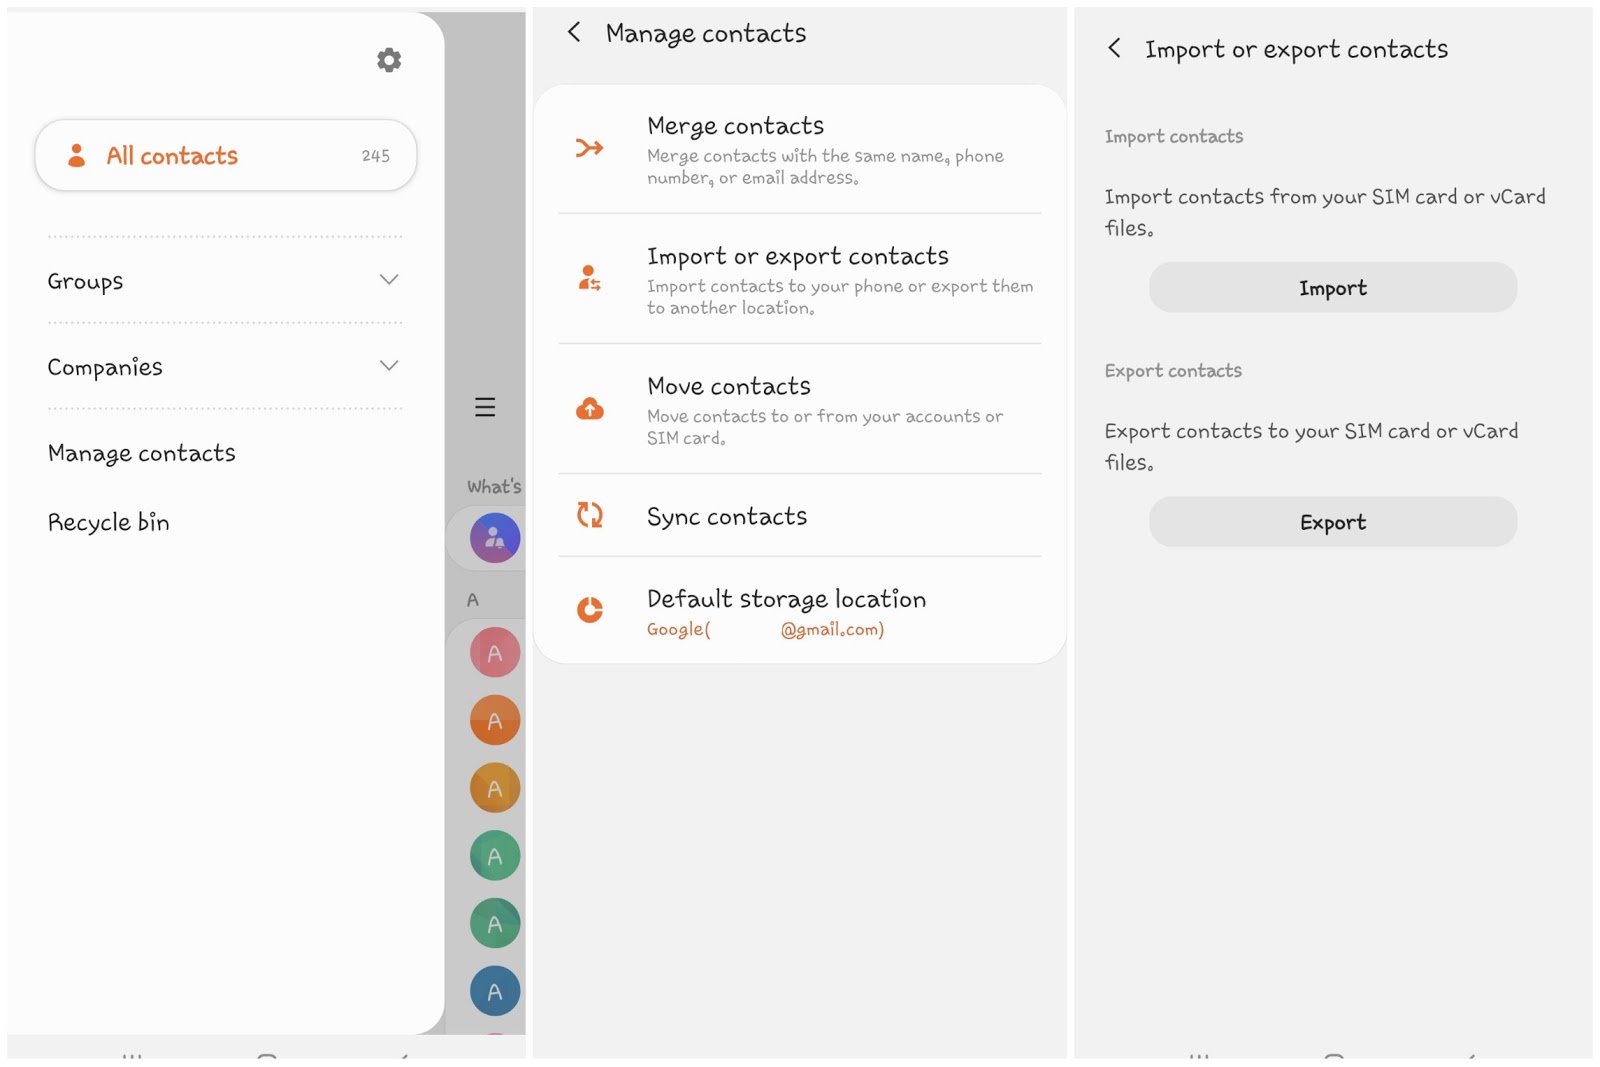
Once you have exported the VCF file, send it to your new Android phone via SHAREit, Bluetooth, or PC. After that, open the Contacts app on your new phone and again go to Menu > Manage Contacts > Import and export contacts. This time, click on Import option and select your Internal storage.
It will automatically scan your phone to find all VCF files. Select the one you want to import and then tap the Done option. Once you importing is finished, you will find all contacts on your new Android phone.
3. Transfer contacts from one Android phone to another using SIM card
SIM cards also have their own memory which can store up to 250 contacts. You can also use your SIM card for transferring contacts from one phone to another. The process goes like this: first you have to transfer contacts from your old phone to your SIM and then move your SIM card to your new Android phone.
For this task, you can use the native Contacts app of your phone. Simply, open it and go to Menu > Settings > Manage contacts. There you will find Move contacts option. Click on it and then select where you want to move your contacts from. Next, select where you want to move your contacts to – click on your SIM card.
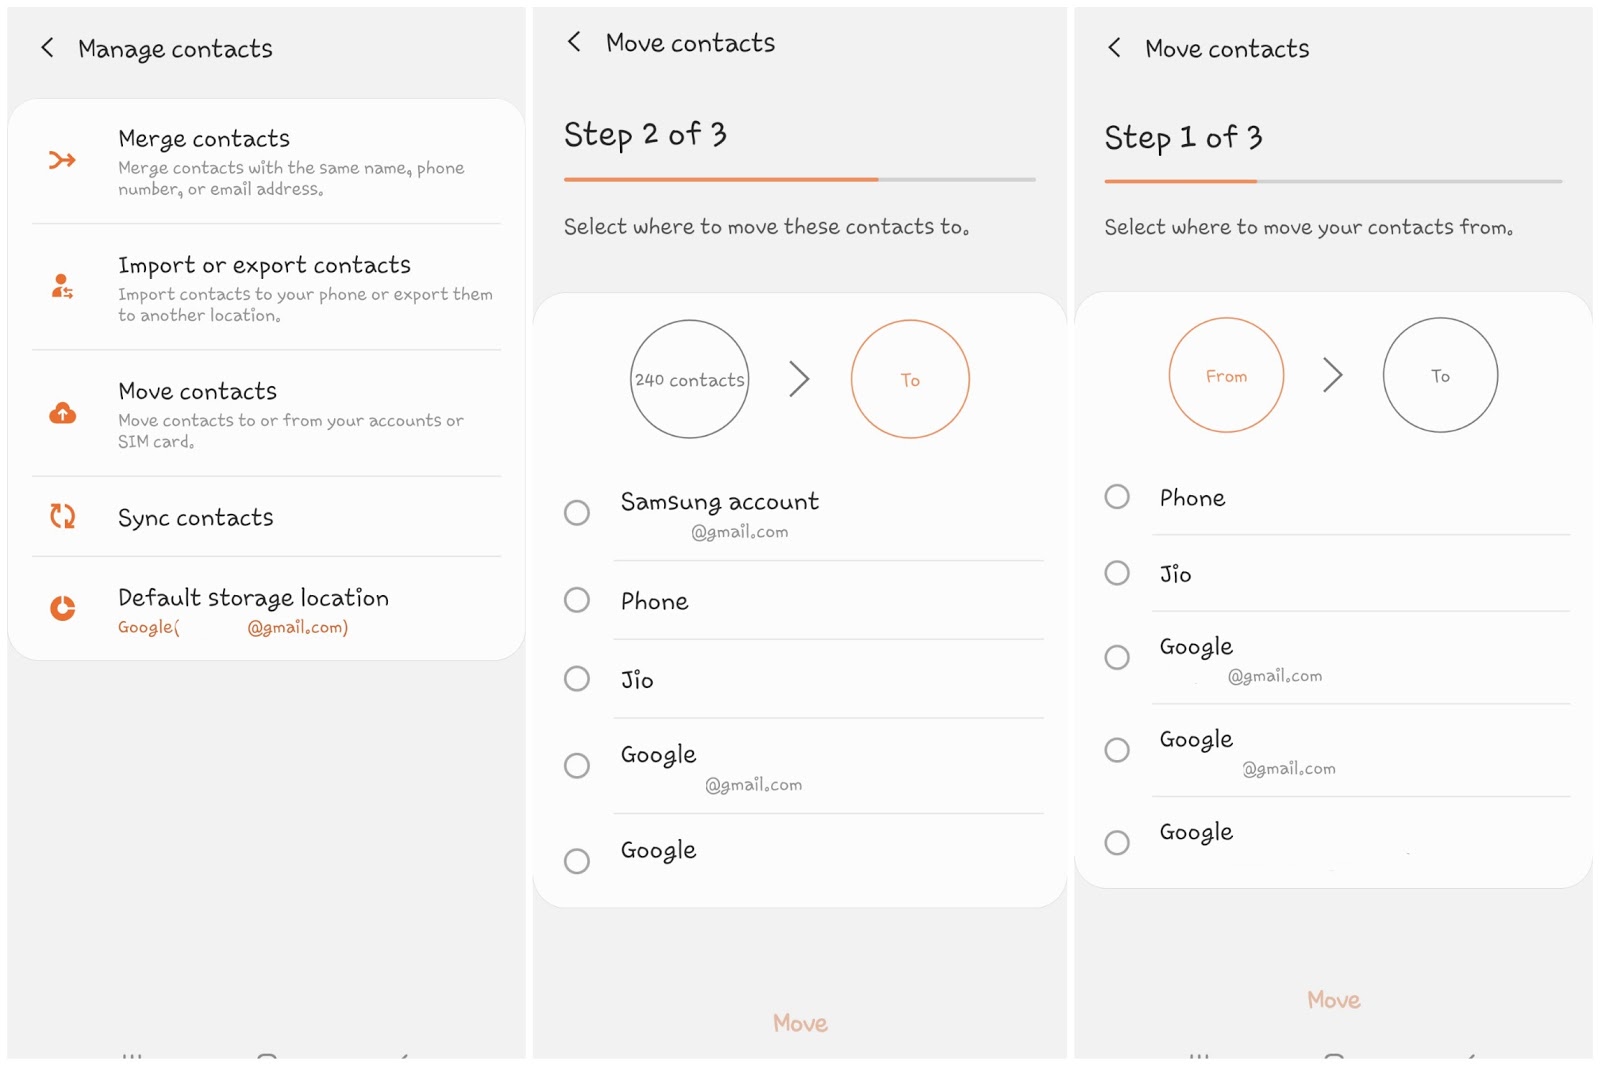
Once you have successfully moved all contacts on your SIM card, remove that SIM card from your phone and insert it in your new Android phone. You will find all your contacts retrieved on it automatically. Optionally, you can later move them from the SIM card to your device. This can be done easily by using the same process.
So these are some methods you can use to transfer contacts from your old phone to your new Android phone. We have tried our best to explain everything in the most simple way possible. Now it is up to you which method you want to use. Let us know which one you find easiest. If you have any question in your mind, feel free to share it in the comments below. Don’t forget to check out more interesting tutorial on our website.

