You can customize your avatar as you wish by choosing your hairstyle, face shape, skin tone, eyes, nose, facial hairs, and other body features. Not just that, but you can also choose your outfit, headwear, glasses, and earrings. There are various options available for all kinds of people.
The Facebook Avatars is quite similar to Snapchat’s Bitmoji app which does the same work. For Indian users especially, Facebook has added more options in the Avatars like bindis, sarees, kurtas, suits, turbans, and lungi. This will allow you to create an exact lookalike copy of yourself.
You can share your Facebook Avatars in your news feed or set it as your profile picture. Apart from that, Facebook will also create some stickers and emojis based on your avatar version which you can use in the comments, Messenger, and also send to WhatsApp.
The article covers everything you need to know about the new Facebook Avatars feature. We will guide you how to create your Facebook avatar and use its stickers on comments, Messenger, and WhatsApp. Some users are unable to use Facebook Avatars, so we have also discussed how to fix that issue. Let’s start this tutorial now!
Table of Contents
How to create your own avatar emoji on Facebook
The Facebook avatar feature isn’t based on facial recognition technology as the Memoji on iPhone, so you have to create your avatar emoji manually. Apart from that, it produces 2D (2-dimensional) pictures only which doesn’t move and interact like a 3D animated object.
These are some drawbacks of the Facebook avatar feature. As the Facebook app isn’t made for the purpose of creating avatar particularly, so we can ignore these drawbacks. Anyways, here’s how you can create your own Facebook avatar emoji on iPhone or Android device –
- Update the Facebook app – The new Facebook Avatars feature is embedded in the most recent version of the Facebook app. If the Facebook app isn’t updated on your phone, then update it from the Google Play Store or Apple App Store.
- Open the Facebook app and go to the menu – Click hamburger icon (three parallel lines) at the top-right corner of the screen.
- Click See More option – Scroll down a little bit and then you will find See More option. Click on it to expand.
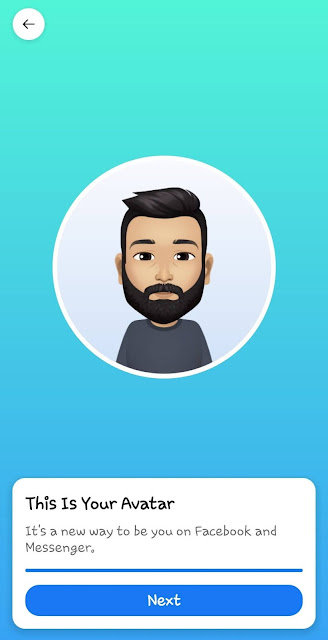
- Tap Avatars option – This option is available at the top on the See More list. After that, you will see an introduction page as shown in the below picture. Click Next to continue.

If you had previously used Facebook Avatars, it is added in the Bookmarks section just below your profile name on the menu.
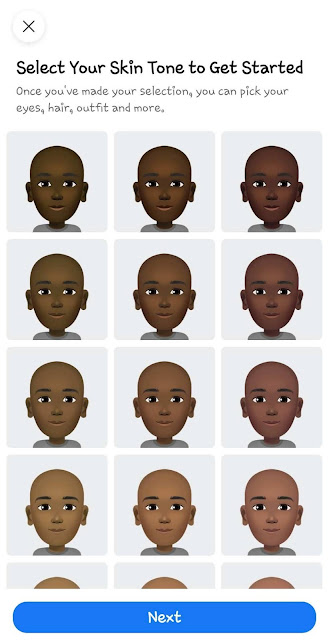
- Select your skin tone – There are all kinds of skin tone shades available from black to white and brown. Once you have selected yours, click Next to continue.

- Customize your Facebook Avatar – In the next few steps, you can customize other things such as eyes, hairstyle, outfit, and more. You can click the mirror icon on the screen to open the front camera. This will help you to match things with your face.

Once you have customized everything, Facebook will process and apply the changes to your avatar.

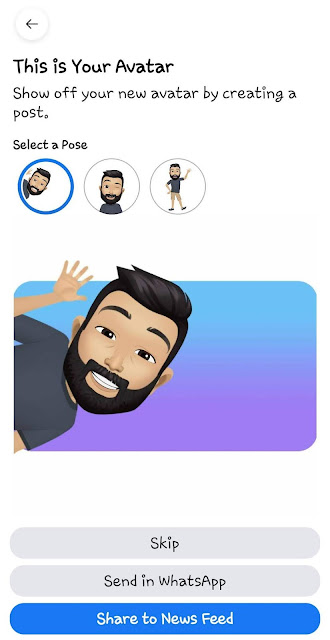
- Share your Facebook Avatar – You can show off your new avatar by creating a post. Select a pose you like (three are three poses available) and then tap the “Share to News Feed” button. You can also send it to WhatsApp.

If you need to edit your Facebook avatar in the future, simply go back to the Avatars option in the Facebook app menu.
How to fix Facebook Avatars not working
Sometimes you don’t find Avatars option in the See more section on the Facebook app menu. Some users may face another problem that when they click on the Avatars option, it doesn’t open at all. Here we have explained why these problems occur and how you can fix them –
- Use the latest version of the Facebook app – You will not find Avatars feature in the older versions of the Facebook app. Simply, update the app on your phone to fix this issue.
- Retry again later – If the Avatars option doesn’t open even after clicking on it several times, then try clearing the cached data of the Facebook app and restart it again. If that doesn’t also work, then wait for some time and try again later. Generally, this problem get fixed automatically.
- Open Facebook Avatars from search shortcuts – The Facebook Avatars can also be accessed from the search shortcuts. Simply, open the Facebook app and then search for Facebook Avatars. You will find it at the top of the search results.
- Device not supported – It might be possible that your device or phone software version isn’t supported for using the Facebook Avatars. In this case, try updating your phone software to the latest version.
- Not available in your country – Facebook Avatars is recently launched in India. This feature is still not available everywhere in the world. If it is not available in your country, then just wait until it is launched or you can try using a VPN to access it.
How to send Facebook avatar stickers in Messenger
Facebook will create many stickers based on your avatar. As of now, these stickers aren’t added to the Messenger, however, you can use them manually. Open the Facebook app, go to the menu and click the Avatars option. Once your avatar is loaded, click the stickers icon at the top-right corner.
On the next page, you will find all your Facebook avatar stickers. Click on the one you want to send and then choose Send in Messenger option. Next, it will open the Messenger app where you can select the person(s) to whom you want to send your avatar sticker.
How to use Facebook avatar stickers in comments
You can also use your avatar stickers in the comments on Facebook posts. They are automatically added in the comments once you create your Facebook avatar. To use them, simply open the comment box of the post where you want to add the sticker.
Then click the Facebook Avatars icon at the bottom-right corner (just before the GIF icon).
After that, tap on the sticker you want to use, write any text (optional), and finally post the comment.
How to use Facebook avatar stickers on WhatsApp
As of now, there is no direct integration of Facebook avatar stickers with WhatsApp. You can only share them on WhatsApp manually like in the Messenger. Again go to the Avatars on the Facebook app and click the stickers icon. Next, tap on the sticker you want to use.
At the bottom, you will see More options. Clicking on it will open the Sharing window. Choose WhatsApp there and then select the chat(s) where you want to send the sticker. Please note that the Facebook avatar stickers are sent as a photo on WhatsApp.
Do you know? – WhatsApp has its own stickers. If you don’t know how to use them, read our guide on how to download and send stickers on WhatsApp. Another interesting thing is that WhatsApp also supports third-party and custom made stickers. You can also create your own personal stickers for WhatsApp using PNG images.
We hope you find this guide helpful to make your own personalized avatar emoji and stickers on Facebook. There is still a lot of room for the upgrade in this feature like facial recognition, 3D avatar, and more. It would be great if Facebook will integrate avatar stickers with Messenger and WhatsApp directly. Let us know what do you think about this new feature. Don’t forget to share this post with your friends.


