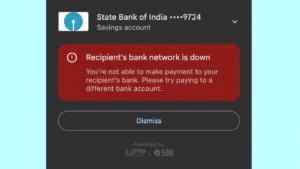
Sending payments on Google Pay is pretty simple until and unless you don’t encounter any error. There are a lot of issues related to payment transactions that Google Pay users face every now and then. One of the most common errors you may also encounter while making payments on Google Pay is payment declined error.
The error message says “Account error. Payment declined: try another bank account or call your bank (YC)“. This will keep appearing no matter how many times you try to complete your transaction. Do you also getting this error on your Google Pay while sending payment to someone? This problem can arise due to various reasons. We will discuss about them in this tutorial and show you how to fix them quickly.
Table of Contents
Create a new UPI ID of your bank account
The most common way to fix payment declined error on Google Pay is to create a new UPI ID of your bank account. There are 4 types of UPI IDs you can create in Google Pay which ends with @oksbi, @okaxis, @okhdfcbank, and @okicici. It is quite possible that your current UPI ID isn’t working and that’s why your payment is getting declined. This step-by-step guide will show how you can create a new UPI ID –
- Open Google Pay app on your smartphone.
- Click your profile picture at the top.
- Tap on Bank account under Payment methods. After that, choose your bank account.
- Next, click on Manage UPI IDs. Here you will find your current UPI ID and three others.

- Click the + button next to the UPI ID you want to create.
- Verify phone number with your bank – Now you will be asked to verify your phone number. Make sure that the number is linked to your bank and the SIM is on your device. Tap the Continue button and then you will asked to send an SMS. Once your verification is done, Google Pay will activate your new UPI ID.
- Pay with your new UPI ID – When you will be making the payment, Google Pay will still choose your old UPI ID which is set as default. To change it, simply click on the drop down button when you are asked to choose your account for the payment (see below picture) and then select your new UPI ID. This time, you won’t get any payment declined error on Google Pay.

Re-add your bank account on Google Pay
Another way to fix this payment declined problem is by re-adding your bank account on Google Pay. In our previous guide, we have already discussed how to remove and change your bank account on Google Pay. You have to follow the same steps in this case. Here’s what you need to do –
- Remove your bank account – Open the Google Pay app on your phone, click your profile photo at the top-right corner. Then go to Bank account > select your bank. After that, tap menu button (three dots) and then click Remove account option. You will be asked to confirm it. Click Continue and you have done it.

- Re-add your bank account – Go to the Payment methods page on Google Pay and click Add bank account option. Select your bank and then Google Pay will start finding your bank account linked with your phone number. Click Start button and enter your card details including last 6-digits of your ATM/debit card and its expiry date. Next, you will be asked to create a UPI PIN. That’s it.
Re-adding your bank account will refresh your UPI ID and fix any bank related issues. Once after this, try again to send payment on Google Pay and hopefully you won’t face payment declined error.
Other methods to fix payment declined error on Google Pay
If you have tried above methods and still you are unable to fix payment declined problem, then here are few other things you can try –
- You have exceeded daily transaction limit – You are allowed to make only certain number of transactions in a day and this limit is set by your bank. If you have exceeded this limit, you won’t be able to make further transactions until next time. Just wait for the next day and then try again to send the payment.
- You have exceeded limit to enter UPI PIN – Did you entered incorrect UPI PIN while making payment on Google Pay. This can also cause payment error. If you entered incorrect UPI PIN several times, it will exceed your daily limit and then you won’t be able to make transactions on Google Pay.
- Check your bank balance – It is also possible that you might not have any sufficient balance on your bank account to complete the transaction. This can also lead to payment declined error on Google Pay. We have already published an article on how to check your bank balance on Android phone.
- Check if your bank account is active – As the error message says “call your bank”, it means there might be some issue with your bank account. Maybe it was blocked for some security reasons. Just make sure that you bank account is active and then try again after some time to make the payment.
- Contact your bank – The last option is to contact your bank. This will help you fix any issue related from their end. Either you can call on the toll free number of your bank or go to your nearest bank branch and ask if everything is fine with your account.
So these are some methods which can definitely help you to fix payment declined error on Google Pay. The first method will fix your problem most probably. If it doesn’t work, then you can try other methods one-by-one. There are few other payment related errors on Google Pay like payment failed or processing, bank server unavailable issue, etc. We have already posted detailed articles on these topics. Make sure to check them out and don’t forget to share this post with friends on social media.