Backing up your photos and videos is essential for a number of reasons. You don’t know when your smartphone can get lost, stolen or broken. If something unusual happens and you don’t have access to your iPhone, it will be really difficult for you to recover your important data.
To prevent yourself from such situations, it is necessary to keep your photos and videos backed up somewhere in a safe place from where you can recover them easily. Another reason why most people back up their iPhones is because of storage issues. iPhones have a limited amount of storage which get fully occupied in no time.
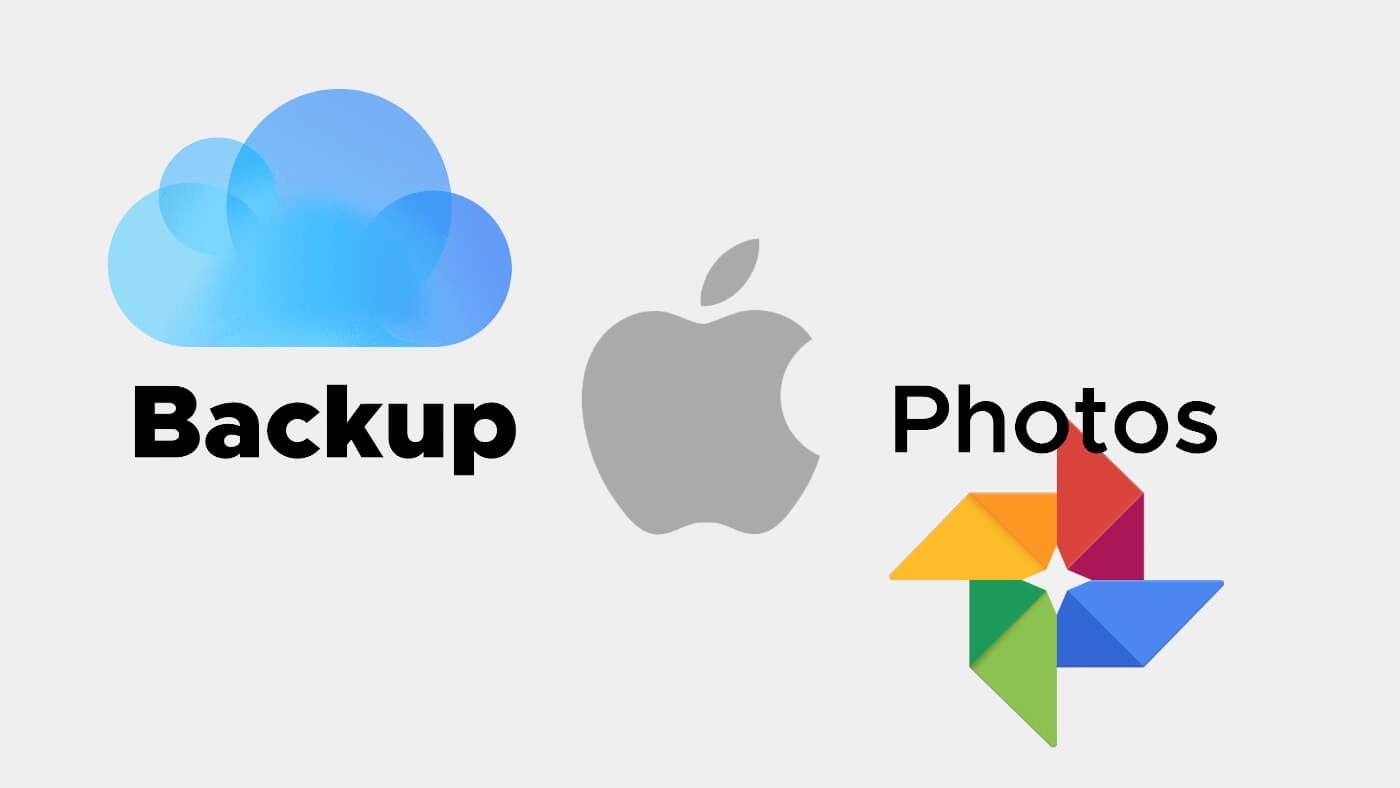
When it comes to iPhone photos backup, there are several options you have by your side. One of the most common methods is the iCloud backup. However, the drawback of this method is that you only get 5GB of storage which isn’t enough for most of us. Guess what? There are some other good alternatives to iCloud such as Google Photos and transferring your iPhone photos to a PC. We are going to discuss all these methods in detail here. Now without further ado, let’s get started!
Table of Contents
1. How to backup photos to iCloud on iPhone
iCloud is the official cloud storage service by Apple which gives you 5GB of free storage. This 5GB storage is collectively shared among all your iPhone data including photos, videos, app data, settings and more. iCloud backup is attached to your Apple ID so you can access it anywhere either by logging in to your account from another iPhone or directly from the iCloud official website.
Before moving to the steps, make sure that you are logged in to your Apple ID on your iPhone. Here’s a complete step-by-step guide on how you can enable iCloud Photos to backup your photos and videos on iOS:
- Open the Settings app on your iPhone or iPad.
- Tap on your profile photo or name at the top. This will open up your Apple ID settings page.
- Click on the iCloud option. Here you will see the storage information of your iCloud account. Below which there is a list of apps for which you can enable iCloud backup.

- Tap on the Photos app at the top.
- Now toggle on the iCloud Photos button. This will automatically upload and safely store all your photos and videos in iCloud. You can browse, search and share them from any of your devices.

- Optimise iPhone storage – Select this option if your iPhone is low on space. This will replace full-resolution photos and videos will smaller, device-sized versions. However, you can still access full-resolution versions from the iCloud at any time.
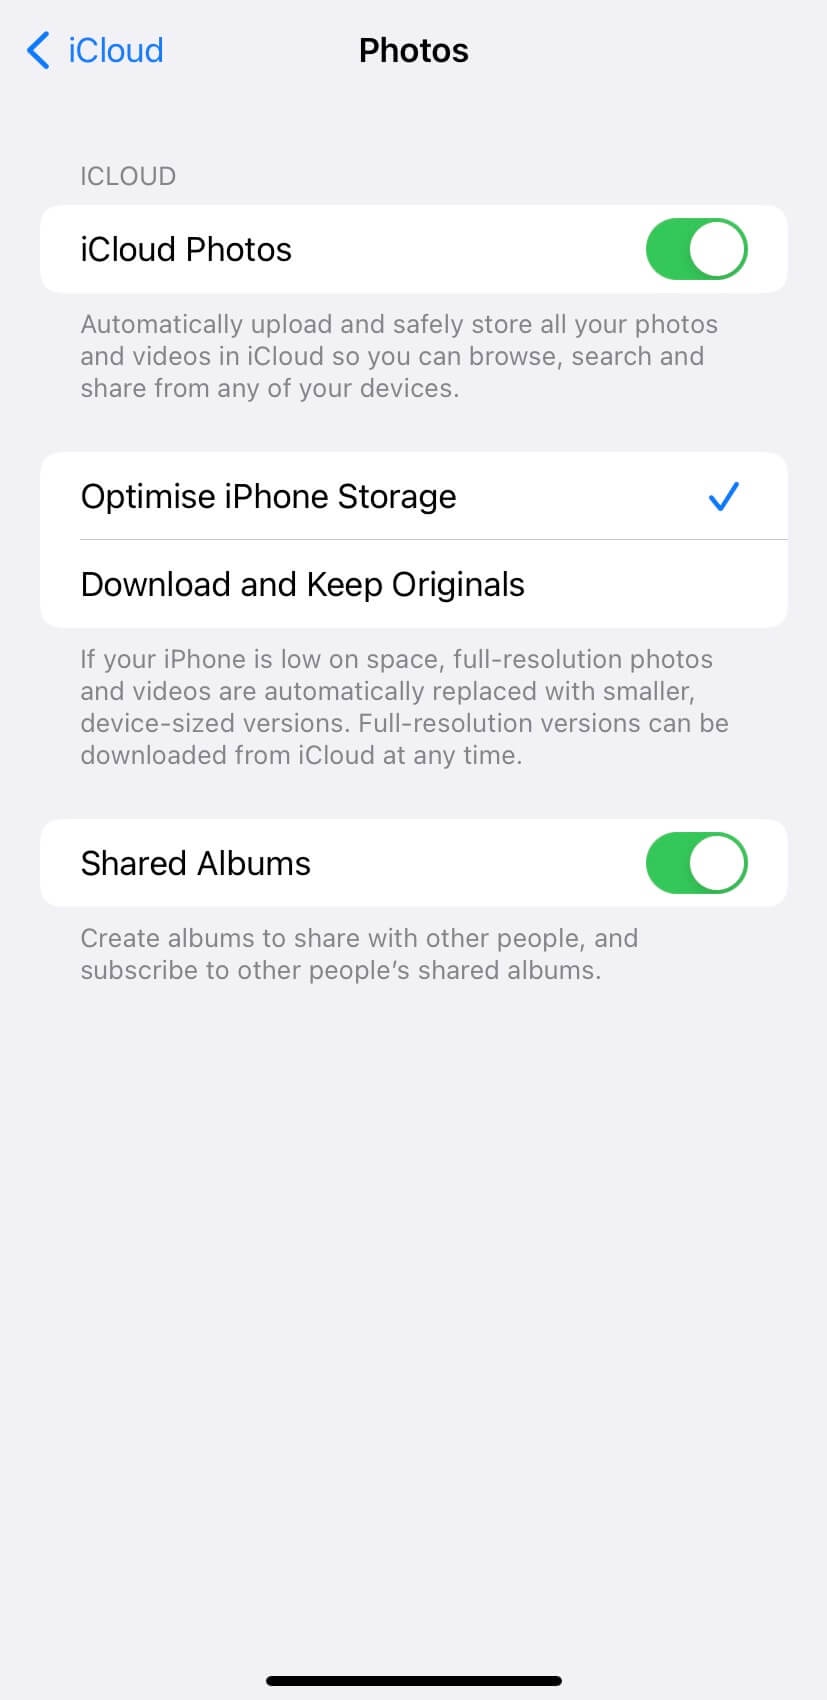
- Download and Keep Originals – If you select this option, your iPhone will store full size original photos and videos. This will take up more space on your device. We recommend you to choose the previous option for optimizing your storage.
Alternative method
This method will also do the same thing but the steps are little different. All you need to do is launch the Settings app on your iOS device and open the Photos app. Here you will find an option to enable iCloud Photos backup. Switch the toggle button on to enable the backup. After that, choose Optimise iPhone Storage option as in the previous method and you have done it.
Note: If your iCloud storage is already full and you are unable to backup your photos for the same reason then read our guide on how to free up your space on iCloud.
How to access your photos backed up on iCloud
Now you might have this question in your mind that how you can access your photos and videos which are backed up on iCloud. This is really simple to do. You just need to log in to your Apple ID on the iOS device where you want to access your backup and your photos and videos will be available to you in the Photos app.
Another way is to log in to iCloud’s official website with your Apple ID credentials. Choose the Photos app once you are logged in and there you will find all your photos and videos. This method will work on any device whether it is an Android phone, Windows-based PC, or MacBook. All you need is a web browser and you are good to go.
2. How to backup iPhone photos to Google Photos
Google Photos is an alternative to iCloud backup. As we have already mentioned, iCloud only provides you with 5GB of storage which isn’t enough for most of us to back up our photos and videos. A single picture clicked by an iPhone camera can take up large MBs of space on your device. So it’s obvious that you are going to fill up that 5GB of storage very soon and that’s why it is important to have an alternative solution to backup your data.
Google Photos is an app developed by Google itself which gives you the facility to backup your photos and videos on cloud storage. With every Google account, you get 15GB of free storage. This storage is collectively shared among various Google services such as Drive, Keep, emails, contacts, photos, videos and other backups.
Here are the steps you need to follow to enable Google Photos backup on your iPhone or iPad:
- Download and install the Google Photos app on your iOS device. It is available on the App Store for free.
- Once it’s installed, launch the app and log in with your Google account.
- Click on your profile picture icon at the top-right corner of the screen.
- Choose the Photos settings option from the pop-up box that opens on your screen. This will take you to the Settings page.

- Click the Backup & sync option at the top.

- Turn on the toggle button next to the Backup & sync.
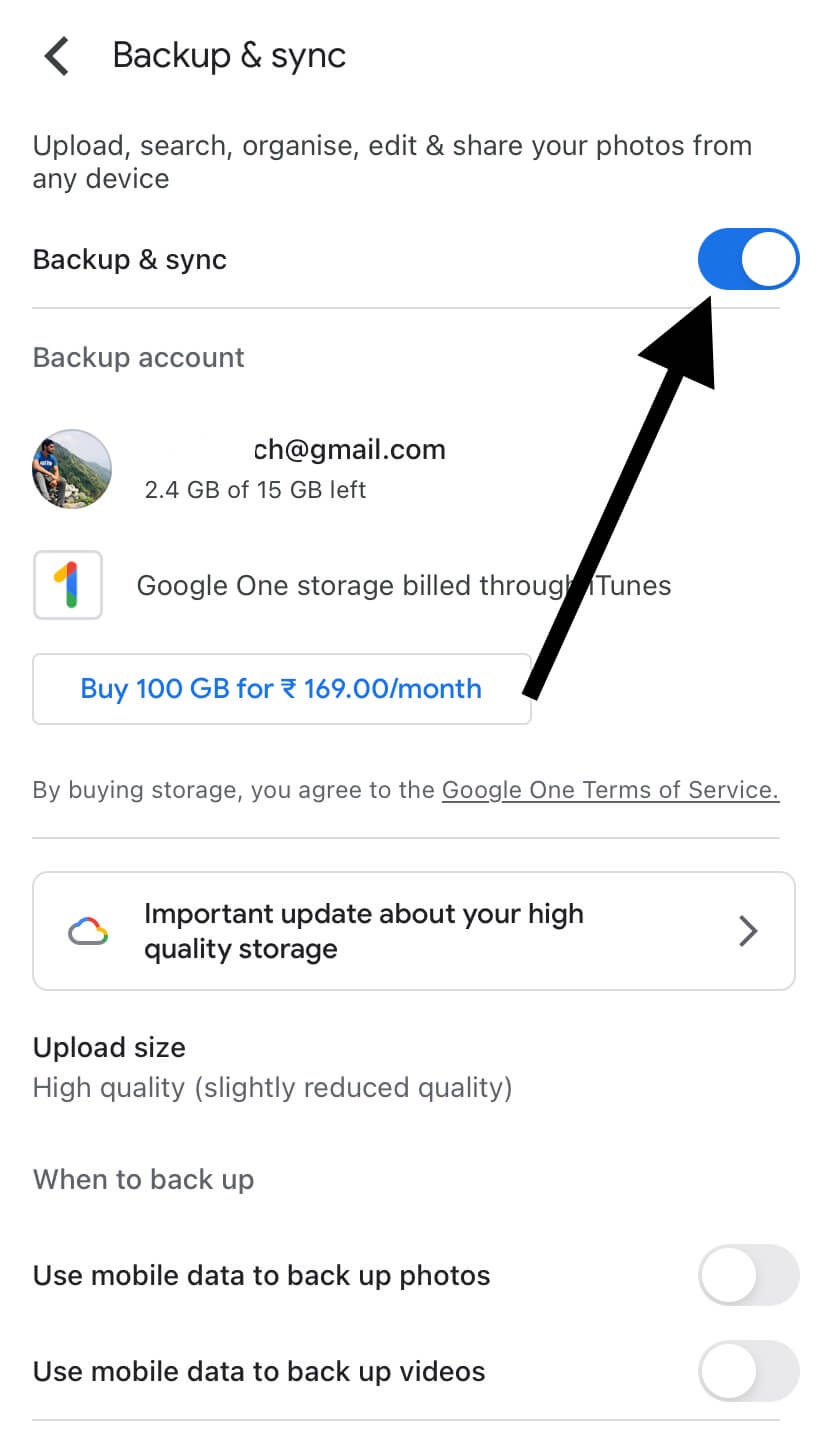
- Click on the Upload size option from the same screen and then choose High quality option. High quality will slightly reduce the size of your photos and videos without compromising the quality.
There is another option named Original. If you select that option, it will upload the original size photos and videos. This will take more space and you will be able to backup less amount of data. That’s why we recommend you to choose the High Quality option.
If you have a lot of photos to backup, the time is not far away when your 15GB of Google storage will be full. In order to optimise your storage usage, you can check out our guide on how to fix Gmail storage full issue where you have shared some useful tips and tricks that can help you to free up your Google storage space.
How to access your Google Photos backup
To access your backup photos and videos, you simply need to install the Google Photos app on your device and log in with your Google account. All your photos and videos will be available to you at any time. If you don’t want to use the app, you can visit the official website of Google Photos at photos.google.com and view your backup directly via a web browser.
3. How to backup iPhone photos to your PC
The last way to backup your iPhone photos is by transferring them to your PC or laptop. The advantage of this method over previous ones is that it doesn’t require to you store your backup online so there is no limit on the amount of storage.
Another benefit is that your photos and videos will be saved to your PC and you can access them anytime even when you are offline. However, this is also the drawback of this method as you won’t be able to access your backup remotely. Also, you will need to manually transfer all your photos and videos regularly to keep everything backed up.
In order to transfer photos from your iPhone to PC, you will need to connect both devices with a USB cable. Here’s a complete guide –
- Connect your iPhone or iPad to your Mac with a USB cable.
- If you are on Mac, open the Photos app.
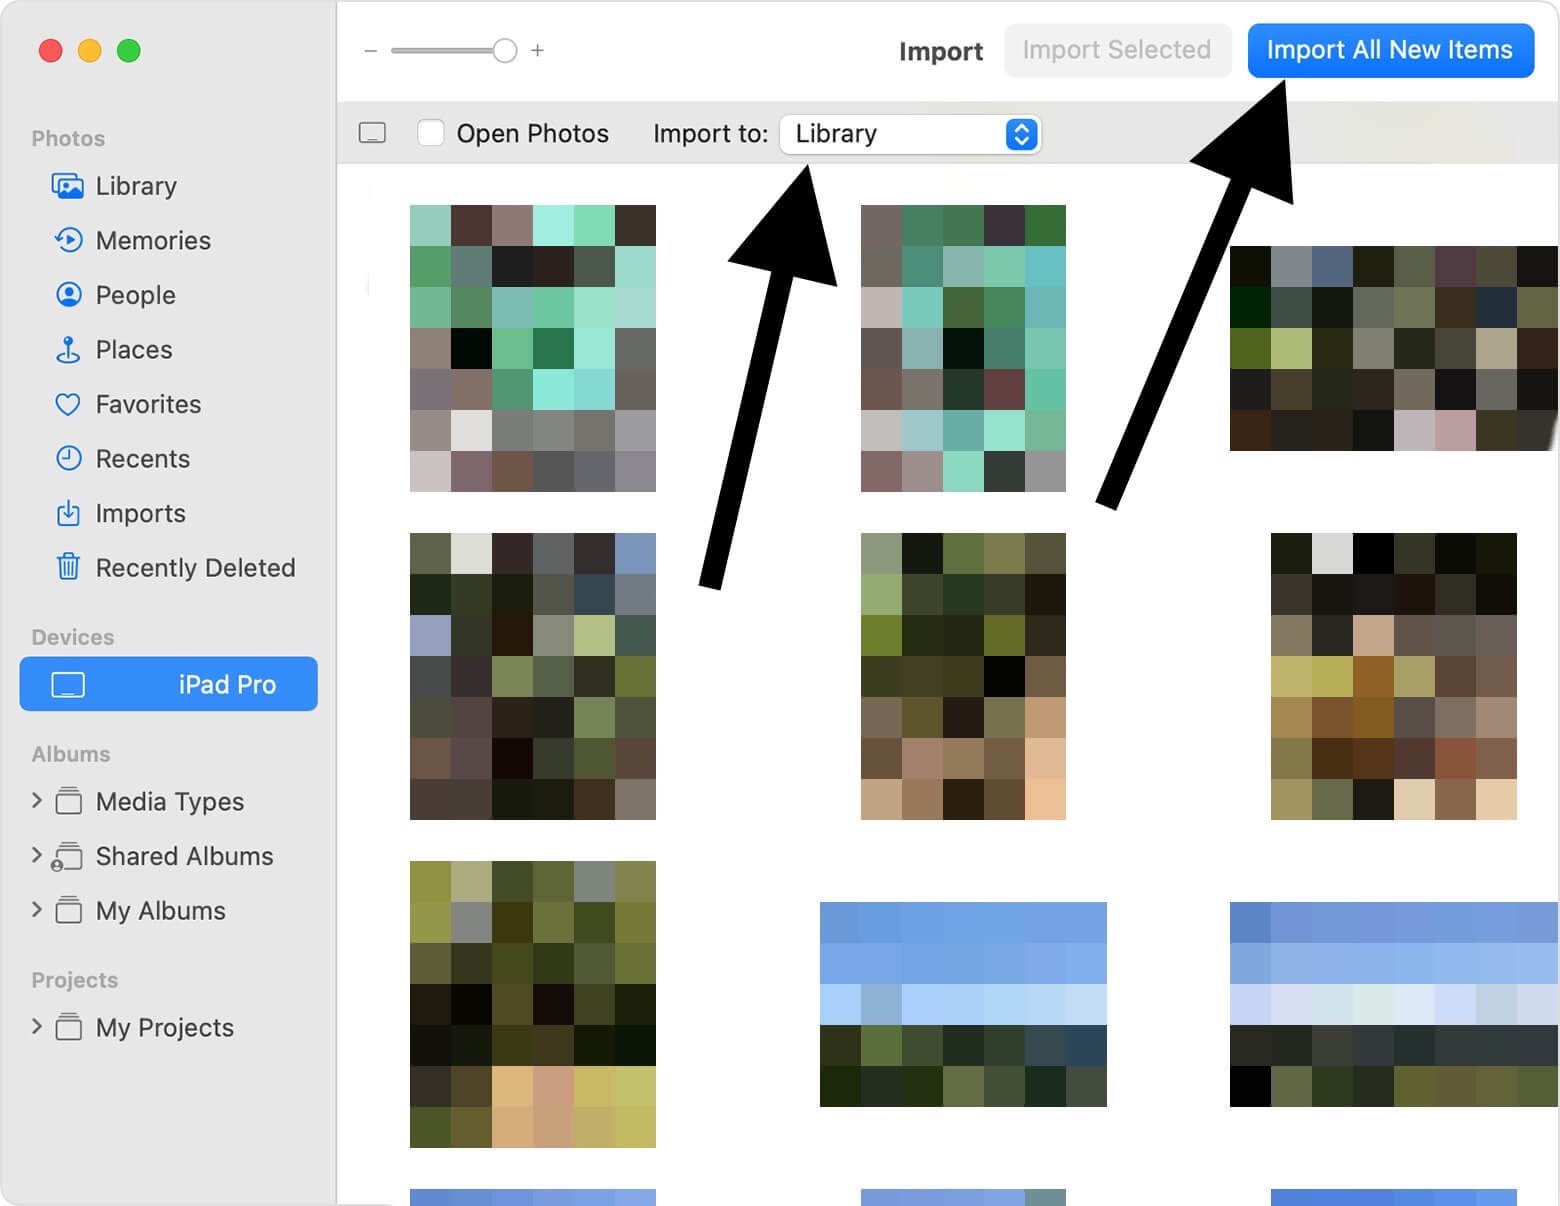
- The Photos app will open up an Import screen where you will see all the photos and videos of your iPhone. If the Import screen doesn’t show up automatically, click on your device’s name from the sidebar menu.
- You may be asked to unlock your iOS device for security reasons. Also, you may see a prompt box on your iPhone asking you to Trust This Computer. Simply click on the Trust option to allow your PC to access your data.
- Now choose the location where you want to save your photos and videos from the “Import to” option at the top. You can choose an existing album or create a new one.
- Next select the photos and videos you want to import and tap on the Import Selected or Import All New Items button at the top-right corner.
- Wait until the transfer process finishes and then you have successfully backed up your iPhone photos and videos to your PC.
If you are using Windows PC, you can either use the iTunes app or the Windows Photos app to transfer your photos. Open the Photos app from the Start menu. After that, go to Import > From a USB device. Now select the items you want to transfer and choose the location where you want to save them. Follow a few more steps to complete the transfer process and you have done it.
Conclusion
So these are some methods that you can use to backup your photos and videos on iPhone or iPad. You can use any of them based on your choice. We recommend you to use the combination of all three methods. First fill up the 5GB of storage that you get with your iCloud account. Once it is filled up, you can move to the Google Photos backup. Apart from that, also keep a local backup saved on your PC time-to-time. If you have any questions in your mind regarding this topic, feel free to share them in the comments below.