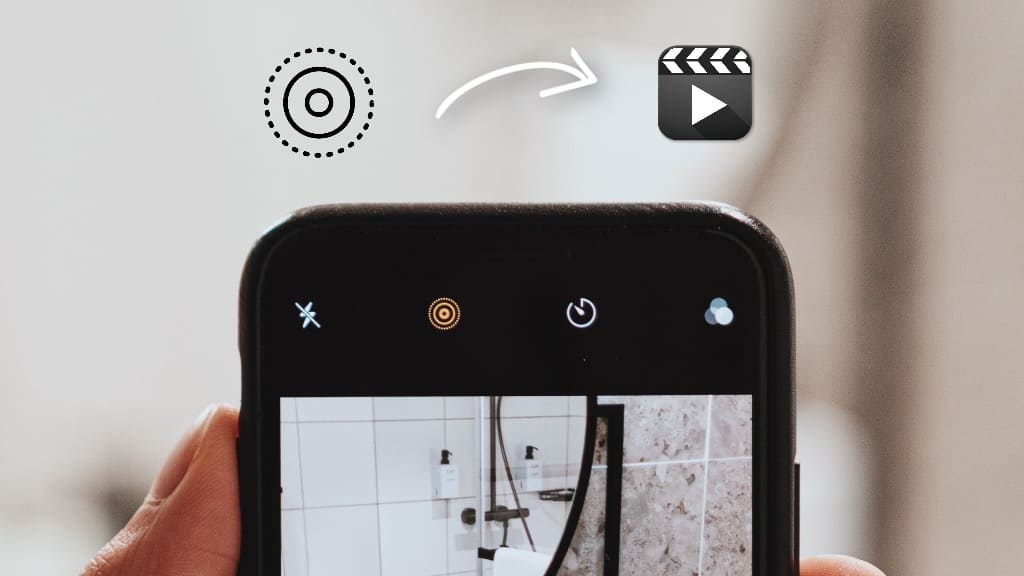
Live Photos is a new way of capturing moments from your iPhone. Instead of taking a normal still picture, Live Photo records the whole moment for 3 seconds. Anything that happens 1.5 seconds before and after you take a picture gets recorded along with the audio. Although, Live Photos will appear as a normal picture in your Photos Library but they can be played as a video also by tapping and holding on your screen.
There are several other ways you can use Live Photos on iPhone. For example, if the current key photo isn’t good enough, you can check the other frames that have been captured by the Live Photo to find the perfect moment and then set any frame of your choice as a new key photo. iPhone also offers a bunch of fun effects for Live Photos such as Bounce, Loop, and Long Exposure.
One major drawback of Live Photos is that they are only supported by Apple devices. If you share them with any other non-iOS device like Android, they will only appear as a still picture. Moreover, you can’t upload Live Photos as a video on social media or cloud storage until you convert them into a GIF or video format manually.
One of the reasons for saving Live Photos as a video is to preserve the moment you have captured along with the background audio, so you can easily share it on social media and make it compatible to play on non-iOS devices. In this article, we are going to share different methods that can help you save Live Photos as a video or GIF on your iPhone/iPad for free. Now without further ado, let’s start with the first method!
Table of Contents
1. Save live photo as a video using the Photos app
This is an official method which doesn’t require you to install any third-party application. iOS has a built-in feature in the Photos app that can convert your Live Photos to a video with just a few taps. Here are the steps you need to follow –
- Open the Photos app on your iPhone or iPad.
- Find and open the Live Photo you want to convert into a video. You can go to the Albums tab and select Live Photos under Media Types. This is the quickest way to filter out your live photos.
- Tap the menu button (three dots) in the top-right corner. This is available right next to the Edit option.
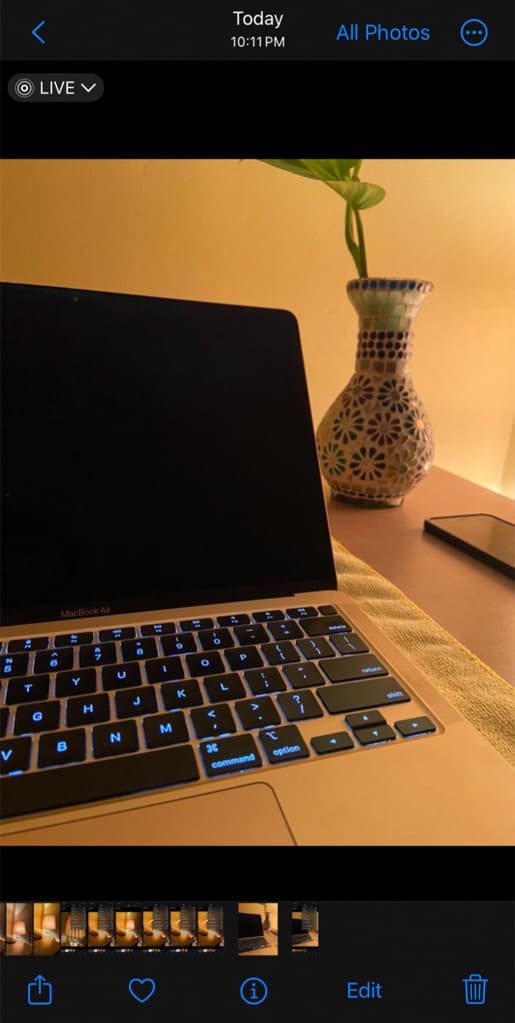
- Now select “Save as Video” option from the menu that pops up on your screen. That’s it.

You have successfully converted your Live Photo into a video. To check it, go to the Photos Library and see the last media.
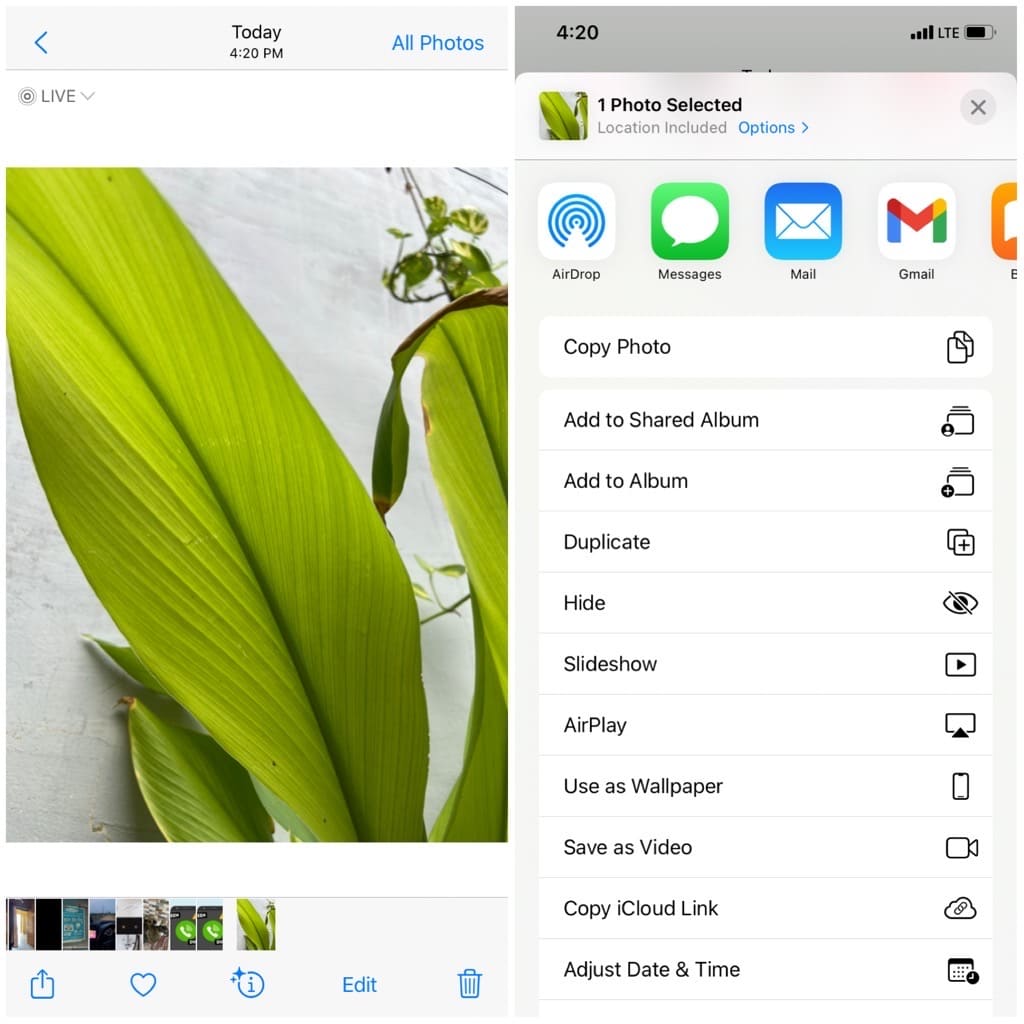
Note: If you are using an older version of iOS like the iOS 15 or below, you will find this “Save as Video” option in the Share Sheet. Simply, open the live photo in the Photos app and tap the share button in the bottom-right corner of the screen. This will open up the Share Sheet where you will see various options to share your live photo. Next scroll down and tap the “Save as Video” option.
2. Save Live Photos as a video using Google Photos
Google Photos is a popular photo organizer and cloud storage app developed by Google. Some iPhone users use Google Photos as their default app to view media and backup photos and videos. Google Photos app is also efficient in playing and saving Live Photos as a video. All you need to do is open the Live Photo in the Google Photos app and then swipe up the screen. After that, you will see an option named Save as Video. Just tap on this option and your Live Photo will be saved as a new video separately.
3. Share live photos as a video or GIF on WhatsApp
If you want to share your Live Photos on WhatsApp, there is a built-in facility in the app that can help you convert your Live Photos into a video or GIF. So there is no need to use the above method. Here’s what you need to do instead –
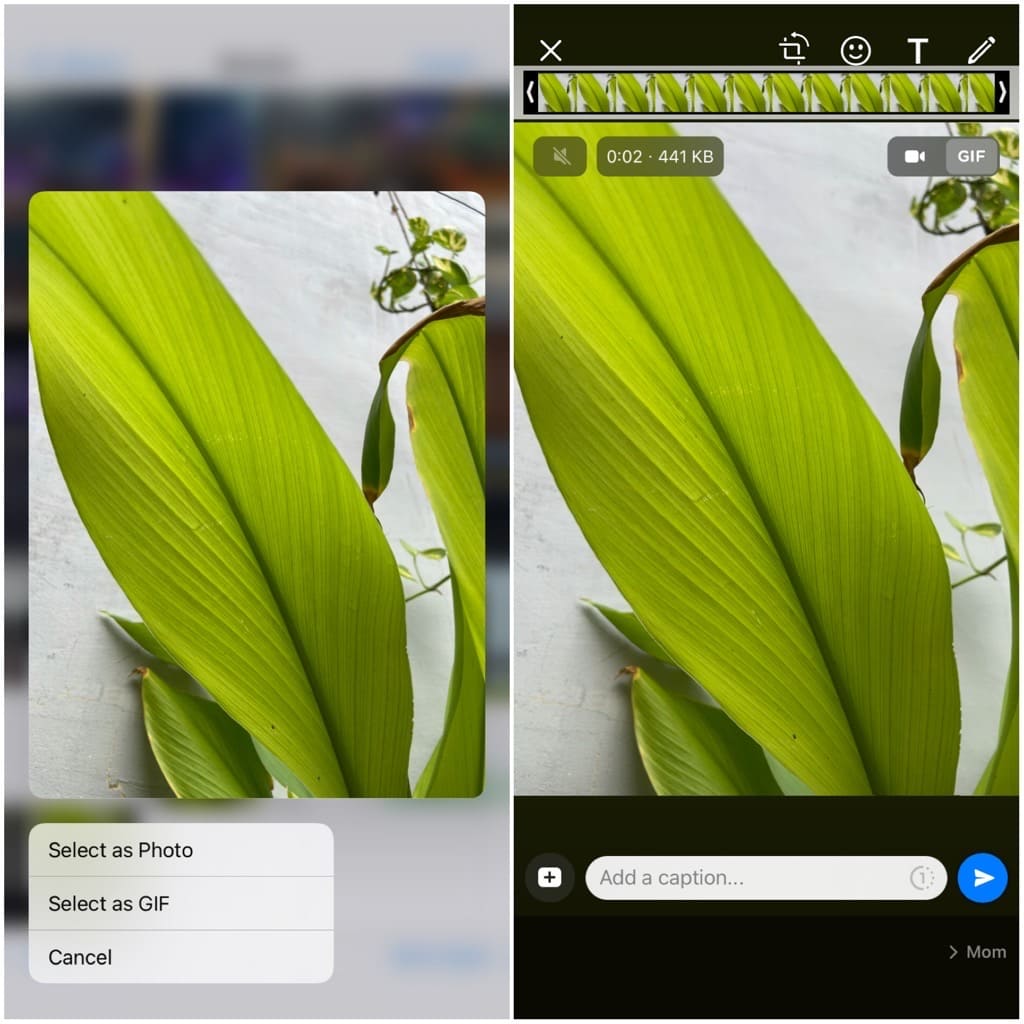
- Open WhatsApp on your iPhone and go inside the desired chat where you want to send your live photos as a GIF.
- Tap the camera icon next to the message box at the bottom and this will open your WhatsApp camera.
- Now click the image (landscape) icon in the bottom-right corner to see all your recent photos. Locate the live photo you want to send as a GIF.
- Tap and hold the live photo and then you will see options to select it as a photo or GIF. Choose the Select as GIF option and then you will see its preview. Note that you don’t have to tap on the live photo once, otherwise it will be loaded as a photo.
- In the preview screen, you can choose to send your live photo as a video or GIF by switching the toggle. There is also an option to mute the audio when you switch to the video mode.
- Finally, you can tap the send button to share your live photo as a GIF or video. That’s it!
In the same way, you can also post your live photos as a video or GIF on your WhatsApp status. Simply, go to the Status tab and click the “+My Status” option. When you select a live photo for your library, you can choose to share it as a video or GIF.
4. Convert live photos to video using VN app
If you want to use a video editor application to edit your live photo as a video, you can use the VN app for this task. VN is one of the most popular video editing apps and it is available on the App Store for free. This app will automatically import live photos as a video into your project. However, you need to adjust the video duration manually.
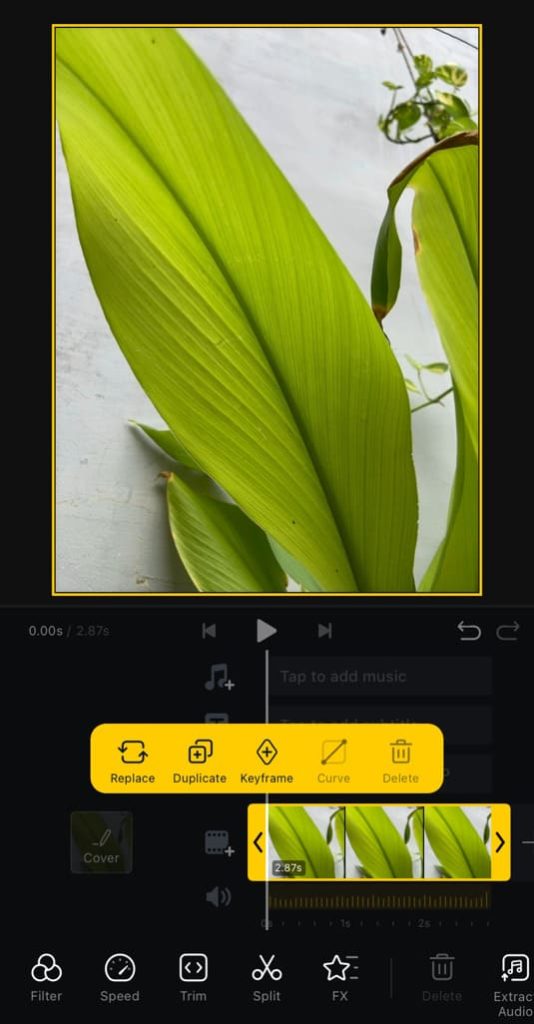
Once you have imported the live photo into your project, just select the clip from the timeline and then drag the slider on the right side to its full length. You will see that your live photo has been changed to a video. Now you can import other clips and continue editing your project. We tested a few other video editing apps like Kinemaster and CapCut only to find out that they don’t work with Live Photos as a video.
5. Apple Bounce or Loop effect to Live Photos
Live Photos has more to offer than just being a 3 second normal video. For example, you can apply a bounce effect on a Live Photo that will give a nice backward and forward motion to your subject. There is another effect called Loop which will make your Live Photo play continuously without any pause.
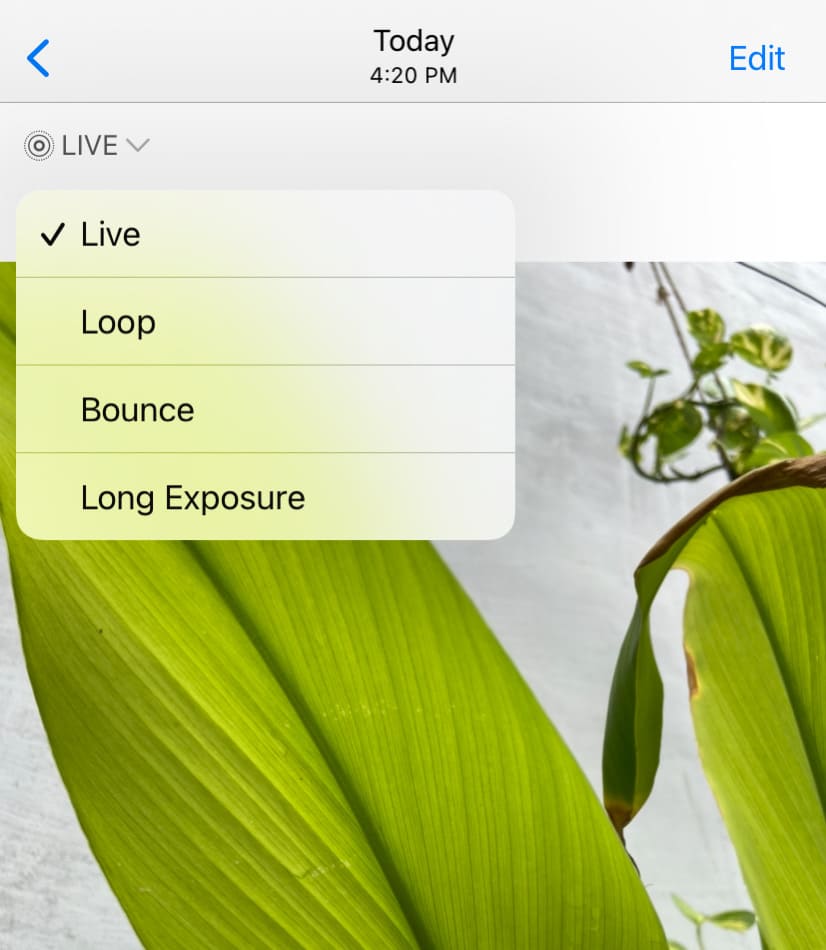
To use these effects with Live Photos on your iPhone, just open the Live Photo in your Photos Library and tap the “Live“ option in the top-left corner of the picture. Now you will get some options on your screen. Select Bounce or Loop, whichever effect you want to apply to your Live Photo and it will save the changes automatically.
How to save multiple live photos as a video at once
Saving multiple Live Photos as a video at once on an iPhone can be achieved by using a third-party app called LP – Live Image to Video & GIF. This app allows you to select multiple Live Photos and create a video from them in bulk. Here’s a simple explanation of how to do it:
- Download and install the LP – Live Image to Video & GIF app from the App Store. Open the app once you’ve installed it on your iPhone.
- For the first time, the app will ask you to allow access to your photos. Select “Full access” option. You’ll see all your Live Photos listed in the app.
- Tap the “Select” option in the upper-right corner of the screen.
- Select the Live Photos you want to save as a video in bulk.
- Now tap the “Export” option in the upper-left corner.
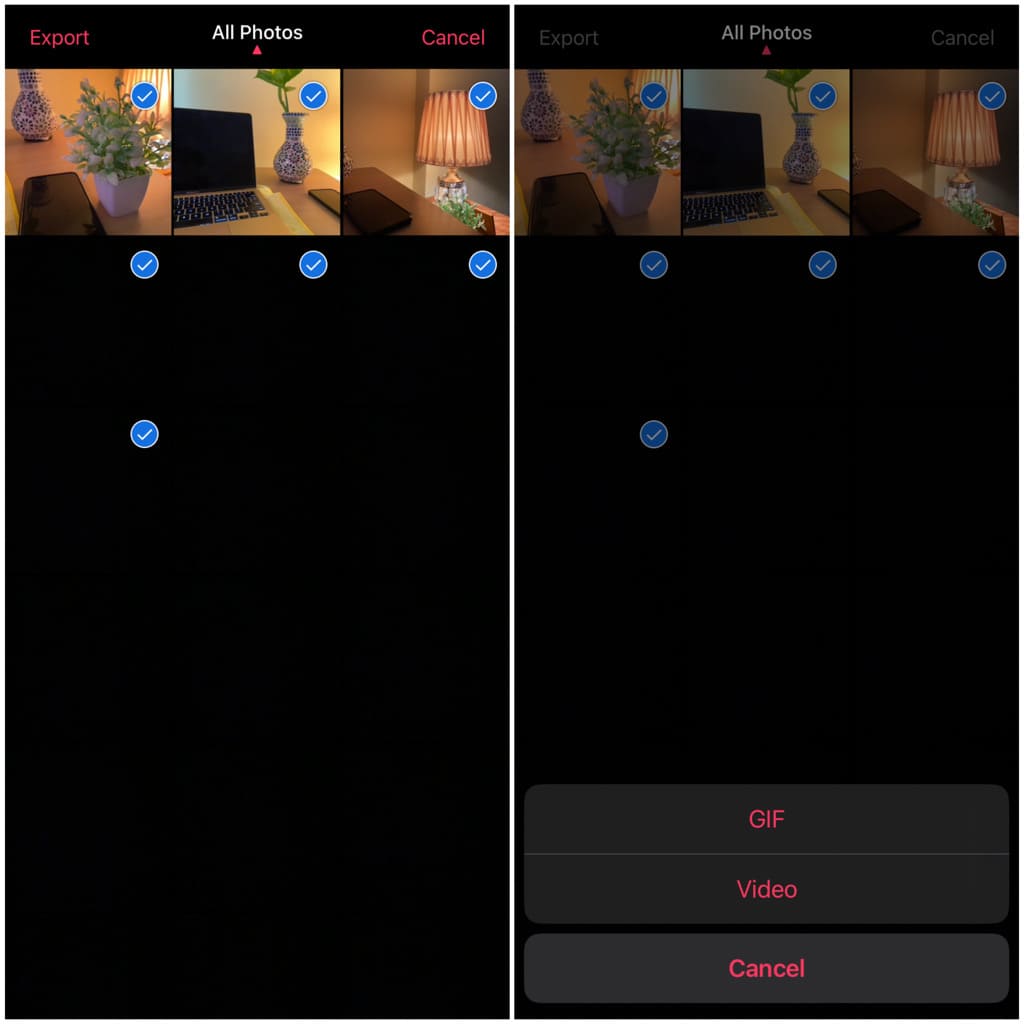
- You will be prompted to select the export format for your live photos. There are two options available: GIF and Video. Choose the “Video” option and wait for the task to finish.
- Once the live photos are converted into videos, you can find them in your Photos Library.
Wrapping up
Live Photos are only supported by Apple devices and when shared outside their native ecosystem, they act as a still picture. This makes it harder to share them on social media or with non-iOS devices. If you want to share your Live Photos outside the Apple ecosystem, you will need to save them as a video first. We hope this guide has been helpful for you to convert Live Photos into a video or GIF on your iPhone/iPad. If you have any questions on this topic, tell us in the comments below.
Read other similara articles:
- How to Recover Deleted Photos on iPhone
- How to Backup Your Photos on iPhone or iPad
- How to Convert Photos to PDF on iPhone
- How to Take Burst Photos on iPhone
- How to Take Long Exposure Photos on iPhone