Every single penny spent on buying an iPhone is worth it. There is no doubt in the fact that iPhone is a very expensive smartphone but its functionality, user-friendly interface and security features are what makes it value for money and different from other smartphones.
You must have been hearing news of smartphones getting lost or stolen every now and then from your friends, family and other people around you. Did this thought ever came into your mind that this can also happen to you anytime? Even the thought of getting your iPhone lost or stolen can bring a lot of fear in your mind.
You have spent your hard earned money in buying an iPhone and you wouldn’t want to lose it that easily after your phone get lost or stolen. That’s why it is important to take precautions beforehand and make your iPhone secure so even if something wrong happens, you can trace and find your iPhone location. Making your data secure is another important concern.
Now when it comes to security, iPhone provides handful of useful features that can not only make your data secure but also help you to find the location of your iPhone when it is lost or stolen. Some of these features are enabled by default while some you have to do by yourself. In this tutorial, we will be sharing all these iPhone security features with you. Let’s get started!
Table of Contents
1. Have a strong password
Having a strong password is the first and foremost security measure that you should follow to protect your iPhone from theft. Some people use very common passcodes like 0000, 1111, etc., having repeated digits or a defined pattern on the keypad. These types of passcodes are really easy to guess and crack.
The number of passcode digits also plays an important role. Usually people keep 4-digits passcode on their iPhone as they get unlocked quickly. You can improve your security more by changing it to 6-digits or using an alphanumeric combination instead. Apart from that, you can also have an extra security layer by using the Face ID or Touch ID lock feature on your device. Let’s see how you can change your password:
- Go to Settings on your iPhone.
- Scroll down and open Face ID & Passcode.
- Enter your passcode for security verification.
- Click on Change Passcode option. You need to enter your current passcode.
- In the next screen, click on Passcode Options and then choose 6-Digit Numeric Code.

- Enter your new 6 digit passcode. Then re-enter it again to confirm. That’s it!
You can choose custom alphanumeric passcode as well but always opening your phone with such type of passcode can be difficult. As an alternative, you can also set up Face ID or Touch ID lock depending on your iPhone model.
2. Lock Control Centre and Notification Centre
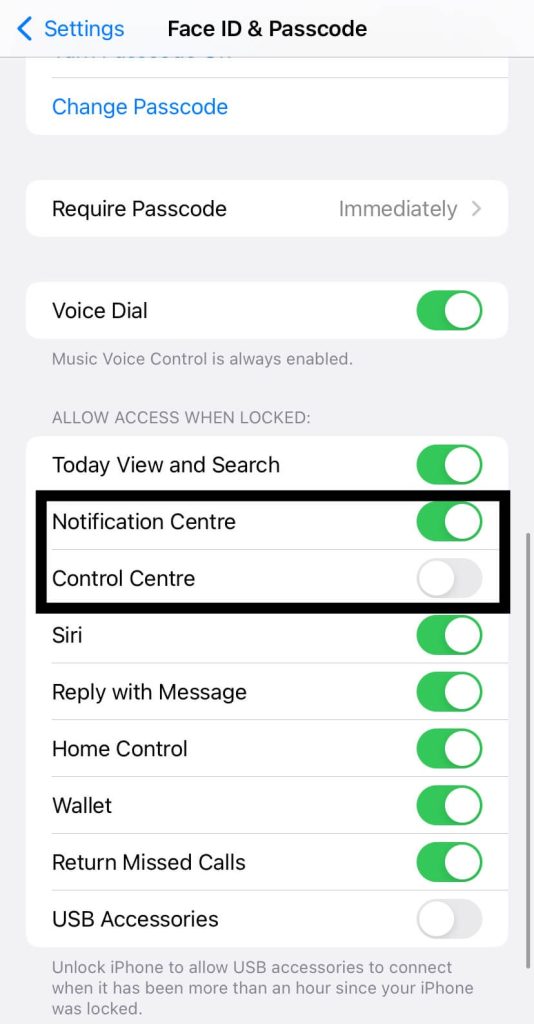
You can access the notification and control centre on iPhone even when it is locked. In such a case, if someone stole your iPhone, the thief can read your notifications and put your phone on airplane mode or turn off the mobile data. This will disconnect your iPhone from the Internet and then you won’t be able to trace its location. In order to prevent this, make sure that your notification and control centre is inaccessible from the lock screen. Here’s how you can do that:
- Open the Settings app on your iOS device.
- Go to Face ID & Passcode and enter your passcode to continue.
- Then scroll down and you’ll see a heading named Allow access when locked.
- Under this heading, toggle on the buttons next to the Notification Centre and Control Centre.
- After applying these settings, lock your iPhone and check whether you can access the Notification and Control Centre or not.
3. Turning off USB accessories
After turning off the USB accessories, no one will be able to jailbreak your iPhone. The lightning port will become inactive until your iPhone is unlocked. This will prevent the thief from connecting your iPhone with any Mac or Windows PC and juice jacking will not possible. For those who don’t know, jailbreak or juice break are the security breaches used by thieves to get the data and media from your device. Let’s see how you can secure your USB port:
- Go to Settings.
- Go to Face ID & Passcode. You will be asked to enter your passcode for verification.
- Scroll down and you will see USB Accessories option under Allow access when locked heading.
- Turn off the button next to this option.
Now no one will be able to use the USB port when your iPhone is locked.
4. Require attention for Face ID
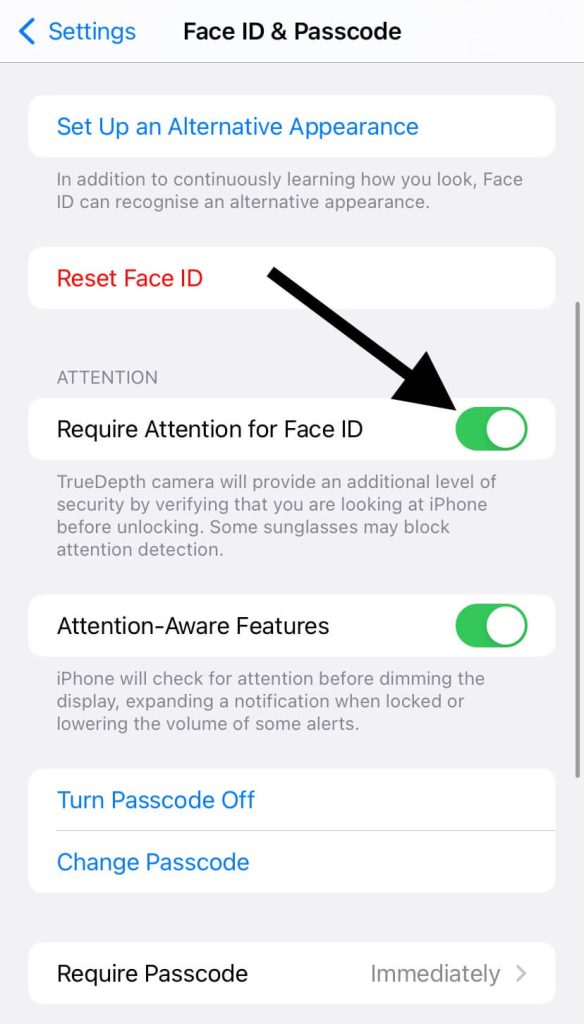
New iPhone models have Face ID lock which lets you unlock your iPhone with face verification. There is a security concern related to this Face ID lock. If you are sleeping or unconscious, anyone can unlock your iPhone by scanning your face. To prevent this, you can enable attention feature which will provide an additional level of
security by verifying that you are looking at iPhone before unlocking. Here’s how you can enable this feature:
- Go to Settings.
- Next open the Face ID & Passcode. Enter your passcode to continue.
- Scroll down and you will see Require attention for Face ID. Make sure that this option is enabled.
5. Make sure that Find My app is active
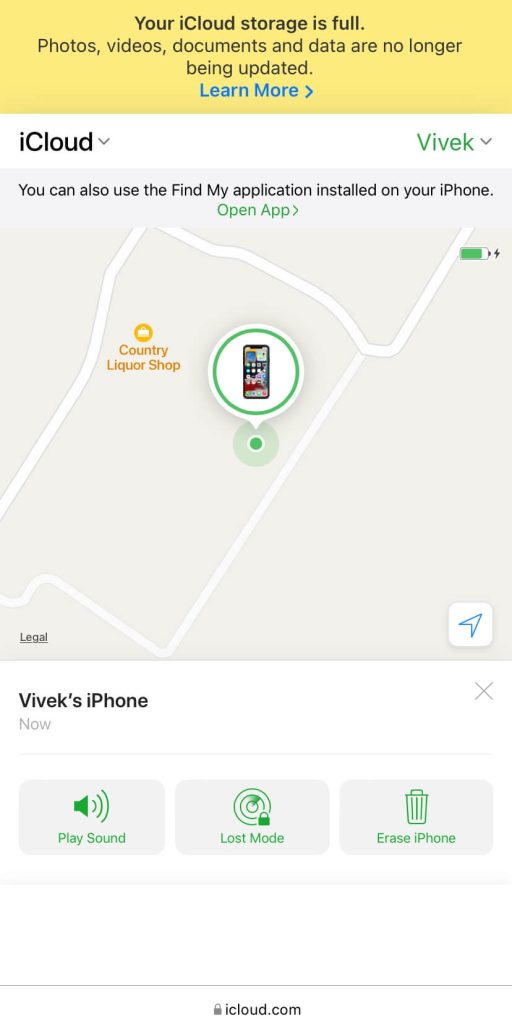
Find My is an application developed by Apple which allow you to trace and find your iPhone location when it’s lost or stolen. The app can do much more than that like erasing data from your device remotely, ringing your iPhone, and more. In order to make the Find My app function properly, you have to enable and set it up on your iPhone first. Here are the steps you need to follow:
- Again open the Settings app on your iPhone/iPad.
- Click on your name or Apple ID at the top.
- Here you will find Find My. Just click on this option.
- Next click on Find My iPhone.
- Make sure that the toggle button is turned on. There is another option called Send Last Location. Enabling this will allow your iPhone to send its location when the battery is critically low.
6.Give a precise location to Find My app
If you want to allow Find My app to find the exact location of your iPhone, then you have to give it precise location permission. Normally, Find My app is able to detect only approximate location of your device. If your iPhone is lost or stolen by thief, it will be easier for you to trace it with precision location. Here’s how you can enable this feature:
- Launch the Settings app.
- Scroll down and go to Privacy.
- Now go to Location Services. Make sure that this feature is enabled. Otherwise, you will not be able to track your iPhone location.
- From the list of apps and services, scroll down and select Find My.
- Under Allow Location Access heading, select While Using the App.
- Make sure that Precise Location is active. This will allow the Find My app to find the exact location of your iPhone. If Precise Location is off, Find My will only be able to determine approximate location of your device.
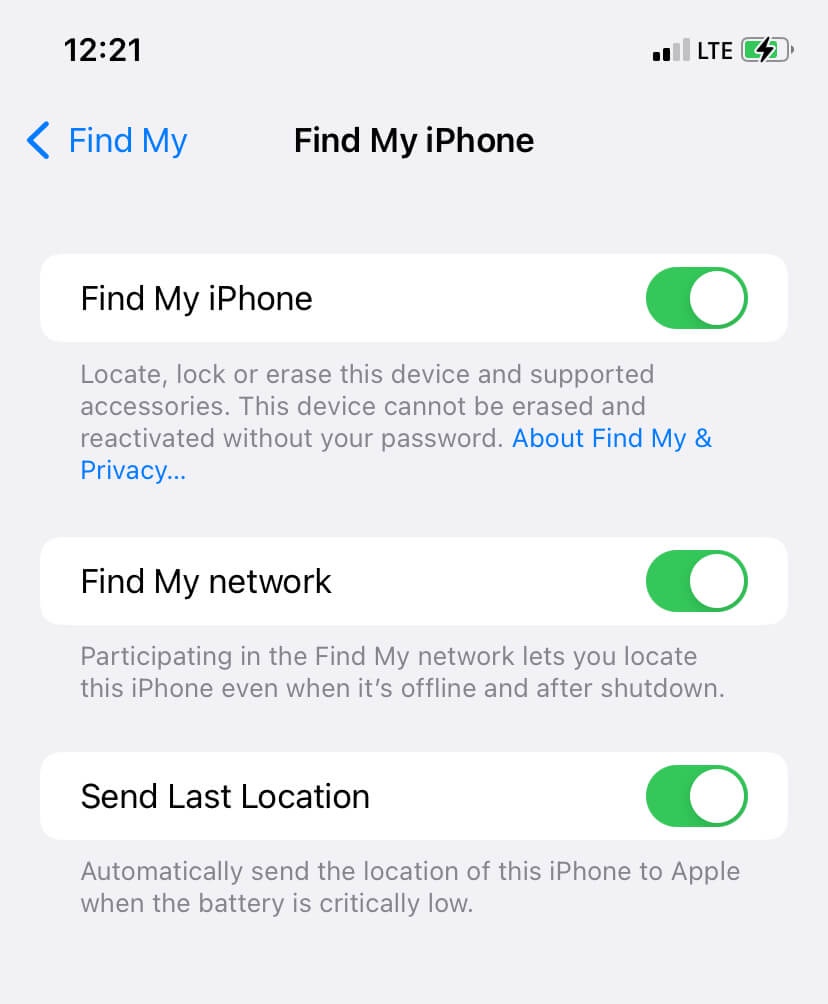
7. Enable last location feature
There are two other useful features that you should enable on your iPhone to protect it from theft and make it more secure. These two features are find my network and send the last location. With these features enabled, you will be able to find the location of your iPhone even if it gets switched off by someone or because of low battery. In both circumstances, your device will send its last location. Let’s see how you can apply these feature:
- Go to Settings and click on your profile name at the top.
- Select Find My option.
- Click on Find My iPhone next.
- Make sure that Find My iPhone and Send Last Location both of these feature are enabled. If not then enable them.
8. Use an e-SIM instead of SIM card
Using an e-SIM will be a wise way to secure your iPhone against theft. The first thing a thief does after stealing a phone is to remove the SIM card so that it can be disconnected from the network. This will restrict your iPhone from sending you its location and thus you won’t be able to trace it. But if you are using an e-SIM, whenever someone turns on your device, your device will have the network and it will send you the location through Find My app.
9. Erase data after the wrong passcode
If the data of your iPhone is very important for you and you need to make sure that it doesn’t go into wrong hands, then you can enable this setting to erase your data if your device get lost or stolen. After applying this setting, if someone enters too many wrong attempts to unlock your iPhone, all your data will be erased automatically. Let’s see how you can enable this feature:
- Go to Settings on your iPhone.
- Select Face ID & Passcode.
- Scroll down and you will see Erase Data. Turn it on.
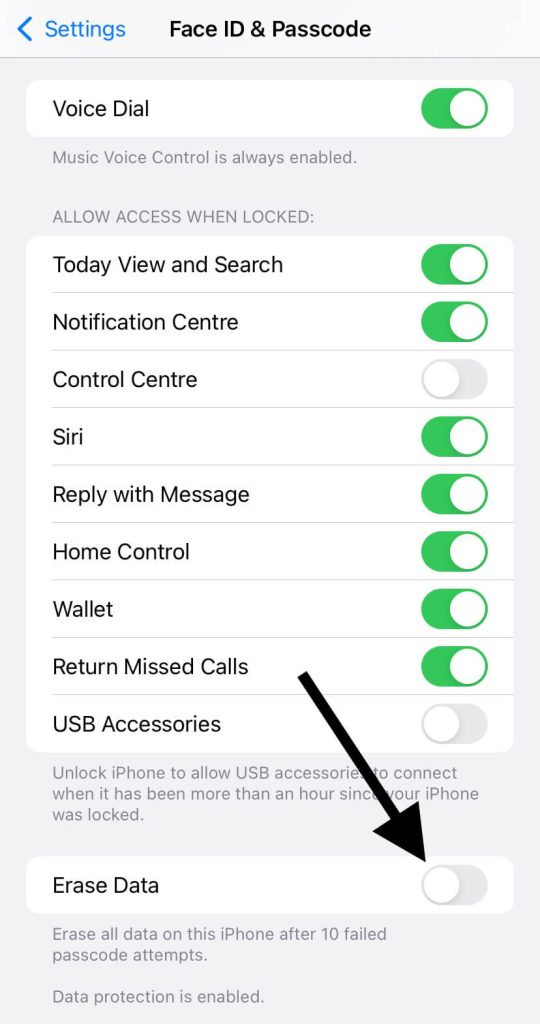
Make sure to turn on this feature only when it is really important for you to protect your data at any lost. Unnecessarily using this feature could lead to your lose as sometimes we forget our own passcode and if in such a situation you made too many wrong attempts by mistake, you’ll lose your data.
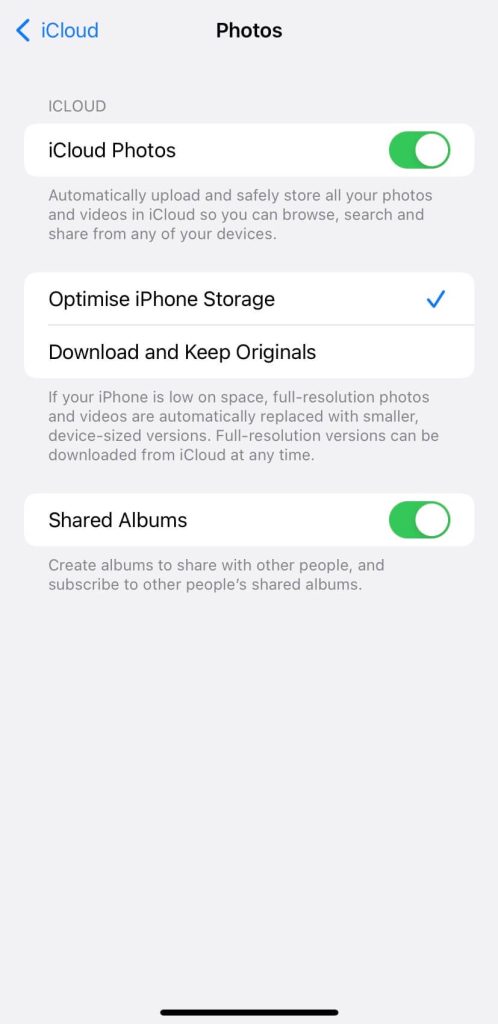
10. Backup your iPhone data
Losing your beloved iPhone can be really difficult for anyone. We have so much important data on our smartphones from photos, videos to documents and other stuff. You should keep all your data backed up somewhere in a safe place so even if your iPhone get lost or stolen, you can still access it. For backup, either transfer data to your PC manually or use Apple’s official cloud storage service called iCloud or applications like Google Photos and Google Drive. You can check out our detailed guide on how to backup photos on iPhone for more information on this topic.
Conclusion
Prevention is better than cure. You have probably heard this popular quote talking about health and medical issues. The same applies to the case of protecting your iPhone against theft, damage, or from being lost. You don’t know when something wrong is going to happen with you and hence you should be well prepared in advance for all the wrong happenings.
We have shared some useful tips that can help you to make your iPhone more secure. In case your iPhone get lost or stolen, you can not only trace its exact location but also protect your important data and media files. We hope you find this guide helpful. Let us know if you have any questions in your mind. Do share this article with other iOS users in your family and friend circle.