If you are an employee or student, you have to deal with a lot of files in your daily life. Keeping the files well organised and making them take up less space is something that everyone would love to do. This is where ZIP format comes to rescue you. As you may already know, ZIP is an archive file format that is used to bind up and compress multiple files and folders to reduce their size collectively.
ZIP archive reduces the size of your files to a significant amount. Moreover, all your data get organised into a single file which makes it easier for you to share and store it. You can easily send it to someone via WhatsApp document or email. Apart from that, you can also upload ZIP files to your cloud storage service like iCloud, Google Drive, or Dropbox.
If you are an iPhone user and you are looking for a free method to compress your files to a ZIP archive, then you have landed on the right web page to learn this thing. We will be using the native Files app of iOS and some other methods that involve third-party apps and online tools for creating a ZIP archive on iPhone/iPad. Without further ado, let’s get started with the very first method.
Table of Contents
Method 1: Create a ZIP archive using the Files app on iPhone
Files app is the native file manager app developed by Apple that comes pre-installed in your iOS device. There is much more that this app is capable of doing. One of its hidden features is to compress your files into ZIP archive. You don’t even need any third-party app on your iPhone or iPad. To get started with this method, first you need to save or download your files to the Files app.
If you want to compress your photos or videos and they are saved in the Photos app right now, you need to send them to the File app first. For this, open the Photos app, tap the Select option at the top-right corner, choose the photo(s) and video(s) you want to save to the Files app, and then click on the share icon at the bottom-right corner.
Next, choose the Save to Files option from the sharing pop-up box, select the folder where you want to save your files in On My iPhone and finally tap the Save button. If you want to compress your files that are saved in a different source like on WhatsApp, Gmail, or Google Drive, download them from there and save them to the Files app in the same way.
Steps to compress ZIP files on iPhone
This step-by-step guide will show you how to create a ZIP archive using the built-in Files app on iOS –
- Open the Files app on your iPhone or iPad and go to the folder where you have saved your files.
- Tap the three-dots button at the top-right corner of the screen.
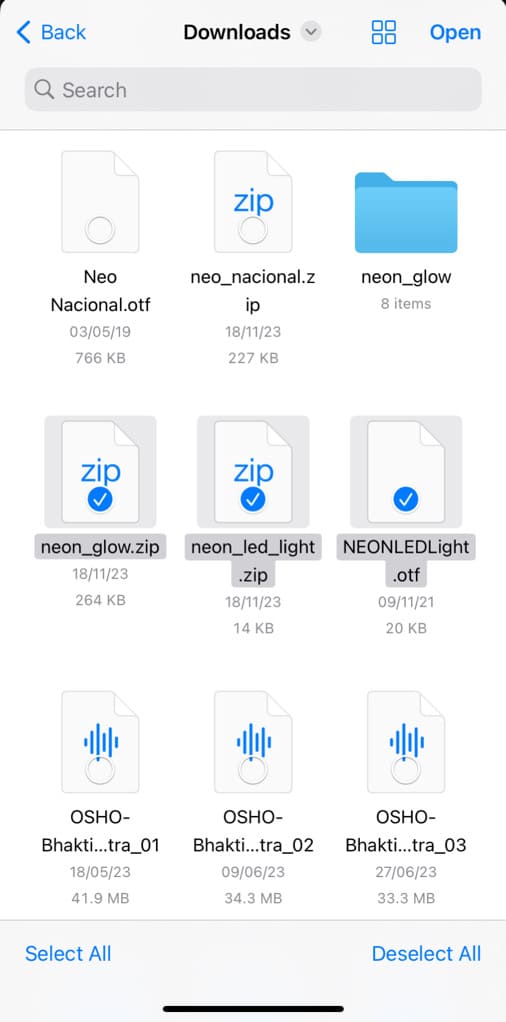
- From the pop-up menu, click the “Select” option and then choose the files and folders you want to compress to a ZIP file.

- Next, tap the three-dots button again but this time at the bottom-right corner.
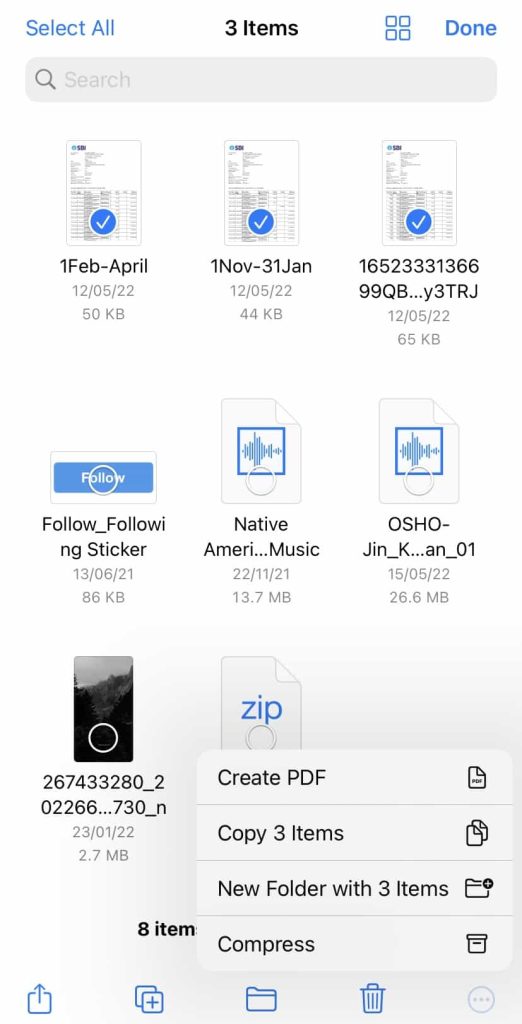
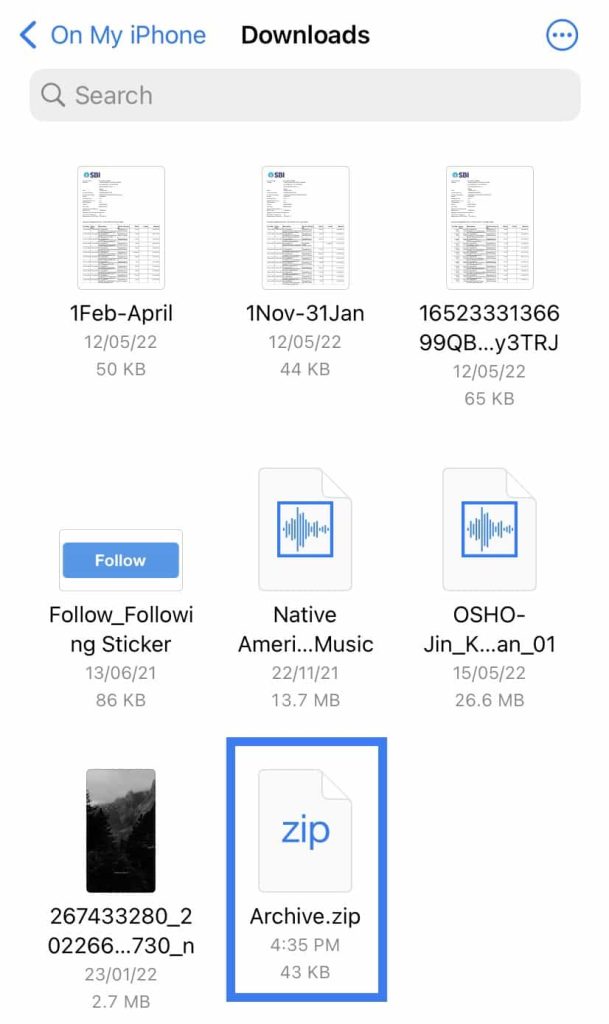
- Choose the Compress option from the pop-up menu. That’s it. Now all of your selected files will be compressed to a ZIP archive which you can find in the same folder saved with the name “Archive.zip”.
How to open and extract ZIP files on iPhone
Opening ZIP files on an iPhone can be done using the built-in Files app. Here are the steps:
- Tap on the Files app icon on your iPhone or iPad.
- Navigate to the location where the ZIP file is saved.
- Once you’ve located the ZIP file, tap on it. The Files app will automatically unzip the compressed file.
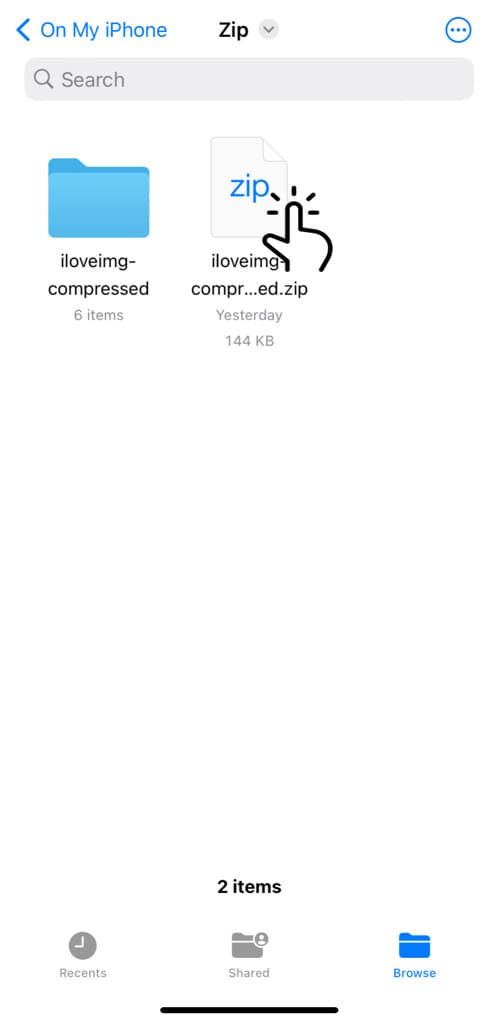
- After unzipping, you will see a new folder containing the extracted files. Tap on this folder to view its contents.
You can now access and use the files that were previously compressed within the ZIP file.
Method 2: Compress files on iPhone with the online ZIP compressor
There are several online tools available on the Internet that you can use to compress your files and create a ZIP archive on your iPhone. As iPhone has a built-in feature in the Files app so there is no need to use this particular method but we are sharing it just for the sake of this tutorial.
There are various different websites available and all of them work pretty much the same way. You can search “Online ZIP compressor” on Google and choose any website based on their SERP ranking or your personal preference.
Using the online ZIP compressor tool is very straightforward. You just have to upload the files from your iPhone, press the action button and let the tool do its magic. Once the ZIP archive is ready, you can download it back to your iPhone. As simple as that! Here’s a step-by-step guide:
- Open Safari browser on your iPhone or iPad.
- Visit the ZIP Compressor website such as Compress2Go.
- Tap on the “Choose File” option to upload.
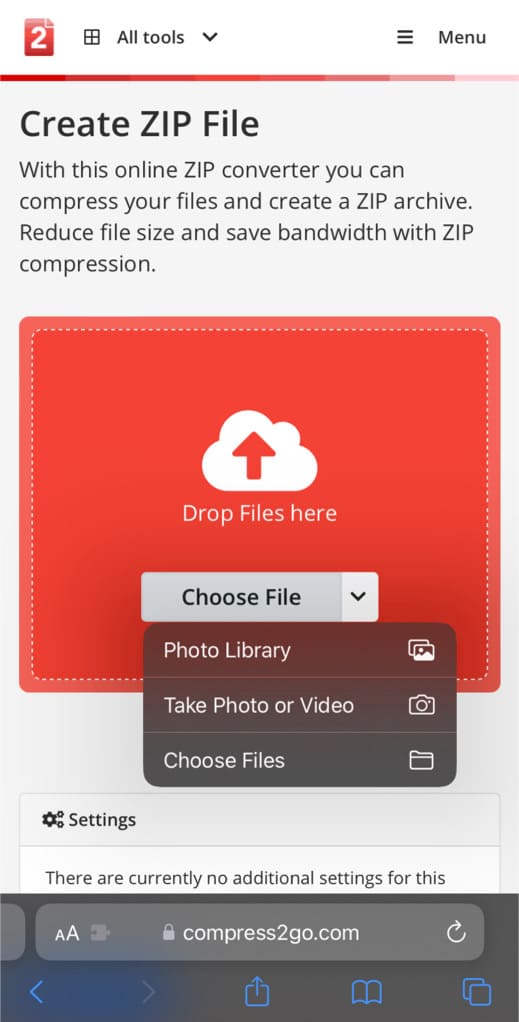
- Again, tap on “Choose Files” to go to the Files browser. If you want to compress your photos and videos, you can select “Photo Library” instead.
- Select the files you want to compress in a ZIP archive and wait for the website to upload them.
- Once the files are uploaded, tap the “Start” button to start the compression.

- Finally, click on the “Download” button to save the ZIP archive on your iPhone. It will be saved to the “Downloads” folder in the Files app.

This method requires you to have an active internet connection on your device and the whole of uploading and downloading your files is very time-consuming so it’s better to stick with the first method.
Method 3: Use third-party iOS apps for creating ZIP files
How can we forget to mention third-party apps when it comes to doing any task on a smartphone? The official App Store of iOS is filled up with so many apps that can help you to compress your files to a ZIP archive. If you need an app specialised in creating and managing your ZIP archive, you can use this method. Open the App Store on your iPhone or iPad and search for “ZIP compressor”.
You will find plenty of free apps on App Store such as Zip & RAR File Extractor, iZip, and WinZip to name a few. Check out the reviews and ratings of these apps and download any of them based on your preference. Some additional pro features of these third-party apps include access to cloud files on iCloud, Google Drive or Dropbox, adding password protection to your ZIP archive, and extracting ZIP files.
Frequently asked questions
ZIP file format helps you to reduce the size of your files by using lossless data compression technology. Once your files are compressed into a single ZIP archive, it is easier for you to share them via WhatsApp, email, or any other medium. The ZIP archive can also be used to save and manage similar types of data in a single file. For example, if you have a scanned copy of all your documents, you can save them collectively in a ZIP file and also add password-protection for security.
You can share ZIP files on WhatsApp by using the Document feature. Simply, open WhatsApp and select the chat where you want to send the ZIP file. Next, tap the + button at the bottom-right corner just before the message editor box and then choose “Document” option from the pop-up menu. Now select the ZIP file from the folder where you have saved it on the Files app and tap the “Send” button to continue.
If you need to rename your ZIP file, simply open the Files app on iPhone and go to the folder where you have saved your file. Tap on the file name or long-press on the file and choose Rename option. Now enter the new name you want to give to your ZIP archive and save the changes by clicking on the Done button from the keyboard.
Yes, you can add an extra layer of security to your ZIP files by password-protecting them. Some third-party apps, such as iZip and WinZip, offer this feature. When creating a ZIP file, look for options to add a password, and follow the app’s instructions to set up a secure password for your compressed file.
Yes, creating a ZIP file can reduce the overall size of files on your iPhone. ZIP files use a compression technique that packages multiple files into a single archive. This compression method reduces the collective size of the files.
Make your files handy with ZIP archive on iPhone!
iPhone has all the necessary features built into its iOS system that you need for your basic needs. Everyone has to deal with documents and files for their office, school, college or personal work. ZIP files have been in the usage for a very long time. They are very convenient for managing multiple files at reduced size and with encryption. We hope this guide has been helpful for you to teach how to compress your files in a ZIP archive on your iPhone or iPad for free. If you have any questions in your mind, let us know in the comments below.
Read other similar articles:
- How to Compress Videos on Android Without Losing Quality
- How to Compress Images on Android Without Losing Quality
- How to Send Videos on WhatsApp Without Compressing
- How to Add Google Drive to the Files App on iPhone
- How to Lock PDF File With a Password on iPhone