Nowadays most of the office and school work is done digitally and in such a situation we need to scan our paper documents many times. The traditional way of scanning requires you to have a computer and scanner/printer. Guess what? There is no need for a scanner now. You can also scan documents with your iPhone and send the PDF file in a few seconds to any person or organization by email, WhatsApp, or any other messaging app.
Most Android smartphones don’t have a built-in feature in their system for scanning documents, although there are several third-party apps available on the Play Store. Now if we talk about iOS, you can find similar apps on the App Store also but there are much better methods available for scanning documents on iPhone and iPad which don’t even require you to install any third-party application. This is what we are going to discuss in this tutorial. Below we have shared 3 simple methods to scan your documents and create their PDF file on iOS devices for free.
Table of Contents
1. Scan documents with the Notes app on iPhone
The Notes app on iOS is a popular note-taking app that offers a quick and convenient way to save text, draw a sketch or jot a handwritten note. Other than that, you can also create checklists, and tables, and add rich media to your notes.
One more hidden feature in the Notes app which you might not be aware of is scan documents. This step-by-step guide will show you how to scan your documents and save them in a PDF file with the built-in Notes app on iPhone –
- Open the Notes app on your iPhone or iPad.
- Now create a new note by clicking on the note icon at the bottom-right corner of the screen.

- Click the camera icon from the tools available at the bottom and then choose Scan Documents option. This will open up the camera screen.

- Place your document in the camera view and press the capture button. You can also turn on the flash light and apply a filter from the top.
- Once you have clicked the picture, you will see the preview of your document. Crop the picture to remove unnecessary part. For this, drag near corners to adjust. If you are not satisfied with your click, you can always take a retake.
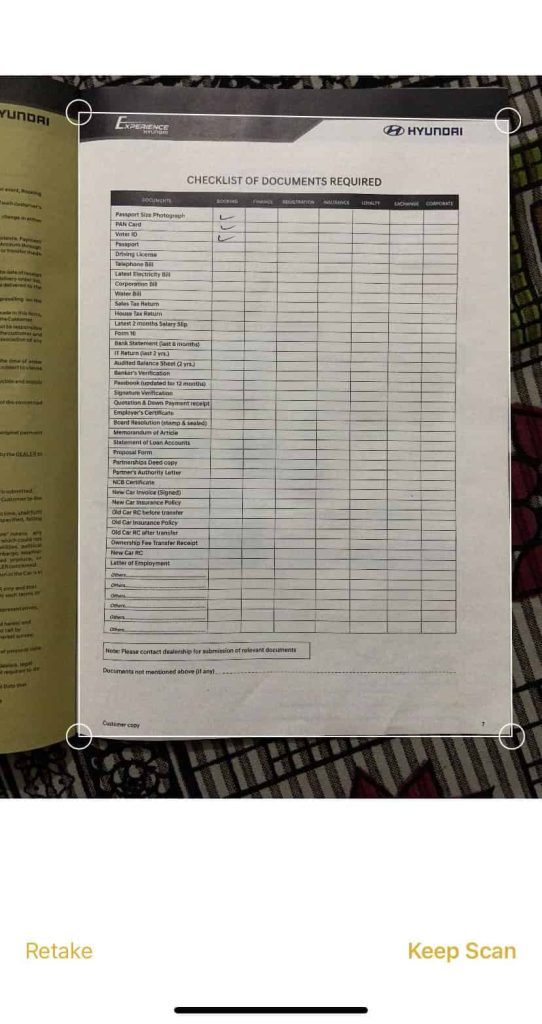
- Click on the Keep Scan option next. Now you can either scan more documents or if you have scanned them all, tap the Save button.

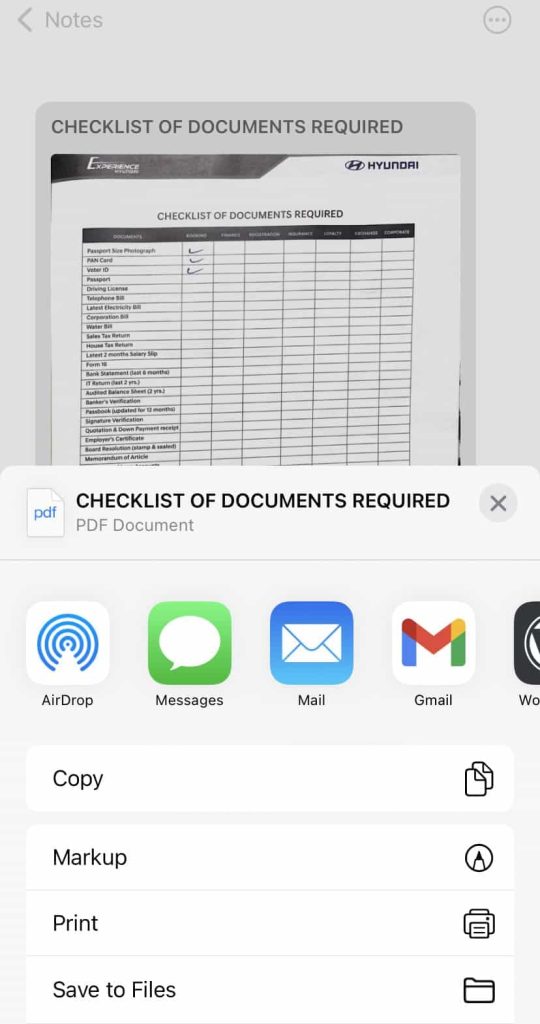
- Your scanned document(s) will be added in the note. To save them as a PDF file, long-press on the preview and then choose Share option.
- Next, select Save to Files, choose the folder where you want to save the PDF and finally click the Save option again. You can also share the PDF file to your recent contact or compatible app such as WhatsApp from the share sheet directly.
2. Scan documents with the Files app on iPhone
Normally, Files app is used to view and access files stored on your iPhone storage, iCloud and other online storage services such as Google Drive. iOS has added document scanning feature in the Files app as well. Although, it’s hidden and very few people know about it. Here’s a step-by-step guide that will show you how to scan your documents with the Files app on iPhone –
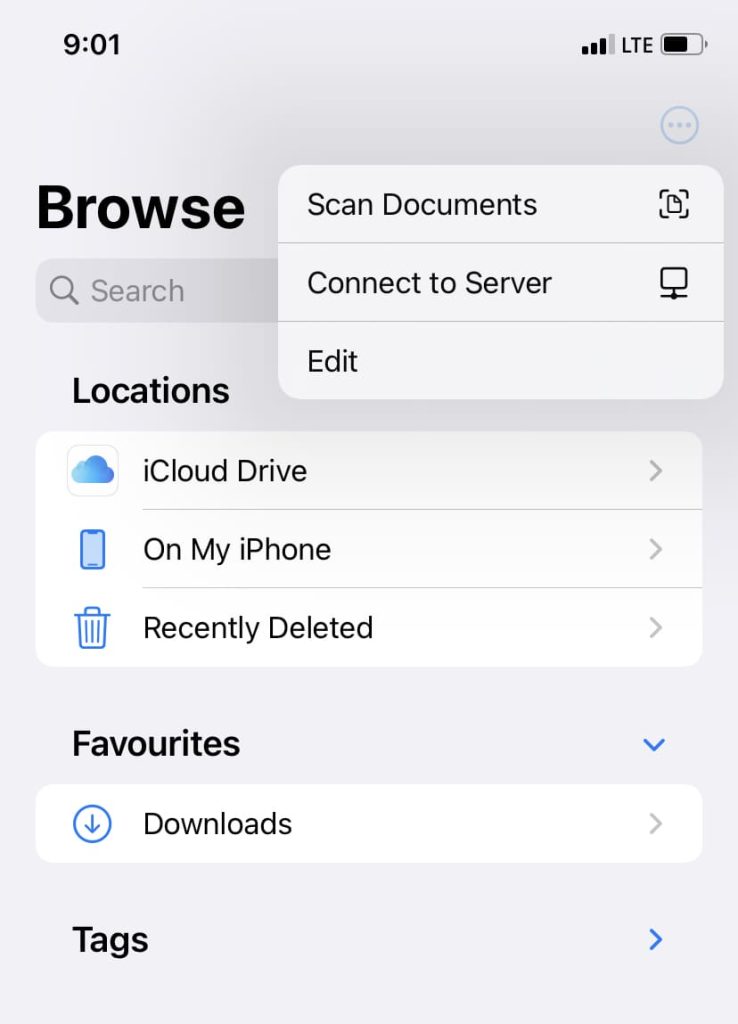
- Find and open the Files app on your iOS device.
- Tap the menu button (three dots) at the top-right corner of the screen and click the Scan Documents option.
- Now take a picture of your document. Turn on the flash if needed and apply a filter/colour.

- Next, crop the picture to show only your document. Click on the Retake option if the picture isn’t good enough.
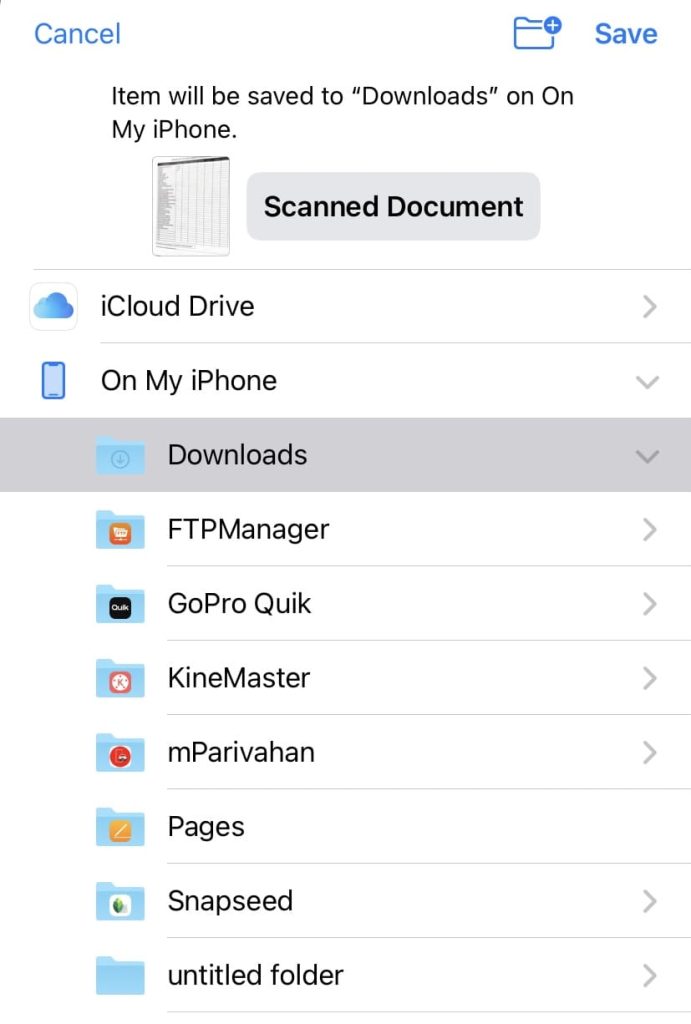
- Tap the Keep Scan option and continue scanning more documents. Once finished, click the Save button. Files app will automatically compile all your scanned documents in a PDF file.
- Now you will be asked to name your PDF file and choose the location where you want to save it. By default, it is named as Scanned Document and saved to the Downloads folder under On My iPhone.
3. Scan documents with the iPhone camera directly
The third method is to directly scan your documents with the iPhone camera and then convert your pictures to PDF using the Photos app. iPhone has a good camera quality and if you just need a normal picture of your document, you can do so with the Camera app.
However, there are a few major drawbacks of this method such as the scanned document won’t be as clear as it will be with the previous methods, you can’t apply scanner filters to enhance the quality of your document, and you can’t crop your picture in 3D.
Take a picture of your documents
Anyways, if you are looking for a quick way to scan your documents or send them to anyone for a normal usage, you can use this method. Simply, open the Camera app on your iPhone, place the document in view, make sure the camera is getting enough light or else turn on the flash light, and finally take the picture.
Now go to the Photos app, open the photo you have taken and edit/crop it (if needed). You can directly send the photo to your friend or share with any app using the Share option.
Convert your documents into PDF
If you want to convert your photos to PDF file, use the Select option at the top-right corner of the screen and first select all the pictures. Next, tap the share button at the bottom-left corner and then choose Print option.
Now pinch to zoom in the preview with your two fingers and then tap the share button. Select Save to Files and give a name to your PDF followed by clicking on the Save option again. Now go to the Files app and there you will find the new PDF file of your documents that you have recently created.
Frequently asked questions
Yes, iPhone can scan documents without installing any third-party app. The Notes app and the Files app on iOS have built-in document scanning features. You can use these features to capture, crop, and save documents as PDF files without the need for additional apps.
The scanned documents are typically saved in the Files app on your iPhone. During the scanning process, you can choose the location where you want to save the PDF file within the Files app.
iPhone saves scanned documents in PDF format. The PDF format is widely supported and ensures that the document looks the same on different devices, making it a convenient choice for sharing and viewing.
To prevent your scanned documents from unauthorised access, you can secure the PDF file with a password using the Files app on your iPhone. Just open the Files app, locate the PDF file containing your scanned documents, and tap on it. Next, tap on the file name at the top and then choose “Lock PDF” option. Now you can set up a password for your PDF file.
Once you’ve scanned your document using the Notes or Files app, navigate to the preview screen. There you will find a variety of editing tools at your disposal. You can crop, rotate, and make any necessary adjustments to enhance the scanned document.
Scan documents on iPhone without the need for an app
The greatest advantage of having an iPhone is that you get a bunch of features in it which are only provided by third-party apps on Android. Scanning documents is one of them.
We have shared not just one but three different methods to help you scan your documents on iPhone and the best part is that you don’t have to install any third-party app for this task. You can also create a PDF file of your scanned documents easily within no time.
Let’s know which method is your personal favourite. If you have any suggestions for this article, feel free to share them in the comments below.
Read other similar articles:
- How to Compress Files to a ZIP Archive on iPhone
- How to Lock PDF File With a Password on iPhone
- How to Download Images from Google Docs
- How to Edit PDF Files on iPhone for Free
- How to Remove PDF Password on iPhone for Free