Do you want to share your Instagram reels on your Facebook profile automatically? This cross-platform posting is possible in a number of ways. As you may already know, Instagram and Facebook are owned by the same company Meta. They both are social media platforms with the same objective to allow people to connect with each other and share their stories and updates.
Meta has come up with a new concept named Accounts Centre which helps users to manage their connected experiences across Facebook, Instagram, and Metaverse in the same place. This also includes a feature using which you can share your Instagram reels to your Facebook profile automatically.
In this article, we will show you how to enable this cross-platform sharing on Instagram. For this particular method, you don’t have to use any third-party application. We will also discuss an alternative method where you can download your Instagram reels and then post them on your Facebook profile manually. Let’s explore all these methods!
Table of Contents
How to connect your Facebook account to Instagram
The first thing you need to do is to connect your Facebook account and Instagram profile. This can be done from the Accounts Centre settings on your Instagram. You will be able to share your Instagram reels on Facebook only when your both accounts are connected. If you haven’t done this yet, here’s how you can connect them –
- Open the Instagram app on your Android or iPhone.
- Tap over your profile picture avatar in the bottom-right corner. This will take you to your Instagram profile.
- Now click menu button (three parallel lines) in the top-right corner and then select “Settings and privacy” from the menu options.
- Go to Accounts Centre option and then tap Set up Account Centre.
- In the next screen, click Add Facebook Account option and log in to your Facebook ID that you want to connect with your Instagram profile. You can select one that you are already logged in.
- Finish the setup and you have successfully connect your Instagram account with Facebook. You can manage your linked accounts from the Accounts Centre anytime.
How to share Instagram reel on Facebook while posting
Once you have connected both accounts, you will have the option to share your Instagram reels on Facebook at the time when you are posting them. Here’s a step-by-step guide –
- Open the Instagram app on your smartphone.
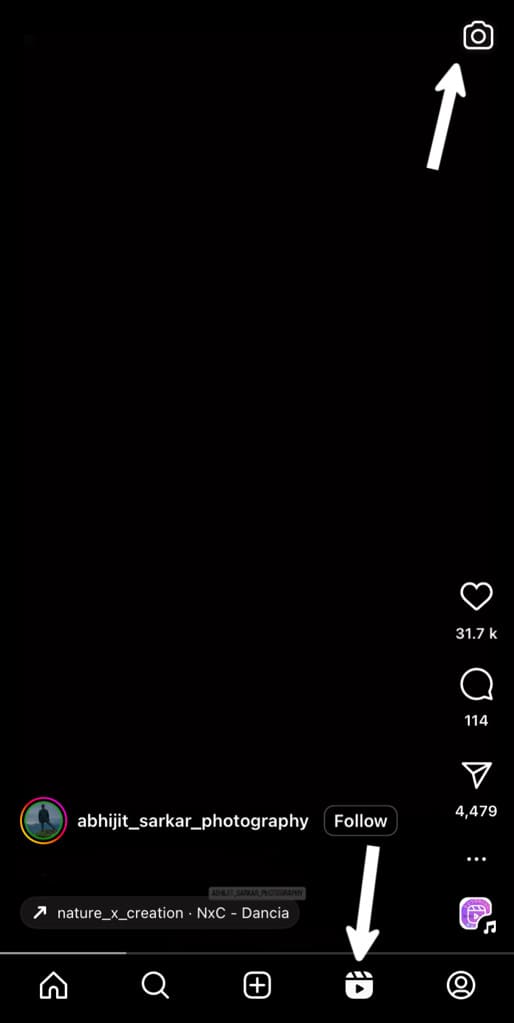
- Go to the Reels section and tap the camera icon in the upper-right corner. Alternatively, press the + (plus) button at the bottom and then select Reels.
- Record a new video for your reel or add an existing video from your camera roll. Tap Next button to continue.
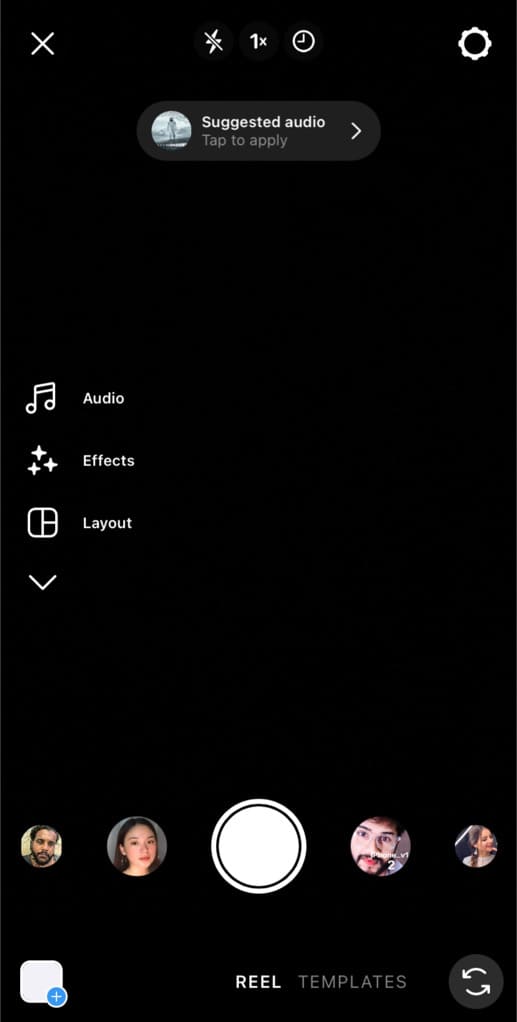
- Now you can edit your reel by adding music, filters, stickers, text, and other elements. Tap Next button again.
- On the next screen, you can write a caption, add hashtags, and choose a cover photo for your Instagram reel.
- Tap on “Share to Facebook” option and turn on the toggle button next to your Facebook profile.

- Now you can post the reel on your Instagram and it will be automatically shared to your Facebook account that you have linked under Accounts Centre.
How to share your Instagram reels to Facebook automatically
Instagram has an option that lets you share all your future reels to Facebook automatically. This option can be enabled from Accounts Centre. If you don’t want to enable “Share to Facebook” option each time you post a new reel, you can use this method.
In case you don’t want to share a particular reel to your Facebook profile, you still have the option to disable the sharing while posting your reel. This step-by-step guide will show you how to enable automatic sharing of your Instagram reels to Facebook –
- Launch the Instagram app on your phone.
- Go to your profile section by clicking on your profile picture icon in the bottom-right corner.
- Now open the menu by clicking three parallel lines in the upper-right side.
- Click “Settings” option from the menu and then tap on “Accounts Centre” in the next screen.
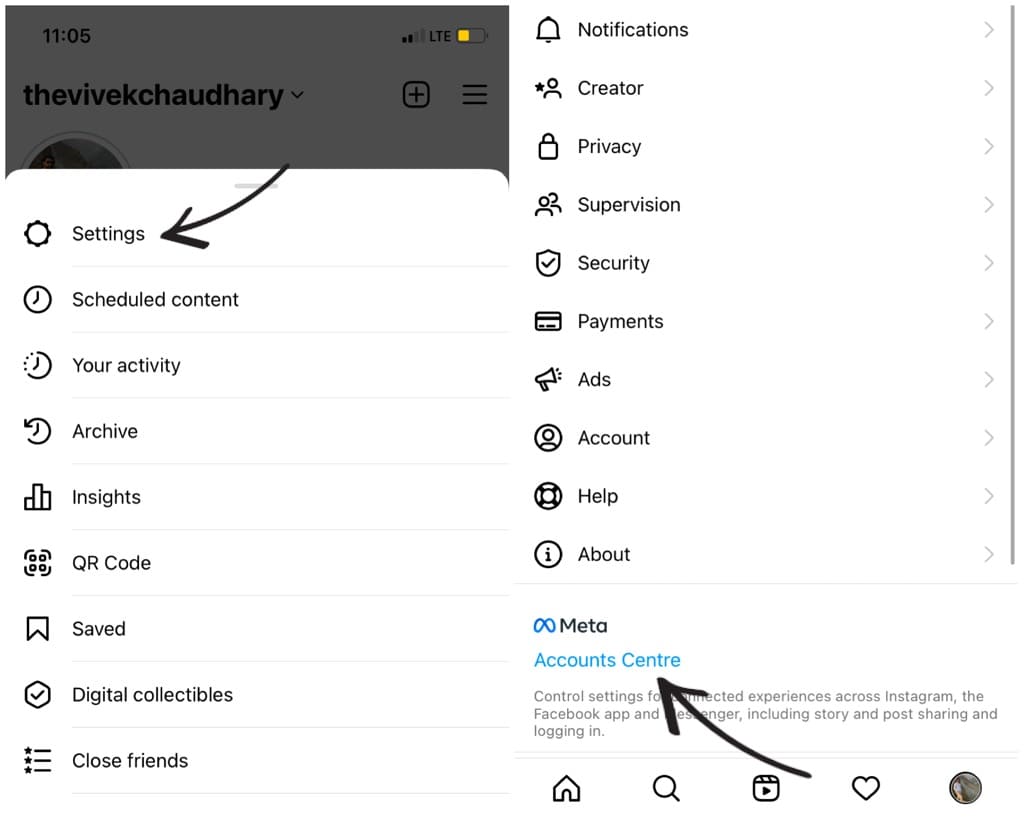
- After that, click “Sharing across profiles” and then tap over your Instagram profile.

- On the next screen, select the Facebook account where you want to share your reels. You will find a section named “Automatically share”. Enable the toggle button next to “Your Instagram reels”. If this option isn’t enabled, tap Set Up followed by clicking on Allow button.

Download and share Instagram reels on Facebook manually
This is an alternative method to share your Instagram reels on Facebook. In this method, first you have to download your Instagram reel and then post it to your Facebook profile manually. For those of you who are having a Creator account on Instagram can use the built-in feature to download your reels.
For this, open the reel on your profile and tap three dots in the upper-right side. This will open a bunch of options on your screen. Select “Save to your device” option. Wait for it to download your reel.
Once it has been downloaded, you can find it your gallery or Photos app. With this method, you will get a watermark on your reel having your username, Instagram logo and audio name in the bottom-left corner.
Post Instagram reel on your Facebook
Now you can post the downloaded reel on your Facebook profile as you would normally share any other video. Here are the steps to follow:
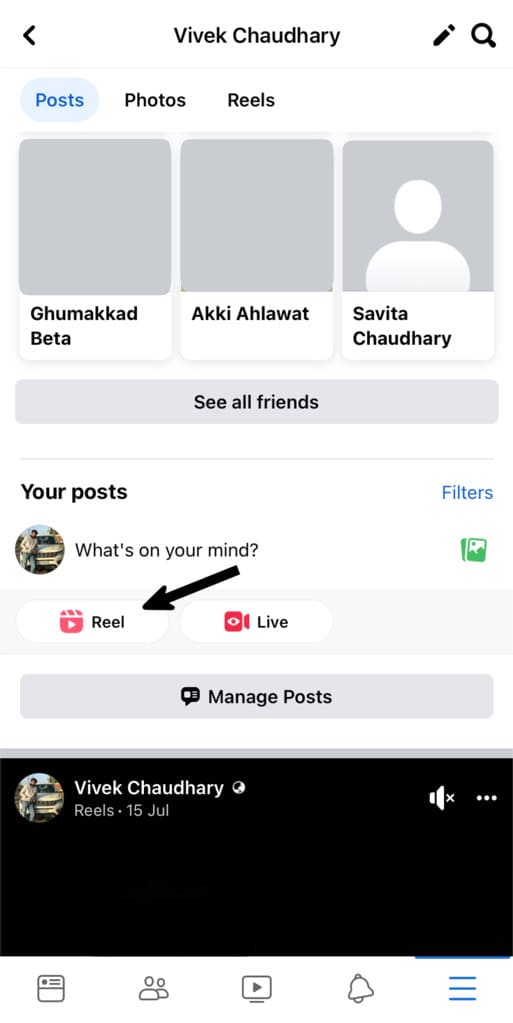
- Open the Facebook app on your device and go to your profile.
- Tap on Reel option in the “What’s on your mind?” box.
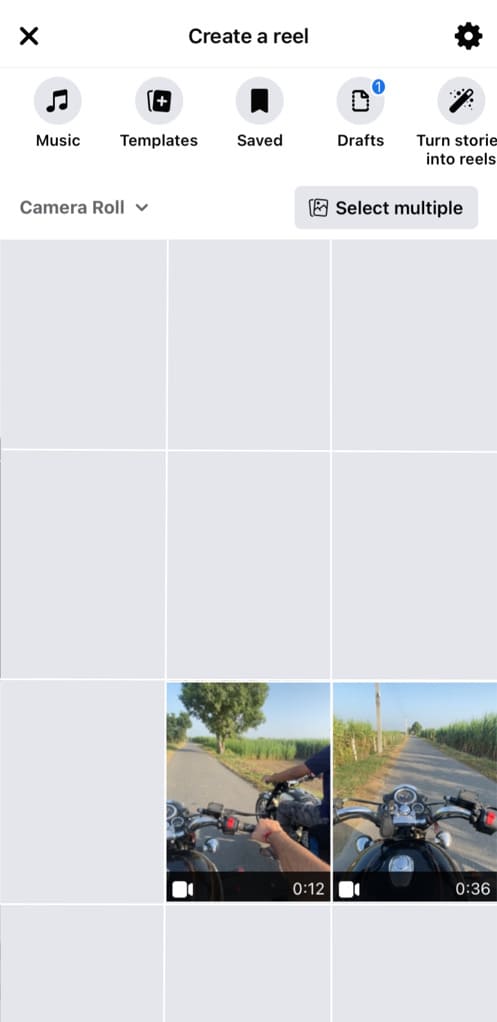
- Select the reel you’ve downloaded from your Instagram.
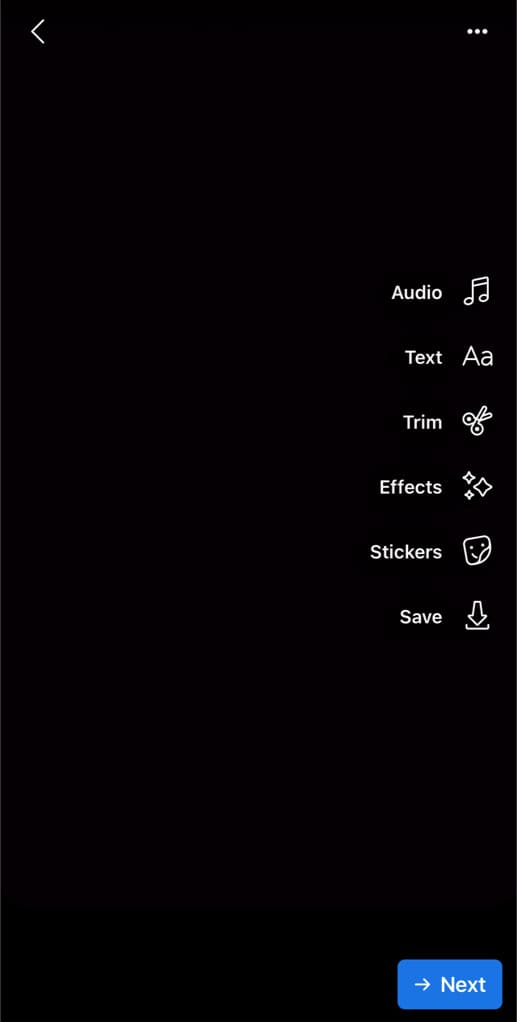
- Edit your video by adding text, audio, effects, stickers, and other elements. Tap the “➞ Next” button to continue.
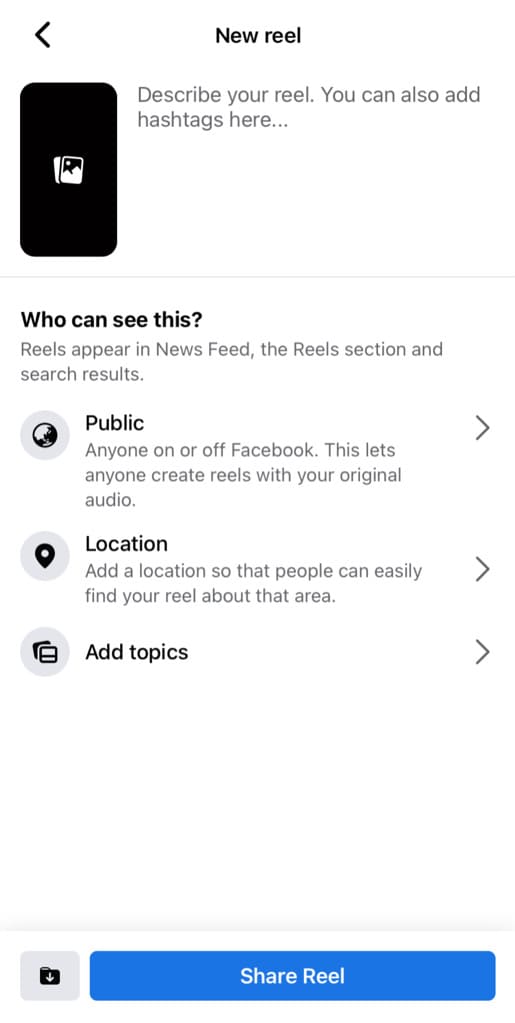
- Now you can write a caption for your reel and select the specific audience you’d like to share it with.
- Finally, tap the “Share Reel” button at the bottom.
Use a third-party Instagram Downloader tool
An alternative way to download Instagram reels on your phone is by using an online Instagram video downloader tool. There are plenty of websites that offer this facility. You can search on Google to find one.
All you need to do is just copy the link of your Instagram reel by tapping the share button (paper airplane) and then clicking on “Copy link” option. You will see a dialog box saying “Link copied to clipboard”.
Now visit the Instagram reel downloader website and paste the link you have copied. It will scan the web page and generate a download link for your reel. Tap on the “Download” button and wait for it to finish.
Frequently asked questions
It’s not possible with Instagram’s cross-platform sharing feature but you can use manual method in such a situation. Simply, download the Instagram reel on your device offline and then post it to your Facebook profile.
If you want to stop sharing your reels automatically, you can turn off this feature in your Accounts Centre settings. Open the Instagram app and go to Profile > Menu (3 parallel lines) > Settings > Account Centre. Now click Sharing across profiles option and then disable the toggle button for “Your Instagram reels”.
Instagram has a feature that enables you to recommend your reels on Facebook. This can boost up the overall performance of your reels and help you reach more audience. Reels recommended on Facebook can be seen by anyone including those who aren’t in your friend list. To enable this feature, go to Settings > Privacy > Reels and Remix. Now turn on the toggle button named Recommend on Facebook.
This depends on your account privacy and the default privacy you have set for your future posts. If you have a private account on Facebook or your profile is locked, your reels will be shared only with your friend list. On the other hand, if your account is public and your post’s privacy is also set to public, then your reels will be visible to everyone. You can change or edit your reels privacy anytime from within your Facebook profile.
With the automatic sharing option enabled, all your future reels will be shared to your Facebook profile automatically. If you want to share only specific reels, then turn off the automatic sharing first and then share your reels to Facebook manually while posting them on Instagram (as explained in second method above).
Final thoughts
Through this guide, you will learned different methods to crosspost reels from Instagram to Facebook. You can either enable automatic sharing or share each reel individually. We have covered almost everything related to this topic. If you think we missed any question, do let us know in the comments below and we will add it to the FAQs.
Read other similar articles:
- How to Share Instagram Story to WhatsApp Status Automatically
- How to Share Threads on Your Instagram Story
- How to Share Your Instagram Story With Only One Person
- How to Share Same Instagram Reel on Two Accounts
- How to Stop Posting Your Instagram Stories to Facebook


![12 Ways to Fix Instagram Reels Not Uploading [2024]](https://www.geekinstructor.com/wp-content/uploads/2023/01/fix-instagram-reels-not-uploading-300x169.jpeg)